


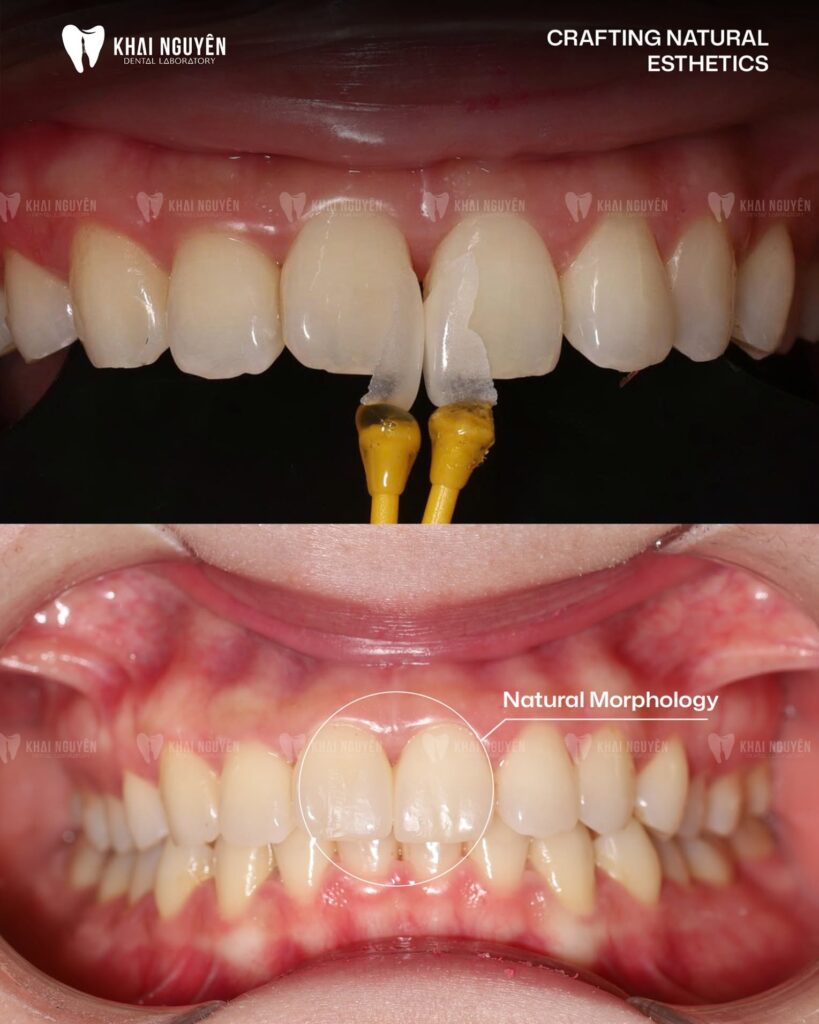
Case fabricated at Khai Nguyen Dental Lab to the treating dentist’s prescription. Photos were taken by the lab and first published on Instagram @khainguyendentallab on 8 July 2026; no patient-identifying information is included. Written for dentists and dental technicians.
Case summary
| Indication | Diastema closure between the upper central incisors with porcelain veneers |
|---|---|
| Material | Hand-layered feldspathic porcelain |
| Units | 2 veneers (left and right central incisors) |
| Technique | Feldspathic layering on refractory dies, hand-finished form and surface texture |
| Photo source | Instagram @khainguyendentallab, 8 July 2026 |
Photo above: Top: the two feldspathic veneers on holding sticks before seating. Bottom: intraoral result with natural morphology after diastema closure.
What the dentist asked for
The patient presented with a midline diastema between the upper central incisors. The remaining dentition was healthy, bright in shade and rich in natural detail. The dentist prescribed two thin veneers to close the gap with one clear requirement: the result had to blend with the adjacent natural teeth rather than look uniformly white.
In this situation translucency and surface structure matter more than strength, because occlusal load on the central incisors is low and the bonding area on enamel is generous.
Two central incisors alone are the most demanding esthetic group a laboratory takes on. On a full arch, the lab sets its own shade and form reference and applies it throughout; on 11 and 21 the reference is already there, the patient’s own 12 and 22, and the two new veneers have to match them on base shade, incisal translucency, cervical saturation and the way the surface catches light.
The central incisors also sit at the middle of the smile and mirror each other: a few tenths of a millimetre of difference in length or axial inclination shows immediately, while the same deviation on a molar goes unnoticed.
Why feldspathic porcelain
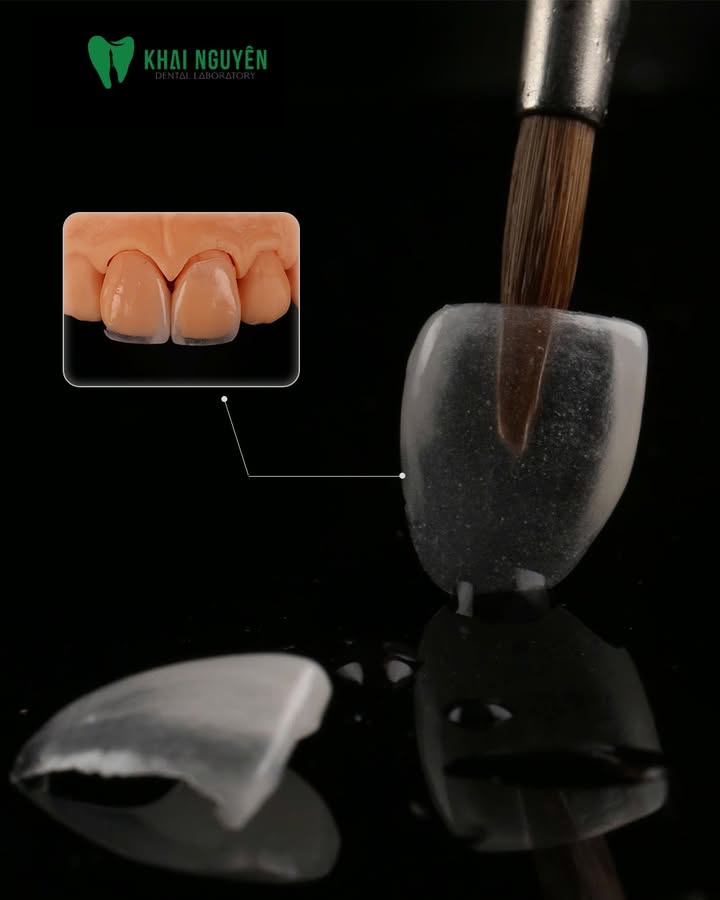
With two units sitting next to natural teeth, the ceramist needs control over every colour layer: dentin at the cervical third, translucency at the incisal edge, enamel striations and small opaque spots. Hand-layered feldspathic porcelain allows these details to be adjusted brushstroke by brushstroke, which pressed or milled monolithic blanks cannot do.
The trade-off is that feldspathic has the lowest flexural strength of the ceramic families (see our comparison of dental ceramics), so the indication is right when most of the bonding surface is enamel and there is no premature contact on the incisal edge.
For diastema closure the veneers must extend mesially to fill the space without making the teeth look oversized. The solution was to distribute the extra width across both central incisors, keep the width-to-length ratio close to the natural teeth, and bring the contact point apically just far enough for the papilla to fill the embrasure.
Lab workflow
- Model and photo analysis. The ceramist measured the diastema, set the new width of each incisor and the position of the contact point. Photos of the adjacent teeth under neutral light guided the base shade and the effects map.
- Layering on refractory dies. A thin dentin layer at the cervical and body, enamel and translucent porcelain in the incisal third. Several firings, each adding one group of effects: vertical enamel striations, incisal halo, subtle opaque spots.
- Form finishing. Line angles and reflective surfaces were positioned so that the two incisors read as symmetrical without being identical, as natural teeth are.
- Quality check. Try-in on the model, marginal fit, proximal contacts and minimum thickness at the edge. The case was photographed before shipping for the dentist’s reference.
Typical in-lab time for this type of case at Khai Nguyen is 3 to 5 working days because most steps are done by hand. See the ordering process for how to send scans and photos.
Result
The post-seating photo shows the diastema closed, with both central incisors showing natural morphology and a surface curvature continuous with the neighbouring teeth. The transition between veneer and tooth is not visible at conversational distance. Shade integration comes from preserving incisal translucency rather than brightening the whole restoration.
Lessons for similar cases
- Send photos of the adjacent teeth and a shade photo with the tab in frame. For feldspathic veneers the lab reproduces detail from photographs, not only from a shade code. Take them before the teeth dehydrate, and add an angled view so the lab can read incisal translucency.
- Agree on the new tooth proportions in advance. Say whether the space should be shared between both incisors or assigned to one, and whether a longer contact is acceptable.
- Check protrusive guidance. Thin feldspathic veneers chip at the edge if there is a premature contact in protrusion. Adjust before final cementation.
Have a similar case? Send the scan or model with photos via WhatsApp +84 902 945 585, or read how to evaluate a dental lab before sending esthetic work.
Choosing between the two materials? See feldspathic or e.max veneers: how to choose.
Written for dentists and technicians. Khai Nguyen Dental Lab manufactures to clinical prescription only and does not sell directly to patients.