Category Archives: Anterior Aesthetics

Porcelain veneers, tooth preparation, anterior morphology, pink aesthetics and smile design. Technical articles and clinical cases on how dentist and lab work together for natural results in the aesthetic zone.

Case Study: Ten GC Initial LiSi Press Veneers in BL2, Teeth 14 to 24

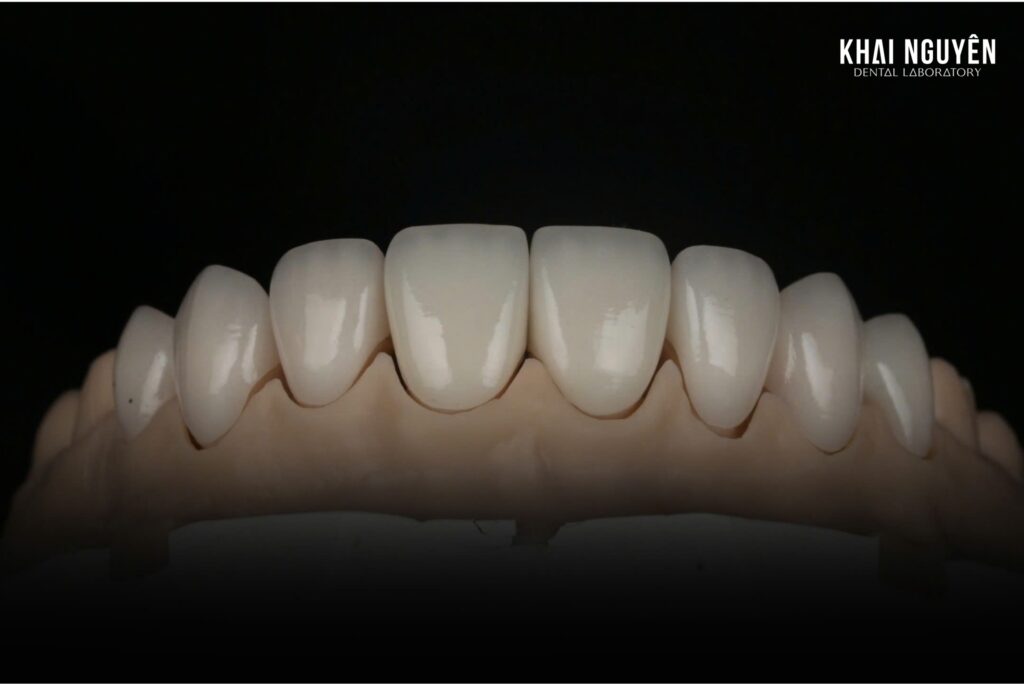
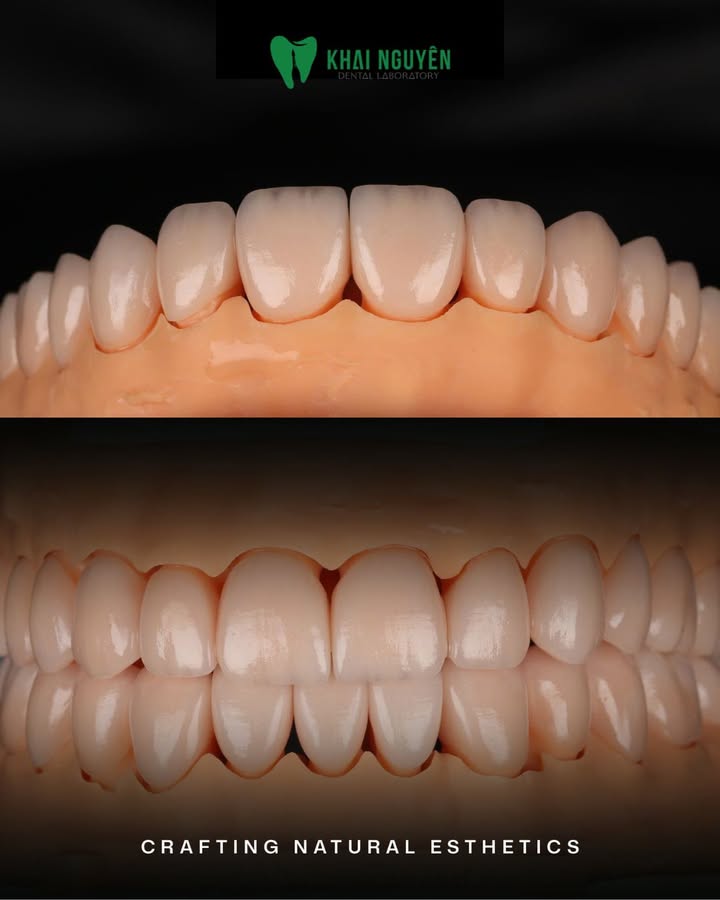
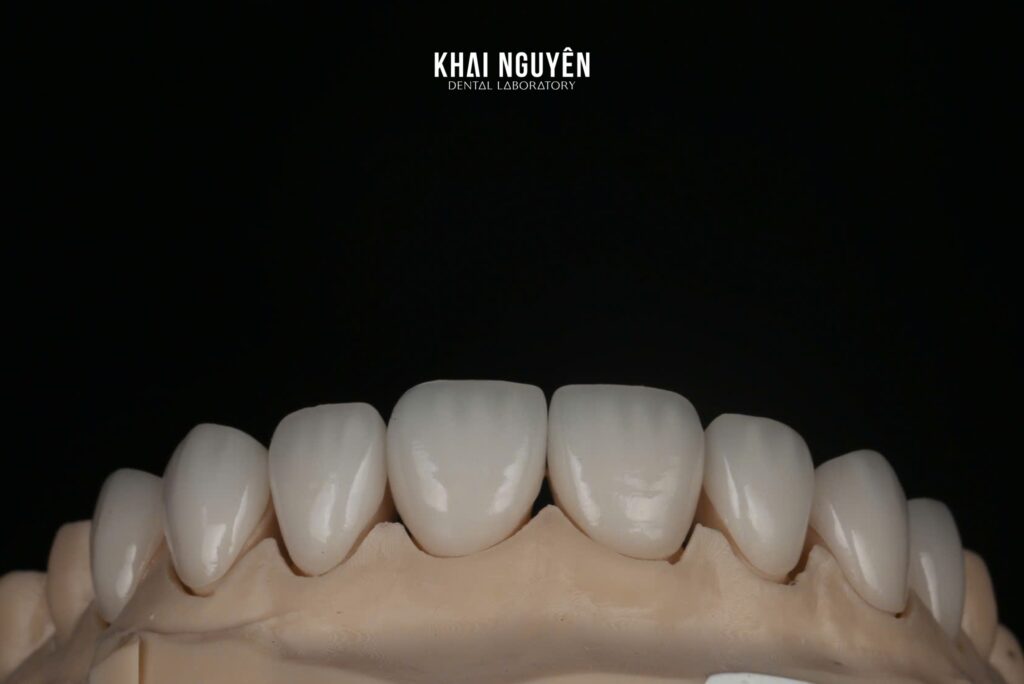
GC Initial LiSi Press veneers teeth 14 to 24, shade BL2, frontal view on the model

Case fabricated at Khai Nguyen Dental Lab to the treating dentist’s prescription, published on Instagram @khainguyendentallab on 11 June 2025. No patient-identifying information is included.

Case summary

Indication Ten pressed ceramic veneers, teeth 14 to 24
Material GC Initial LiSi Press
Shade BL2
Dentist A long-standing international partner of the lab (name not published)
Photo source Instagram @khainguyendentallab, 11 June 2025

Photo above: ten LiSi Press veneers in shade BL2 on the model, frontal view.

What the dentist asked for

The prescription was a smile arch from tooth 14 to 24 in bleach shade BL2 with natural incisal effects. This was an overseas case, so the lab had no chance to adjust shade chairside: every decision about translucency, form and surface texture had to be right first time. All communication was by photograph and written description.

Why LiSi Press for ten bright units

At BL2 the consistency between units matters more than elaborate effects on any single tooth: the eye immediately spots one unit off-tone in a row of ten. GC Initial LiSi Press has fine, evenly distributed lithium disilicate crystals, so translucency stays stable between pressings and across different thicknesses, which suits pressing many units at once. Compare the pressed systems in e.max Press vs LiSi Press vs Vintage LD Prime.

For effects the case took a minimal approach: keep natural translucency in the incisal third, add light enamel striations, avoid pronounced dentin lobes. With bleach shades, strong effects make teeth look drawn rather than real.

Lab workflow

  1. Design all ten units in one file to unify incisal edge length, smile line and width proportions before pressing.
  2. Press in groups so units from the same pressing share thermal conditions, reducing shade differences between teeth.
  3. Light cut-back at the incisal third and translucent layering, keeping thickness minimal because bright-shade veneers need no thick masking layer.
  4. Selective mechanical polishing for a uniform micro-texture across the arch.
  5. Photograph from several angles before shipping, since a remote dentist needs to review before booking the seating appointment.

Lessons for multi-unit veneer cases sent from abroad

  • Agree incisal edge length by measurement or a wax-up photo before the lab presses, because changing length afterwards costs the whole pressing.
  • With bleach shades, ask for moderate effects. Write “light striations, translucent edge” rather than a generic “natural effects”. Read more on bleach shades and stain technique.
  • Request multi-angle photos before dispatch on international cases; it is the only inspection before the restorations reach the patient.

Send a multi-unit veneer case via WhatsApp +84 902 945 585 or read the ordering process.

Case Study: Twelve-Unit ZirCAD Prime Zirconia Bridge and Crowns in A3 to A3.5

Twelve-unit ZirCAD Prime zirconia bridge and crowns, shade A3 to A3.5, frontal view

Case fabricated at Khai Nguyen Dental Lab to the treating dentist’s prescription, published on Instagram @khainguyendentallab on 20 June 2025. No patient-identifying information is included.

Case summary

Indication Twelve-unit restoration: zirconia bridge and crowns
Material IPS e.max ZirCAD Prime
Shade A3 to A3.5
Technical focus Uniform form, shade and surface texture across twelve units
Photo source Instagram @khainguyendentallab, 20 June 2025

Photo above: twelve zirconia bridge and crown units in shade A3 to A3.5 on the model, frontal view.

Why twelve units is harder than twelve times one unit

A single crown slightly off-tone against natural teeth is usually acceptable. In twelve adjacent units the eye compares the restorations with each other rather than with natural teeth, so any unit differing in gloss, translucency or form shows immediately. A long case also demands occlusal control across the whole arch and adequate connector cross-sections at the pontics.

Shade A3 to A3.5 is a warm range, common in middle-aged patients, and is not as forgiving as bleach shades: each tooth needs a gradient from a warm cervical zone to a translucent edge while the arch as a whole must not read as too yellow.

How the lab keeps twelve units consistent

  1. One design file for the whole case. Each tooth is built in relation to the others, never designed as separate crowns and merged later.
  2. Controlled disc nesting. With a multilayer ZirCAD Prime disc, the position of each unit inside the disc decides whether the cervical zone sits in the opaque layer and the incisal edge in the translucent one. Wrong nesting is a common reason a few units come out off-tone.
  3. Sinter in one batch so all units go through the same thermal cycle.
  4. Stain by arch, not by tooth. All twelve units are placed on the model and stained together, checked under neutral light after each firing.
  5. Static and excursive occlusion checked on the articulator before the surface is finished.

Lessons for multi-unit cases

  • Send a reliable bite record and facial photos. A twelve-unit case redefines the whole smile, so the lab needs references from the face, not only from the model.
  • State the shade range explicitly, for example A3 cervically and A3.5 on the body, if you want the gradient to run a specific way.
  • Consider a framework try-in for cases with long pontic spans, to check fit and occlusion before staining.

See also choosing zirconia discs by case and the three-unit zirconia bridge 11 to 13. WhatsApp +84 902 945 585.

Case Study: A 0.2 mm Ultra-Thin Feldspathic Veneer on Tooth 21 for Diastema Closure

Ultra-thin 0.2 mm feldspathic veneer measured with a calliper, Khai Nguyen Dental Lab

Case fabricated at Khai Nguyen Dental Lab to the treating dentist’s prescription, published on Instagram @khainguyendentallab on 28 April 2026. No patient-identifying information is included.

Case summary

Indication A single veneer on tooth 21, closing a diastema and slightly lengthening the incisal edge
Material Hand-layered feldspathic porcelain
Thickness 0.2 mm (ultra-thin), measured with a calliper
Goal Seamless integration with tooth 11 in texture and translucency
Photo source Instagram @khainguyendentallab, 28 April 2026

Photo above: measuring the veneer with a calliper, reading 0.2 mm.

Why one veneer is harder than ten

When restoring a whole arch the ceramist sets the rules for shade and effects and applies them consistently. When restoring one tooth next to a natural one, the natural tooth sets the rules: the veneer must copy the translucency, enamel striations, white opacities and light reflection of the adjacent tooth 11. One detail wrong shows immediately, because the two central incisors sit side by side and are always compared directly.

This case added two form requirements: closing a diastema, so the veneer had to extend mesially, and slightly lengthening the incisal edge to balance tooth 11. Both change the width-to-length ratio, so they must be planned in advance to keep the tooth from looking oversized.

Why 0.2 mm

A thickness of 0.2 mm is close to the limit for a ceramic veneer. The advantages are almost no tooth reduction, bonding entirely to enamel, and retained natural translucency because the layer is too thin to mask colour. The conditions that come with it: the tooth must be bright and even in colour, since such a thin layer masks nothing; and the whole bonding surface must be enamel, with no exposed dentin.

Only feldspathic porcelain layered on a refractory die reaches this thickness together with real effects; pressed or milled blanks cannot go to 0.2 mm and still survive handling. In return, a veneer this thin is fragile before bonding, so transport and try-in must be careful.

Lessons for single ultra-thin veneers

  • Photograph the adjacent tooth in close-up from several angles and under different light sources. This is the most important document, more important than the shade code.
  • Check the substrate before prescribing 0.2 mm. With dark spots or an endodontically treated tooth, more thickness and a masking layer are needed.
  • Agree the tooth proportions after diastema closure in advance, and say whether a longer contact point is acceptable.
  • Prepare the bonding protocol for an ultra-thin veneer: gentle dry try-in, correct surface treatment and a cement chosen per the manufacturer’s instructions.

See the two-veneer diastema closure case for comparison. WhatsApp +84 902 945 585.

Masking a Dark A4 Preparation to a Bright 1M1: Three Things the Dentist Can Prepare

Veneer e.max trên nền cùi tối màu A4 được nâng lên màu 1M1 bằng thỏi e.max MO và sườn đắp sứ

Written for dentists and dental technicians. The cases shown were fabricated by Khai Nguyen Dental Lab to the treating dentists’ prescriptions and published on the lab’s Facebook and Instagram in July and August 2026; no patient-identifying information is included.

Restoring one or two central incisors over a dark preparation is the most stressful brief a ceramist receives: the substrate has to be masked, yet the restoration must stay translucent enough to blend with the natural neighbour. This article explains how Khai Nguyen handled an A4 preparation prescribed for a 1M1 result, and the three things a dentist can prepare chairside to raise the odds of success.

Why a dark preparation is difficult

Esthetic ceramics look natural because they transmit light. That same translucency lets the substrate show through: an A4 stump, or a tooth darkened after endodontic treatment, turns a thin restoration grey whatever shade of ingot is chosen. To reach a bright 1M1 without an opaque, plastic look, the masking layer must sit in the right place (against the stump), stay thin enough to leave room for translucent porcelain, and carry a warm tone that neutralises the grey of the substrate.

The larger the colour distance between stump and target, the more thickness is needed. That is why the first of the three factors below is in the dentist’s hands, not the lab’s.

Three things the dentist can prepare chairside

1. Restorative space

Over a dark stump, a 0.3 to 0.5 mm veneer can hardly mask and stay translucent at the same time. The lab needs at least 0.8 to 1.0 mm labially for a thin masking core plus a layered surface, and 1.5 mm or more at the incisal edge for translucency. For a full crown, 1.2 to 1.5 mm labially allows a medium-opacity pressed core with layering on top. Photograph the preparation with a stump shade guide in frame; without it the lab has to guess the opacity and the remake risk is high.

2. Material

For the A4-to-1M1 case, Khai Nguyen pressed the core from an IPS e.max Press MO (medium opacity) ingot. MO masks a dark substrate without killing the restoration, unlike the HT or MT ingots normally used for veneers on bright stumps. For very dark stumps or metal posts, multilayer zirconia masks better; where several units on the same arch must match, the lab can prescribe both crowns and veneers in zirconia so the colour stays consistent (see the full-arch case below). Our ceramic materials comparison summarises the masking ability of each family.

3. A design built around the right effects

The MO core is designed with a cut-back in the incisal third and on the labial surface, leaving room for layered porcelain that carries enamel striations, dentin lobes and the incisal halo. The masking sits deep inside; the vitality sits on the outside. When the dentist sends photos of the adjacent teeth under neutral light and states the desired level of effects (light, medium, pronounced), the lab maps the effects to the patient’s real teeth instead of a generic template.

Photo above: A4 stump restored in 1M1: the e.max MO core masks the dark substrate while the layered porcelain keeps natural translucency.

Lab workflow for the A4-to-1M1 case

  1. Stump shade assessment from the photo with the stump guide, and the decision on core opacity.
  2. Digital design at full contour, then a cut-back leaving an even 0.4 to 0.6 mm for porcelain labially and more at the incisal edge.
  3. Pressing the core from the e.max MO ingot; masking checked by seating the core on a die of matching stump shade.
  4. Layering warm dentin at the cervical zone to neutralise grey, enamel and translucent porcelain at the edge, effects following the photos of the natural teeth; several firings.
  5. Checks under several light sources, especially with light transmitted from behind, which is when a dark substrate shows most.

When many units must match: zirconia for crowns and veneers alike

In a recent full-arch case the dentist prescribed zirconia for the bridges, crowns and veneers. Zirconia veneers are not a routine choice, but with several stumps of different colour they solve two problems at once: masking the substrate and keeping one material system across the arch so the shade stays uniform. In return, dentist and lab must agree carefully on minimum thickness, bonding protocol and margin position, because zirconia does not forgive an over-thin edge the way feldspathic porcelain does.

The two-central-incisor case

Two central incisors are harder than one, because the eye compares two symmetrical teeth directly. Beyond shade and form, the lab must reproduce the same type of effects on both: the same position of dentin lobes, the same incisal translucency, the same surface texture, without making them identical. In this case the dentist sent close-ups of the canines and lateral incisors so the lab could read the patient’s own “effect language” instead of applying a standard pattern.

Checklist for sending a dark-stump incisor case

  • Photo of the prepared stump with a stump shade guide in frame, under neutral light.
  • Photos of the adjacent and opposing teeth with the target shade tab (1M1, BL2, A1) next to them.
  • State the reduction achieved labially and incisally; if it is insufficient the lab will say so before production.
  • State the desired level of effects and the patient’s age, since young teeth need more detail than older ones.
  • For important cases, ask for a photo of the core on a coloured die before layering.

Read the case study on zirconia crowns and veneers over uneven preparation shades, or send an anterior case via WhatsApp +84 902 945 585.

Case Study: Three-Unit Zirconia Bridge 11–13 in ZirCAD Prime A2, Cut Back and Layered

Three-unit IPS e.max ZirCAD Prime bridge, teeth 11 to 13, shade A2, cut-back and layered, on the model

Case fabricated at Khai Nguyen Dental Lab to the treating dentist’s prescription. Photos were taken by the lab on the model and first published on Instagram @khainguyendentallab on 11 April 2025; no patient-identifying information is included. Written for dentists and dental technicians.

Case summary

Restoration Three-unit fixed bridge, teeth 11 to 13 (abutments 11 and 13, pontic 12)
Material IPS e.max ZirCAD Prime (multilayer zirconia), labial layering porcelain
Shade A2
Technique Digital cut-back design with hand-layered labial porcelain for a seamless shade gradient and natural translucency
Photo source Instagram @khainguyendentallab, 11 April 2025

Photo above: the bridge from 11 to 13 on the model with a soft-tissue mask, labial surfaces layered with a gradient from a warm cervical area to a translucent incisal edge.

What the dentist asked for

The patient was missing tooth 12, with teeth 11 and 13 suitable as abutments. The dentist chose a three-unit fixed bridge rather than an implant. For a bridge in the anterior segment the brief was clear: the pontic at 12 had to look like a tooth emerging from the gingiva, the two abutment teeth had to match the translucency of the natural teeth on the opposite side, and the whole bridge had to be shade A2 with a visible gradient from cervical to body to incisal.

Why ZirCAD Prime, cut back and layered

A three-unit anterior bridge needs a framework strong enough at the connectors. Multilayer ZirCAD Prime combines a load-bearing 3Y-TZP cervical zone with a more translucent 5Y-PSZ incisal zone in one disc, which suits short anterior bridges. Monolithic zirconia, even when stained, still struggles to reach the translucency and depth of a natural incisor. The lab therefore designed the bridge as a labial cut-back: the zirconia framework keeps the full palatal surface, the connectors and the occlusal contacts, while the incisal third and the labial surface are layered by hand. This retains framework strength and adds the layered porcelain needed for natural effects. Our ceramic materials comparison explains when monolithic is enough and when layering is worth it.

Lab workflow

  1. Digital design. The bridge was first designed at full contour to check form, occlusion and connector cross-sections, then cut back uniformly on the labial surface to make room for porcelain without thinning the connectors.
  2. Milling and sintering. The framework was milled from a ZirCAD Prime disc, nested so that the cervical zone sat in the opaque layer and the incisal zone in the more translucent layer.
  3. Labial layering. Warm dentin at the cervical area, enamel and translucent porcelain at the incisal edge, vertical enamel striations, several firings and checks under different light sources.
  4. Checks. Try-in on the model with the soft-tissue mask to assess the pontic emergence, occlusion checked in intercuspation and excursions, then polishing.

Result

The photos on the model show three units with the same incisal translucency, a smooth gradient from cervical to body, a pontic at 12 resting on the tissue with a slightly convex tissue surface, and uniform enamel texture. From the lateral view the labial contour continues from 11 to 13, so the pontic cannot be picked out.

Lessons for similar cases

  • Prescribe “cut-back and layered” on the form for any anterior bridge, so the lab designs the framework at the right thickness from the start instead of grinding it back after milling.
  • Send a photo of the ridge at the missing tooth. Pontic shape depends on the ridge; the photo lets the lab choose between an ovate and a modified ridge-lap design.
  • Reduce the labial surface of the abutment teeth sufficiently (at least 1.2 to 1.5 mm for framework plus porcelain) so the abutments do not end up thicker than the natural teeth.

Read more on disc selection in 3Y-TZP vs 5Y-PSZ zirconia, or send a case via WhatsApp +84 902 945 585.

Case Study: GC Initial LiSi Press Veneers in A1 and the Three Finishing Steps

GC Initial LiSi Press veneers shade A1: surface texture mapping, custom porcelain build-up and line angles, Khai Nguyen Dental Lab

Case fabricated at Khai Nguyen Dental Lab to the treating dentist’s prescription. Photos were taken by the lab on the model and first published on Instagram @khainguyendentallab on 18 August 2026; no patient-identifying information is included. Written for dentists and dental technicians.

Case summary

Indication Pressed ceramic veneers in the upper anterior segment
Material GC Initial LiSi Press (pressed lithium disilicate), layered outer surface
Shade A1
Technical focus Three finishing steps: mapping the surface texture, custom porcelain build-up, defining the line angles
Photo source Instagram @khainguyendentallab, 18 August 2026

Photo above: Left: the finished result from the lateral view. Right, top to bottom: pressed and cut-back frameworks; effect porcelain built up at the incisal edge; line angles and reflective zones marked before final contouring.

What the dentist asked for

The dentist sent reference photos and a specific description of the desired form: slightly square central incisors, clearly visible incisal translucency, and a micro-texture that shows under oblique light without looking rough. Target shade A1. With a brief this detailed, the decisive step was not the pressing but the hand finishing after it.

Why LiSi Press

GC Initial LiSi Press is a pressed lithium disilicate with fine, evenly distributed crystals, giving stable translucency at thin sections and a smooth polished surface. It suits anterior veneers that need enough strength together with depth of colour. Compared with the other pressed systems in the same family (see e.max Press vs LiSi Press vs Vintage LD), LiSi Press lets the ceramist cut back and layer with the manufacturer’s matching porcelain, so thermal expansion is compatible and the risk of cracking in the layered zone is low.

The three finishing steps

  1. Mapping the surface texture. After pressing and cutting back the incisal zone, the ceramist drew the areas that would carry vertical striations, horizontal ridges and flat reflective planes onto the framework. The map followed the dentist’s reference photos, not a generic template.
  2. Custom porcelain build-up. Translucent and effect porcelains were applied at the incisal edge according to the map: mamelons of different lengths on the two central incisors, a faint blue-grey translucent band between them, a thin halo. Fired and checked under oblique light.
  3. Defining the line angles. Mesial and distal line angles were pencilled in and the surfaces contoured so that the reflective zone between them had the width that gives the “slightly square” form requested, followed by mechanical polishing that preserves the micro-texture.

These three steps are why the lab’s pressed veneers take longer than monolithic pressed crowns finished with stain only. Typical in-lab time for layered pressed veneers is 3 to 5 working days.

Result

The lateral view shows a continuous surface curvature from the central incisor to the canine, incisal translucency increasing towards the distal corner, and vertical striations that are visible yet evenly glossy. The form matches the reference photos and shade A1 keeps its depth because it comes from the layered porcelain rather than from surface stain alone.

Lessons for similar cases

  • A reference photo of the desired form is worth more than a verbal description. A photo of natural teeth or of a case the dentist likes lets the lab map the surface correctly from the start.
  • State the degree of texture: “light”, “medium” or “pronounced”. Younger patients usually need more texture, older patients flatter and glossier surfaces.
  • Ask for photos before shipping. For layered veneers, a photo under oblique light lets you comment on texture before the case leaves the lab.

Ready to send a pressed veneer case? See the ordering process or message WhatsApp +84 902 945 585.

Case Study: Zirconia Crowns and Veneers Combined to Mask Uneven Preparation Shades

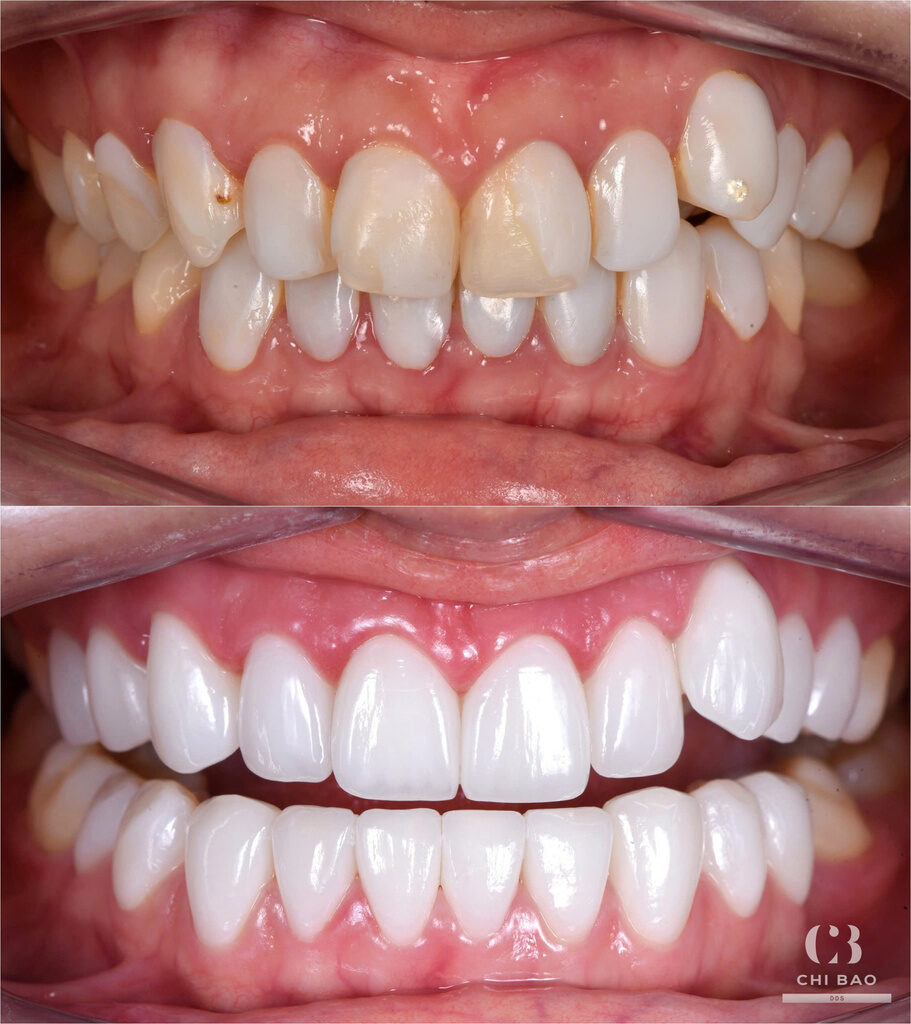
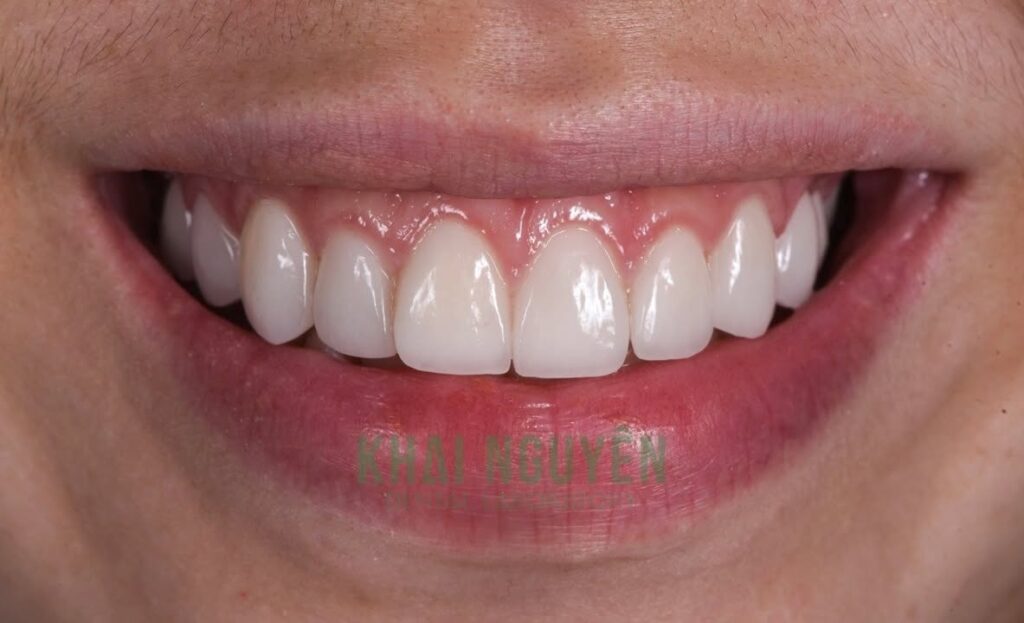
Before and after: old anterior crowns replaced with a combination of zirconia crowns and porcelain veneers, Khai Nguyen Dental Lab

Case fabricated at Khai Nguyen Dental Lab to the treating dentist’s prescription. The before-and-after photos were sent to the lab by the dentist as feedback and first published on Instagram @khainguyendentallab on 23 July 2026; no patient-identifying information is included. Written for dentists and dental technicians.

Case summary

Indication Replacement of old anterior crowns in the upper arch, with veneers on the adjacent teeth
Materials Zirconia crowns (see the zirconia systems used at the lab) combined with porcelain veneers
Main challenge Uneven preparation shades between teeth; adjacent teeth with white and brown enamel spots
Goal Block out the preparation shades while preserving natural incisal translucency
Photo source Instagram @khainguyendentallab, 23 July 2026

Photo above: Before: opaque, discoloured old crowns with dark gingival margins and mottled adjacent teeth. After: a uniform anterior arch with translucency retained at the incisal edges.

Initial situation

The pre-treatment photo shows the upper incisors carrying old crowns that were highly opaque, yellow compared with the natural teeth, flat in form and with dark gingival margins. The adjacent teeth had multiple white and brown enamel spots of the kind typically seen in fluorosis. The dentist decided to replace the old crowns and restore the neighbouring teeth to create one uniform anterior arch.

The problem for the lab was the substrate. Teeth previously prepared for crowns had different stump shades, some darker after endodontic treatment or metal posts, while the teeth prepared only for veneers had bright but mottled enamel. Using the same opacity for every unit would have produced either a uniformly opaque result that looked artificial, or a uniformly translucent one that showed the differing substrates.

Why a zirconia and veneer combination

For teeth with heavy tissue loss and dark substrates, multilayer zirconia crowns give the best masking of any ceramic family while still offering enough translucency in the incisal third when the right disc is chosen. For teeth with plenty of enamel and only superficial discolouration, thin porcelain veneers are the more conservative option. Our ceramic materials comparison summarises masking ability and translucency by family.

The deciding factor was the colour distance between each stump and the target shade of each tooth. The lab set the opacity of the core individually per unit, then used one porcelain system for the outer layer so the whole arch shared the same translucency and surface texture.

Lab workflow

  1. Stump shade assessment from the dentist’s photos taken with a stump shade guide in frame.
  2. Digital design of the whole anterior group at once to unify incisal edge length, smile line and the labial position of crowns relative to veneers.
  3. Opacity per unit: multilayer zirconia for the teeth with dark substrates; a thin masking layer under the veneers on teeth with darker spots.
  4. Shared outer layer on crowns and veneers, building incisal translucency and consistent enamel striations across the arch.
  5. Checks under several light sources so the units do not separate visually when the lighting changes, especially with light transmitted through the incisal edges.

Result

The post-seating photo sent by the dentist shows a uniform anterior arch from canine to canine, an even pink gingival margin, retained incisal translucency and subtle enamel striations. The enamel spots no longer show through the restorations. In the full view, zirconia crowns and veneers cannot be distinguished.

Lessons for similar cases

  • Always send stump shade photos when any tooth has been root-treated or carries a post. Without them the lab has to guess the opacity and the remake risk is high.
  • Prescribe the whole group on one form rather than sending crowns and veneers separately, so the lab designs and layers them together.
  • Allow an extra 0.1 to 0.2 mm of labial reduction on very dark substrates so the lab has room for a masking layer without over-contouring.

Read more on choosing zirconia discs in 3Y-TZP vs 5Y-PSZ zirconia, or message WhatsApp +84 902 945 585.

Case Study: e.max Press Crown with Feldspathic Veneers in Shade OM1 and the Incisal Halo

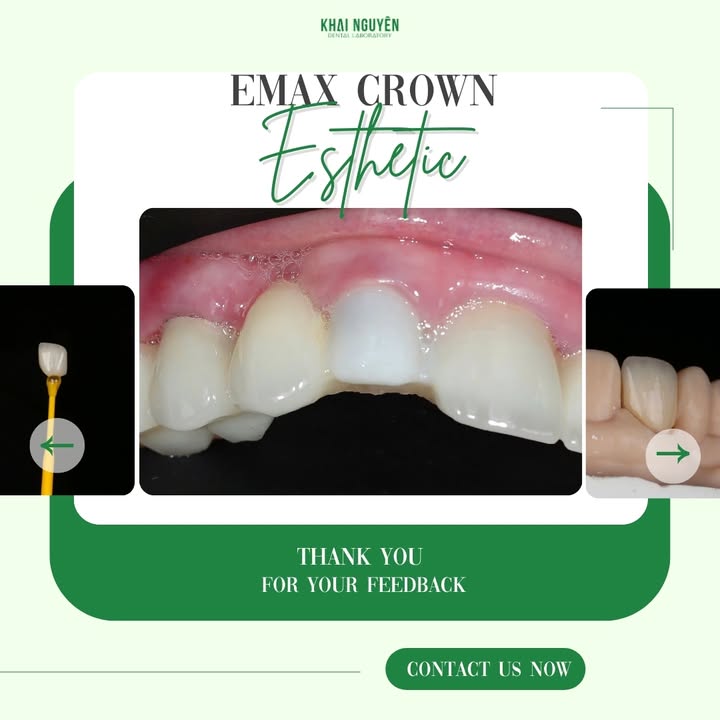
IPS e.max crown and feldspathic veneers shade OM1 showing the incisal halo, Khai Nguyen Dental Lab

Case fabricated at Khai Nguyen Dental Lab to the treating dentist’s prescription. Photos were taken by the lab on the model and first published on Instagram @khainguyendentallab on 17 June 2026; no patient-identifying information is included. Written for dentists and dental technicians.

Case summary

Indication Pressed IPS e.max crown combined with feldspathic veneers in the upper anterior segment
Materials IPS e.max Press (crown) and feldspathic porcelain (veneers)
Shade OM1 (bleach shade group)
Technical focus Recreating the incisal halo and enamel striations on a very bright base shade
Photo source Instagram @khainguyendentallab, 17 June 2026

Photo above: Incisal halo on an OM1 central incisor: a thin, brighter opaque band framing the translucent incisal zone.

What the dentist asked for

The patient had bleached and wanted the anterior segment restored in shade OM1. One tooth needed a full crown because of extensive tissue loss; the others needed veneers only. The dentist required both types of restoration to share the same translucency, surface structure and character, even though they would be made from two different materials.

The difficulty with OM1 is that its high value makes restorations look flat and opaque. Natural bright teeth still show stratification: a slightly warmer cervical area, vertical striations on the body, a translucent incisal edge framed by a thin bright band, the halo. Without these details a white smile reads as plastic.

Why e.max Press with feldspathic

The full crown needs strength to carry load and mask the preparation, so pressed lithium disilicate with a flexural strength around 400 to 500 MPa and enough translucency for anterior work was chosen (see the materials comparison). Veneers on teeth with plenty of remaining enamel suit hand-layered feldspathic, which gives the finest control over effects. To make the two materials match, the e.max crown was pressed from an ingot of suitable translucency, then cut back in the incisal third and layered with the same porcelain used for the veneers. The outermost layer of crown and veneers is therefore one ceramic system fired on the same schedule, so light behaves the same way on every unit.

Lab workflow

  1. Ingot and opacity selection. For OM1, an ingot opaque enough to mask the preparation without killing incisal translucency.
  2. Press and cut-back. The crown was pressed to full contour, then reduced in the incisal third to create room for effect porcelain.
  3. Effects on crown and veneers together. Translucent porcelain at the edge, a halo built with higher-opacity enamel around the incisal outline, fine vertical striations with effect porcelain, then firing and checks under several light sources.
  4. Surface and gloss. A consistent micro-texture across the whole arch and mechanical polishing instead of a thick glaze, to avoid a mirror-like surface.

Result

The close-up on the model shows a distinct halo at the incisal edge of the central incisor, translucency below it and vertical enamel striations running the length of the crown. At normal viewing distance the pressed crown and the layered veneers cannot be told apart. That was the success criterion for the case: a bright arch that still has depth.

Lessons for similar cases

  • When combining crowns and veneers in one arch, ask the lab to use one ceramic system for the outer layer. Prescribing different core materials per tooth is normal; the surface layer must be uniform.
  • Bleach shades still need effects. Write it on the prescription: “halo, striations, translucent edge”. Otherwise the lab may read the request as a uniform shade.
  • Photograph OM1 and OM2 tabs next to the bleached natural teeth so the lab sees the target value under the same lighting.

Need help choosing materials for an anterior case? Message WhatsApp +84 902 945 585 or read our comparison of pressed lithium disilicate systems.

Case Study: Feldspathic Veneers for Diastema Closure of the Central Incisors

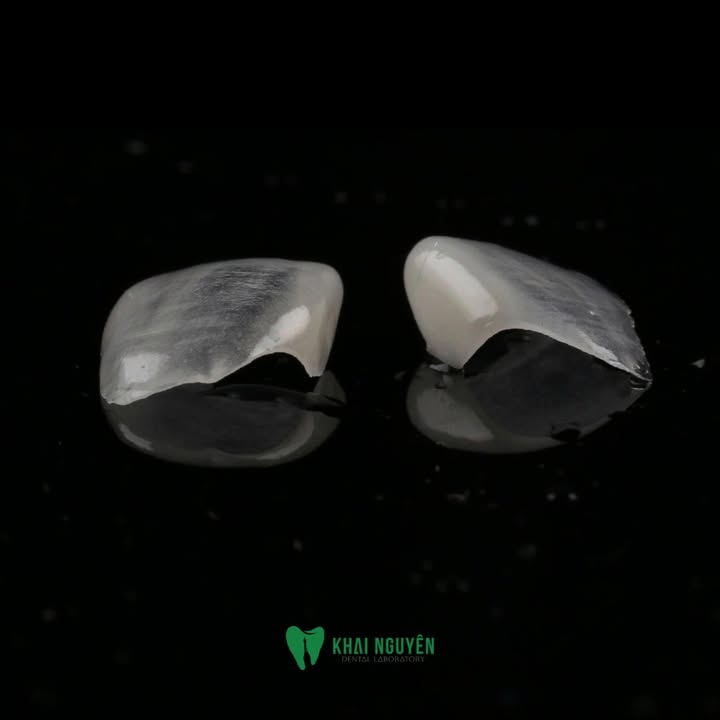
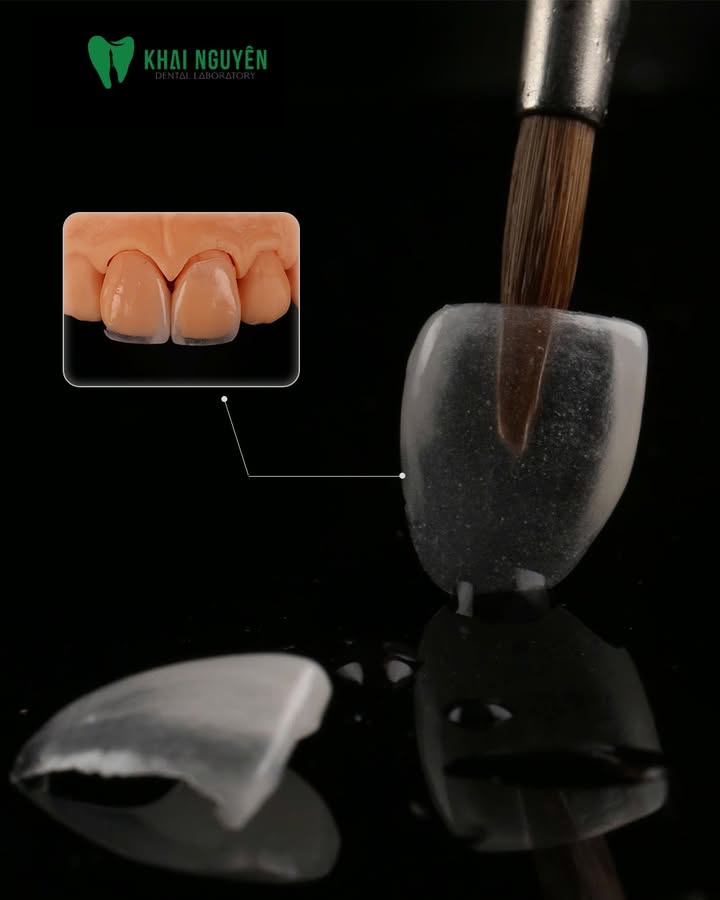
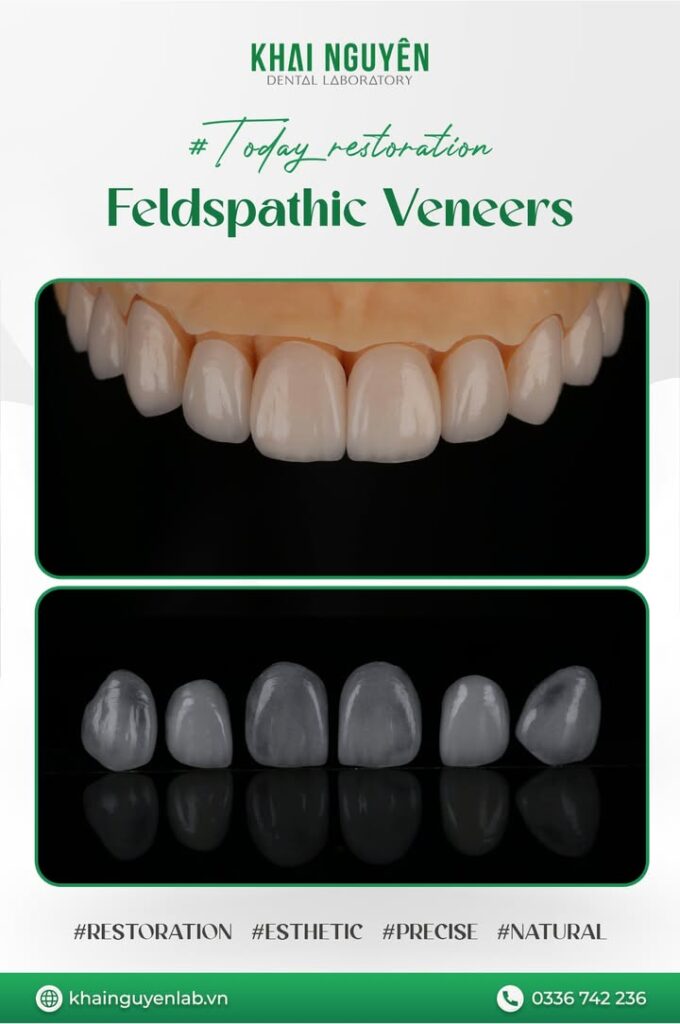
Two feldspathic veneers for diastema closure of the central incisors, before seating and after, Khai Nguyen Dental Lab

Case fabricated at Khai Nguyen Dental Lab to the treating dentist’s prescription. Photos were taken by the lab and first published on Instagram @khainguyendentallab on 8 July 2026; no patient-identifying information is included. Written for dentists and dental technicians.

Case summary

Indication Diastema closure between the upper central incisors with porcelain veneers
Material Hand-layered feldspathic porcelain
Units 2 veneers (left and right central incisors)
Technique Feldspathic layering on refractory dies, hand-finished form and surface texture
Photo source Instagram @khainguyendentallab, 8 July 2026

Photo above: Top: the two feldspathic veneers on holding sticks before seating. Bottom: intraoral result with natural morphology after diastema closure.

What the dentist asked for

The patient presented with a midline diastema between the upper central incisors. The remaining dentition was healthy, bright in shade and rich in natural detail. The dentist prescribed two thin veneers to close the gap with one clear requirement: the result had to blend with the adjacent natural teeth rather than look uniformly white. In this situation translucency and surface structure matter more than strength, because occlusal load on the central incisors is low and the bonding area on enamel is generous.

Why feldspathic porcelain

With two units sitting next to natural teeth, the ceramist needs control over every colour layer: dentin at the cervical third, translucency at the incisal edge, enamel striations and small opaque spots. Hand-layered feldspathic porcelain allows these details to be adjusted brushstroke by brushstroke, which pressed or milled monolithic blanks cannot do. The trade-off is that feldspathic has the lowest flexural strength of the ceramic families (see our comparison of dental ceramics), so the indication is right when most of the bonding surface is enamel and there is no premature contact on the incisal edge.

For diastema closure the veneers must extend mesially to fill the space without making the teeth look oversized. The solution was to distribute the extra width across both central incisors, keep the width-to-length ratio close to the natural teeth, and bring the contact point apically just far enough for the papilla to fill the embrasure.

Lab workflow

  1. Model and photo analysis. The ceramist measured the diastema, set the new width of each incisor and the position of the contact point. Photos of the adjacent teeth under neutral light guided the base shade and the effects map.
  2. Layering on refractory dies. A thin dentin layer at the cervical and body, enamel and translucent porcelain in the incisal third. Several firings, each adding one group of effects: vertical enamel striations, incisal halo, subtle opaque spots.
  3. Form finishing. Line angles and reflective surfaces were positioned so that the two incisors read as symmetrical without being identical, as natural teeth are.
  4. Quality check. Try-in on the model, marginal fit, proximal contacts and minimum thickness at the edge. The case was photographed before shipping for the dentist’s reference.

Typical in-lab time for this type of case at Khai Nguyen is 3 to 5 working days because most steps are done by hand. See the ordering process for how to send scans and photos.

Result

The post-seating photo shows the diastema closed, with both central incisors showing natural morphology and a surface curvature continuous with the neighbouring teeth. The transition between veneer and tooth is not visible at conversational distance. Shade integration comes from preserving incisal translucency rather than brightening the whole restoration.

Lessons for similar cases

  • Send photos of the adjacent teeth and a shade photo with the tab in frame. For feldspathic veneers the lab reproduces detail from photographs, not only from a shade code.
  • Agree on the new tooth proportions in advance. Say whether the space should be shared between both incisors or assigned to one, and whether a longer contact is acceptable.
  • Check protrusive guidance. Thin feldspathic veneers chip at the edge if there is a premature contact in protrusion. Adjust before final cementation.

Have a similar case? Send the scan or model with photos via WhatsApp +84 902 945 585, or read how to evaluate a dental lab before sending esthetic work.


WhatsApp