Category Archives: Digital Workflow

Intraoral scanners, STL/PLY files, CAD/CAM design with Exocad, milling, sintering furnaces and dental photography. How clinics and labs exchange digital data to shorten turnaround and reduce remakes, from day-to-day practice at Khai Nguyen Dental Lab.

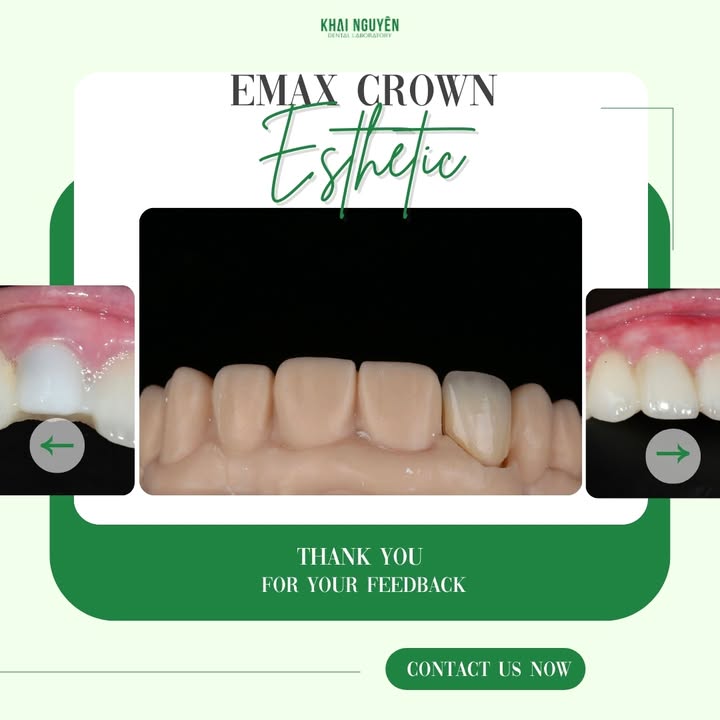
Glazing vs Polishing Ceramic Restorations: What Differs and When to Use Which

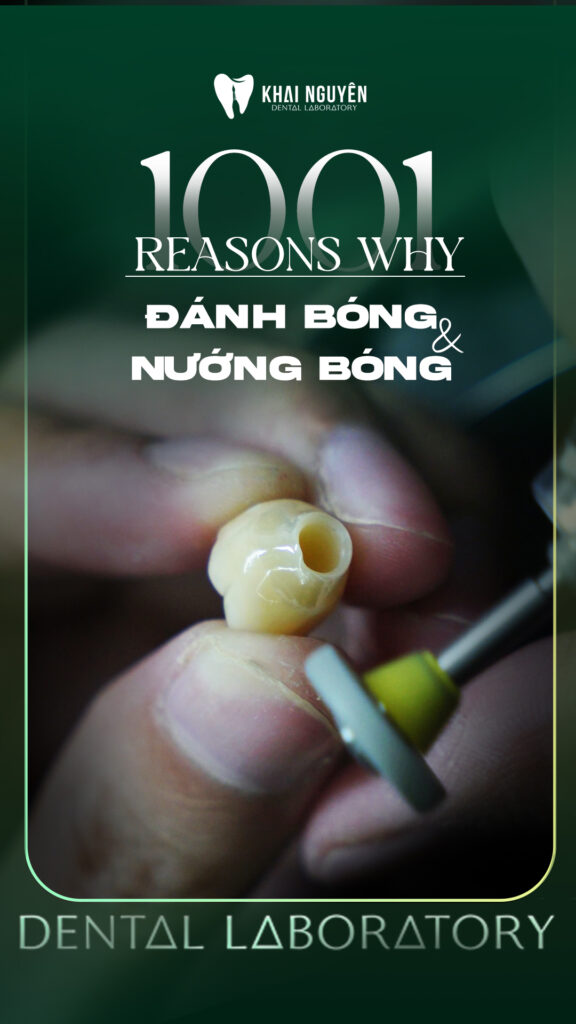
Đánh bóng cơ học và nướng bóng (glaze) phục hình sứ: kỹ thuật viên Khai Nguyên đang đánh bóng mão sứ

Part of the “1001 questions at the lab” series produced by the technicians of Khai Nguyen Dental Lab for young technicians and for dentists who want to understand how ceramic restorations are finished. The first episode was published on the lab’s Facebook page in May 2026.

“Glaze or polish?” is the question new technicians ask most at the finishing stage, and it is also what dentists wonder when one crown arrives mirror-shiny and another has the soft lustre of a natural tooth. The two techniques produce surfaces that differ in optics, roughness and longevity, and they are not always interchangeable.

Two techniques, two kinds of surface

Glazing (firing) Mechanical polishing
Method A thin layer of glass (glaze paste or spray) is applied and fired below the porcelain firing temperature; the glass flows and levels the surface Rubber points, discs and polishing pastes (fine diamond, aluminium oxide) are used from coarse to fine until the surface shines on its own
Resulting surface Very glossy and uniform, tending towards a mirror; the glass fills micro-texture, so texture is softened Soft lustre that keeps the striations and texture the technician created; gloss can be varied by zone
Durability of the gloss The thin glass layer can wear over the years or be removed when the dentist adjusts the occlusion; the adjusted area becomes rough The gloss is in the ceramic itself; after adjustment, re-polishing restores it
Effect on opposing teeth Fresh glaze is very smooth, but worn glaze exposes rough ceramic underneath that can abrade opposing enamel, especially with zirconia Well-polished zirconia is considered kinder to opposing enamel than glaze-only zirconia
Time Fast, one firing for many units Labour-intensive, unit by unit and zone by zone

Photo above: A Khai Nguyen technician polishing a ceramic crown mechanically: the gloss is created in the ceramic itself, independent of any glaze layer.

When to use which

Glazing suits

  • Stained monolithic posterior restorations that need a sealed surface quickly.
  • After staining, because stains need a firing to fix them and the glaze protects the colour underneath.
  • Layered porcelain with fine porosity after the last firing; glaze seals it.

Mechanical polishing suits

  • Anterior veneers and crowns that must keep hand-made surface texture (vertical striations, horizontal ridges, reflective planes); a thick glaze erases these details.
  • Monolithic zirconia in direct contact with opposing enamel; smoothly polished zirconia causes less wear than worn glaze.
  • Occlusal surfaces and contact points that the dentist may adjust at seating; chairside re-polishing restores the gloss afterwards.

Combining both

In most esthetic cases at Khai Nguyen the technicians combine the two: stain and fire a very thin glaze to fix the colour, then polish selectively to reduce gloss where natural teeth are not shiny (cervical zone, between striations) and keep high gloss on the reflective planes. The result is zone-dependent gloss like a natural tooth rather than uniform shine. For monolithic full-arch work in Aidite 3D Pro multilayer zirconia the process is shorter: stain with the Biomic kit and glaze, since the multilayer disc already provides the effects.

Three common finishing mistakes

  1. Glaze too thick. A glass-like surface with no texture; on incisors it creates flat reflections that make the teeth look larger. Fix: a thin glaze or none, and polish instead.
  2. Skipping polishing grades. Jumping from a coarse point to fine paste leaves long scratches under the gloss, visible under oblique light. Fix: work through every grit and check under a raking light after each.
  3. Occlusal adjustment without re-polishing. The adjusted area exposes rough ceramic that stains and wears the opposing tooth. Fix: a chairside ceramic polishing kit matched to the material, or return the unit to the lab if the area is large.

What the dentist can write on the prescription

  • “Soft lustre, keep texture” for anterior teeth; “high gloss” for posterior teeth if the patient prefers it.
  • The material of the opposing teeth (enamel, ceramic, composite) so the lab chooses the least abrasive finish.
  • A request for photos under oblique light before shipping if surface texture matters.

Read more: three finishing steps on LiSi Press veneers in A1, choosing zirconia discs by case. Send a case via WhatsApp +84 902 945 585.

Which Intraoral Scanners Work With Our Lab? STL, PLY, DCM Files and Error-Free Digital Cases
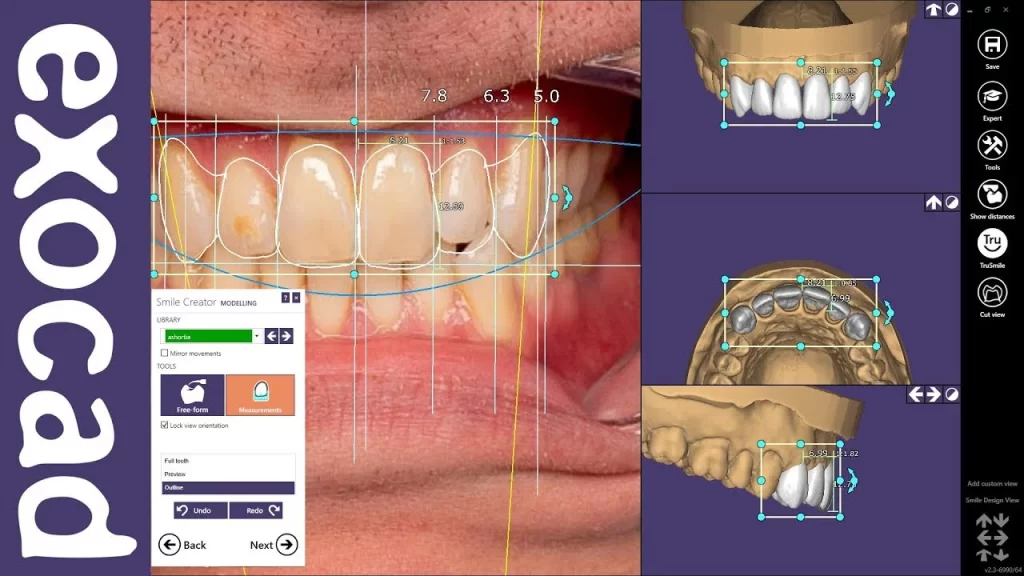
Exocad Smile Creator smile design interface

TL;DR: every current intraoral scanner can export an open STL, PLY or DCM file, and a lab can take that file straight into exocad. The real barrier is not “is my scanner compatible” but three small things: exporting the right format, sending complete data (both arches, bite, scan body for implants) and getting fast feedback when a scan has a defect. This guide lists how to export from each common scanner, the scan errors we see most, and how our lab responds.

The three file formats to know

  • STL: a plain triangle mesh, no colour. The most common format; every CAD package reads it. Sufficient for crowns, bridges and inlays/onlays.
  • PLY: like STL but with surface colour. Lets the technician see gingiva, margins and neighbouring teeth; export PLY when the scanner supports it.
  • DCM: 3Shape’s format, mesh with colour and case information. exocad reads DCM from TRIOS directly.

Closed native formats (for example native iTero files) must be exported to STL/PLY through the manufacturer’s portal before sending.

How to send files from common scanners

Scanner Export formats How to send to the lab Notes
3Shape TRIOS (3, 4, 5) DCM (default), STL, PLY 3Shape Communicate: add the lab as a partner and send the case; or export DCM/PLY and upload to the case portal Include the bite scan and photos; DCM keeps colour best
iTero (Element, Element 5D, Lumina) STL, PLY (via MyiTero) Add the lab to the lab list on the scanner or export STL from MyiTero and upload Export “open STL” with both arches and bite; native iTero files cannot be opened by the lab
Medit (i500, i600, i700, i900) STL, PLY, OBJ Medit Link: invite the lab as a partner and send directly; or export PLY PLY keeps colour; tick “both arches + occlusion” on export
Dentsply Sirona Primescan / Omnicam STL, PLY (Connect Case Center) Connect Case Center: add the lab and send; or export STL from Connect software Export “unlocked” so the lab can open the file
Carestream CS 3600 / 3700 / 3800 STL, PLY CS Connect or export and upload Check the bite covers both sides
Shining 3D Aoralscan STL, PLY, OBJ Shining cloud or export Export PLY to keep gingival colour
Planmeca Emerald STL, PLY Romexis Cloud or export

For files over 100 MB (full-arch colour scans) use the case portal or a download link; email is usually capped at 25 MB.

Minimum data for a digital case

  1. Scan of the prepared arch and the opposing arch.
  2. Bilateral bite scan in maximum intercuspation.
  3. Prescription: tooth number, restoration type, material, shade, due date. See the ordering process.
  4. Photos: preparation with a shade tab; smile photo for esthetic-zone cases.
  5. For implants: implant system, connection size, scan body type and a scan with the scan body seated.
  6. For esthetic cases: a pre-operative or mock-up scan if you want the morphology preserved.

Seven common scan errors and how to avoid them

  • Missing margin: retract and dry before scanning; rescan the area, not the whole arch.
  • Holes on occlusal or proximal surfaces: auto-fill invents morphology; angle the tip to close them.
  • Bite that does not align: patient not in habitual occlusion or one-sided bite scan; scan both sides and check on screen before sending.
  • Too few neighbouring teeth: capture at least 2–3 teeth each side so the lab can build morphology and contacts.
  • Saliva, blood, debris: creates false surfaces; dry and rescan.
  • Scan body not fully seated or wrong type: the implant crown will be off-axis; photograph the seated scan body.
  • Locked export: the lab cannot open it; choose open/unlocked export.

How our lab responds to a file

At Khai Nguyen every file is checked in the next working shift: margins, holes, occlusion and preparation depth against the chosen material. If there is a problem you receive an annotated screenshot with a suggestion (rescan one area, reduce further, or change material) before production starts. For esthetic cases you can request an exocad design preview to approve contour and contacts. In-lab time of 1.5–3 working days counts from file approval. Read more in turnaround time and shipping.

Frequently asked questions

Can I send digital cases without a scanner?

Yes. Ship the model or silicone impression; the lab pours and scans it on a desktop scanner and continues digitally. It only adds shipping time.

Is an older scanner that only exports STL enough?

Enough for crowns, bridges and inlays/onlays. For esthetic cases add photos to compensate for missing colour information.

Do you accept designs made in the clinic’s own software?

Yes. Send the design STL together with the original scan so the lab can check occlusion and thickness before milling or pressing.

See also the workshop on digital impression techniques and our guide to outsourcing to a Vietnam dental laboratory. To try a case: WhatsApp +84 902 945 585.

KDF Master Plus – New Porcelain Furnace from Japan

KDF Master Plus – New Porcelain Furnace from Japan

KDF Master Plus – New Porcelain Furnace from Japan

  • The new 2018-model KDF Master Plus porcelain furnace, made in Japan — 100% brand-new in the box, with full catalogue, furnace liner tray and firing tray.
  • Smooth lift system with no vibration during operation.
  • Runs flawlessly and completely original, firing beautiful ceramics.
  • User-programmable, with an easy-to-use interface and parameters shown on the LCD screen. The LCD has passed strict testing to minimize screen failure or freezing while a program is running.
  • Maximum firing temperature up to 1,200°C. A zigzag heating system distributes heat evenly to every point in the chamber, so crowns and bridges fire with consistent color at every position.
  • Highly versatile, KDF offers around 500 firing programs, of which about 160 are pre-programmed — far more than standard furnaces. It can fire every type of ceramic: porcelain-fused-to-metal, all-ceramic, veneers, zirconia or Cercon — and you can set up your own firing programs as you like, which is very convenient.
  • The manufacturer’s dry pump runs quietly and ensures an absolute vacuum inside the furnace.

Leading Advanced Dental Lab Technology

Leading Advanced Dental Lab Technology

As a pioneer in adopting, investing in and applying leading dental technology in Vietnam, Khai Nguyen Dental Lab is proud to be a dental manufacturing company equipped with the most modern prosthetic equipment — with full machinery and high-quality materials that deliver precision, esthetics, durability and safety for the end user.

Trained and upskilled by international experts and supported by advanced dental machinery, the technicians at Khai Nguyen consistently ensure the quality of their prosthetic work while shortening treatment time for both dentists and patients.


WhatsApp