

Written for dentists and dental technicians, based on the bar-supported full-arch cases Khai Nguyen Dental Lab published on Facebook and Instagram between June 2025 and July 2026. Photos were taken by the lab; no patient-identifying information is included.
For fixed full-arch implant restorations the question dentists most often put to the lab is: screw a zirconia bridge directly to the multi-unit abutments, or mill a titanium bar and place zirconia over it? And with a bar, mill monolithic zirconia that wraps the bar completely (full contour) or make a separate overlay (the “split iBar” approach)? This article explains how Khai Nguyen chooses between these options, and one step few people notice that decides the success of the case: polishing the bar below the gingiva.
Three constructions for a fixed full arch
| Construction | How it is made | Advantages | Watch out for |
|---|---|---|---|
| Zirconia bridge screwed directly | Monolithic or gingiva-layered zirconia bridge screwed to multi-unit abutments | Few components, low profile, good esthetics | All load passes through zirconia; fracture risk around screw channels if the framework is thin or the fit is not passive |
| Full contour on iBar | CAD/CAM titanium bar screwed to the implants; monolithic zirconia milled to enclose the bar and bonded to it | Titanium carries the load, zirconia only provides esthetics; less zirconia fracture | Needs enough restorative height for bar plus zirconia; two fits must be right |
| Split iBar (bar plus separate overlay) | Separate titanium bar; teeth and gingiva milled as a separate part bonded or screwed to the bar; overlay replaceable later | Repair and replacement of the overlay without touching the bar; easy bar polishing | Junction between bar and overlay must be sealed; strict bonding protocol |
A full-contour iBar case in Aidite 3D Pro
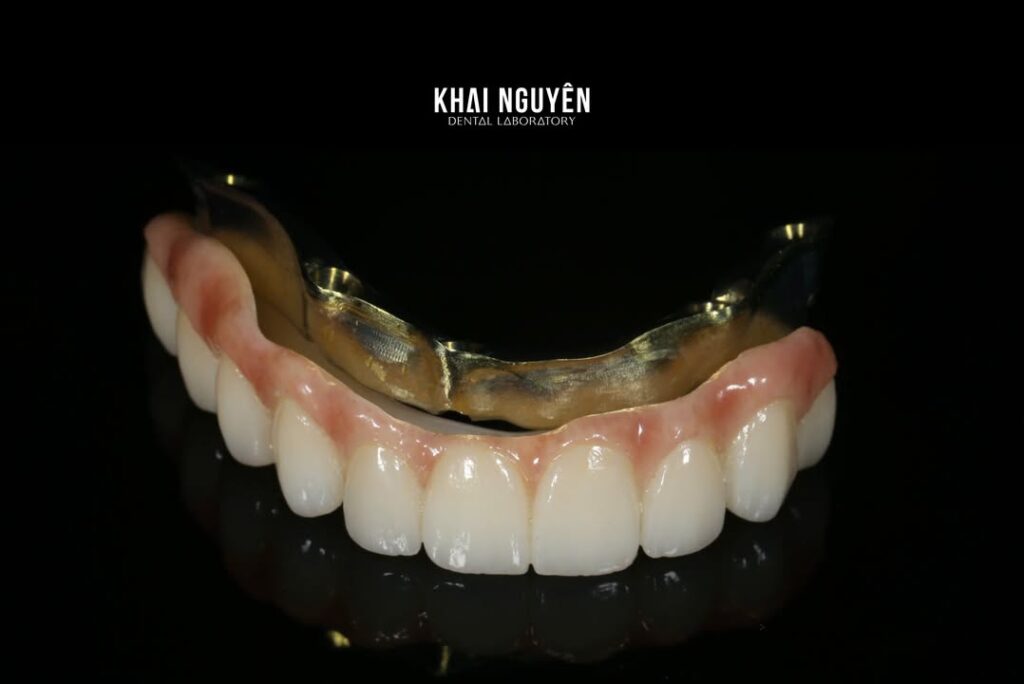
In one All-on-X case Khai Nguyen chose a full-contour design: monolithic zirconia milled to enclose the iBar for maximum rigidity and load capacity. To balance esthetics in a monolithic restoration the lab used Aidite 3D Pro, a multilayer zirconia with a smooth gradient from cervical to incisal built into the disc.
At the finishing stage the technicians only stained with the Biomic kit and glazed; no layering was needed and the result still had depth. This shortens the process, avoids the chipping risk of layered porcelain on a heavily loaded restoration, and still meets the dentist’s esthetic requirements.
Why the bar has to fit passively
On a natural tooth, the periodontal ligament allows several tens of microns of movement, enough to absorb part of a restoration’s discrepancy. An implant integrates directly with bone and has almost none of that capacity.
A bar joining several implants therefore has to seat passively: place it and it sits, without tightening screws to draw it into position. If it has to be pulled in, that residual load stays in the system and shows up later as a loosening screw, a fractured screw, or bone loss around the implant.
Accuracy on a bar case does not come from one step but from a chain: recording implant positions by impression or scan, transferring them to the model without distortion, fabricating the bar, then verifying fit before any esthetic work begins.
An error at any stage carries into the next, and catching a discrepancy at the bar stage costs far less than finding it after the ceramic is on. The quality of the implant position record therefore drives most of the result: with a conventional impression, splint the impression copings together; with a digital workflow, use scan bodies matched to the system and verify with a confirmation scan.
Digital workflow from bar to overlay
- Verify implant positions. The model is checked with a verification jig before design. When the impression is taken with intraoral photogrammetry (IPG), the implant positions reach the lab as digital data and this step becomes much shorter.
- Teeth first, bar second. Teeth are set up from the bite record and facial photos for vertical dimension, midline and lip support, then reduced inward to define a bar that supports every tooth without showing through thin gingiva. Bar and overlay live in the same design file.
- Mill the titanium bar and test the fit. Single-screw (Sheffield) test on the model; a gap at the opposite end means the bar is not passive and must be remade before the zirconia is milled.
- Mill the monolithic zirconia from a multilayer disc, sinter, try on the bar; check that the cement space is thin and even.
- Polish the bar below the gingiva. See the dedicated section below.
- Esthetic finishing: stain, glaze, layer or stain the gingiva; bond the overlay to the bar following the cement manufacturer’s protocol; remove excess cement.
The hidden step that decides the case: polishing the bar below the gingiva
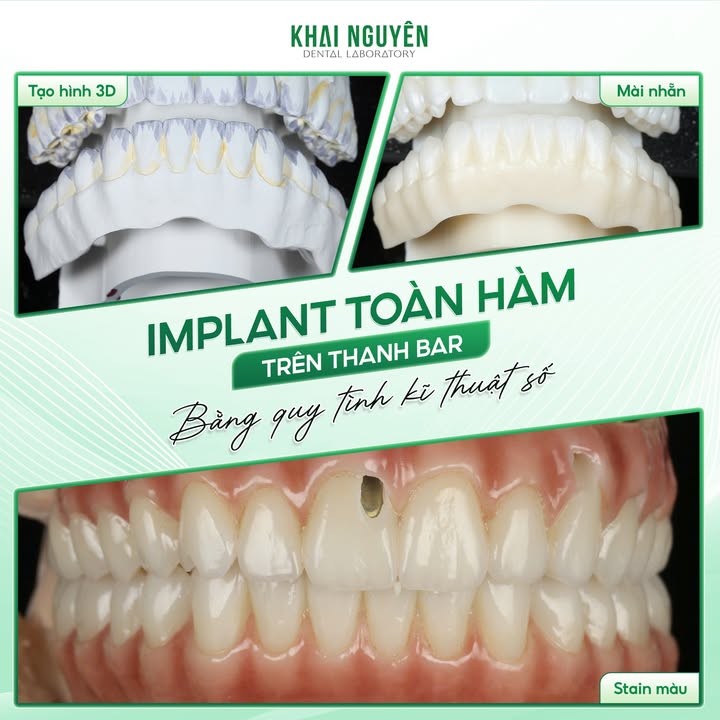
With the split iBar approach, the part of the bar under the gingiva and the tissue surface of the restoration are what the patient never sees but touches every day. Titanium or zirconia that is not thoroughly polished there retains plaque, causes peri-implant mucositis and odour, and is a common reason for dissatisfaction even when the teeth above are beautiful.
At Khai Nguyen the whole underside of the bar and the junction areas are mirror-polished before the overlay is bonded, and the tissue surface of the overlay is made slightly convex with no dead corners, so floss and interdental brushes pass through.
Photo above: Polishing the titanium bar below the gingiva in a split-iBar All-on-X case: hidden, but decisive for soft-tissue health and patient satisfaction.
Which construction for your case
- Low restorative space (below roughly 12 mm from the multi-unit top to the occlusal plane): a directly screwed zirconia bridge is usually the only feasible option.
- Enough space and a bruxing patient or heavy occlusal load: full contour on an iBar, so titanium takes the load and zirconia only handles esthetics.
- The dentist wants long-term repairability: split iBar, because the overlay can be replaced without removing the bar.
- Long spans on few implants: a titanium bar distributes the load; Khai Nguyen calls this zirconia on I-bar for long-span cases.
Real cases: full-arch Aidite 3D Pro zirconia overlay on a titanium iBar and directly screwed upper and lower All-on-X. Related product: full-arch zirconia bonded on bar. Send a full-arch case via WhatsApp +84 902 945 585.
Written for dentists and technicians. Khai Nguyen Dental Lab manufactures to clinical prescription only and does not sell directly to patients.