

Case fabricated at Khai Nguyen Dental Lab to the treating dentist’s prescription. Photos were taken by the lab and first published on Instagram @khainguyendentallab on 14 June 2025; no patient-identifying information is included. Written for dentists and dental technicians.
Case summary
| Site | Tooth 11 (upper right central incisor) on an implant |
|---|---|
| Restoration | Custom hybrid abutment (zirconia bonded to a Ti-base) with a separate zirconia crown, cemented extra-orally |
| Material | 3M Lava zirconia |
| Shade | A2 |
| Special requirement | Copy the soft-tissue profile shaped by the dentist; 0.5 mm of tissue pressure at the cervical zone as prescribed |
| Photo source | Instagram @khainguyendentallab, 14 June 2025 |
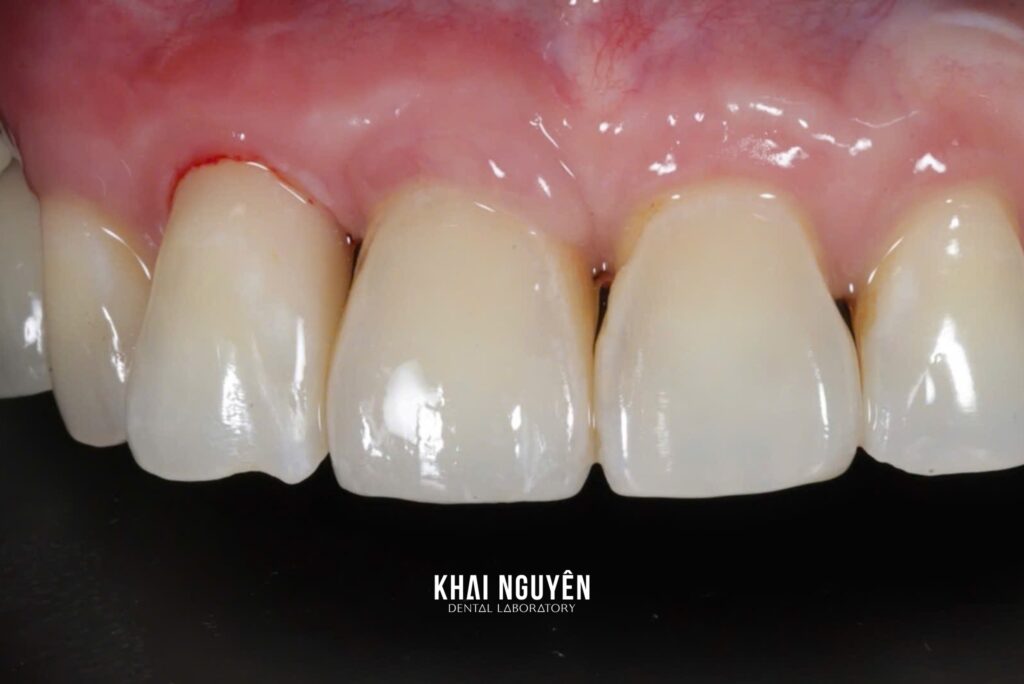
Photo above: the zirconia crown on tooth 11 after seating, with the gingival margin hugging the cervical contour and matching tooth 21.
What the dentist asked for
An implant at a central incisor is the most demanding single-implant case, because any error in the soft-tissue contour shows immediately in the smile. Here the dentist had shaped the tissue with a provisional during healing and sent the lab a scan with the scan body together with a scan of the provisional.
The brief was explicit: the subgingival part of the abutment had to copy the established emergence profile, tissue pressure at the cervical zone had to be exactly 0.5 mm, and the crown on 11 had to match the natural 21 in form, translucency and shade A2.
Why a hybrid abutment and a separate zirconia crown
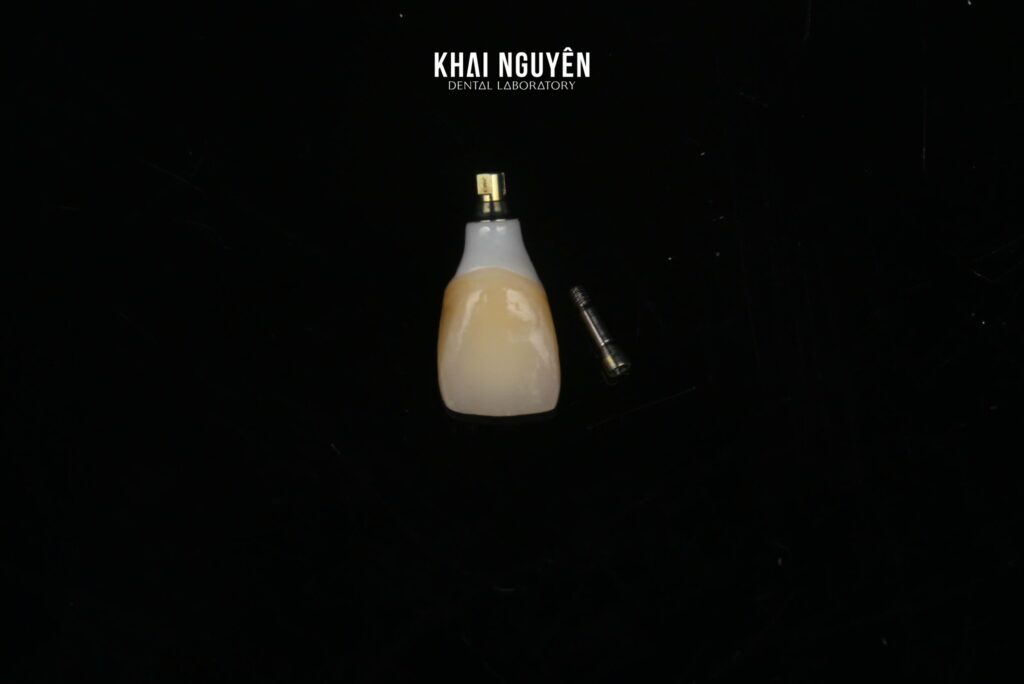
A hybrid abutment is an individually designed zirconia body bonded to the implant manufacturer’s Ti-base. It lets the lab shape the transmucosal zone freely to the existing profile and gives a tooth-coloured substructure instead of grey metal under thin anterior tissue.
The separate zirconia crown is cemented onto the abutment outside the mouth (or intra-orally at the dentist’s choice), so the cement line sits where it can be controlled and the whole assembly remains retrievable through the screw channel.
A multilayer 3M Lava disc was chosen because the crown needed enough opacity to mask the Ti-base and screw channel while keeping incisal translucency to blend with tooth 21. See 3Y-TZP vs 5Y-PSZ zirconia for how discs are selected.
Lab workflow
- Merging the digital data. The scan with the scan body, the scan of the provisional and the opposing scan were aligned in the design software to capture the implant position and the existing gingival contour.
- Abutment design. The transmucosal zone copied the provisional, then was enlarged uniformly by 0.5 mm at the cervical zone as prescribed to apply light tissue pressure so the margin would close tightly on seating. The screw-channel axis was checked to exit palatally.
- Crown design. Tooth 11 was built as a mirror of the natural 21 in width, outline and labial contour, with small deliberate differences so the two incisors would not look identical.
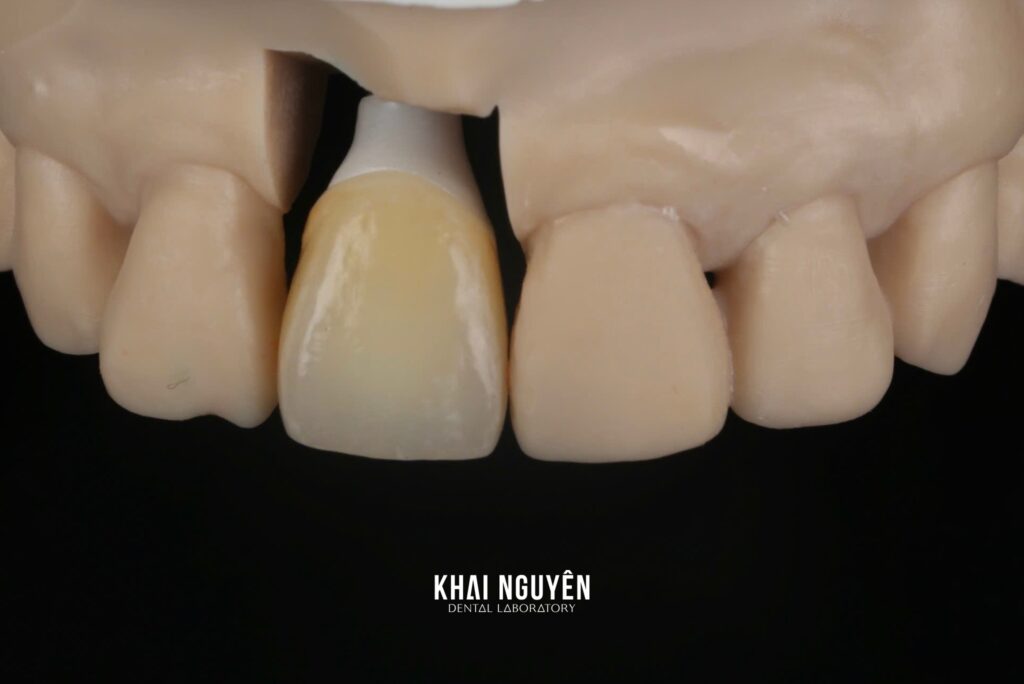
- Production and checks. Abutment and crown were milled from the Lava disc, sintered, the zirconia body bonded to the Ti-base, then stained and polished. The assembly was checked on a model with a removable soft-tissue mask for the emergence contour, occlusion and proximal contacts.
Result
The post-seating photo shows the gingival margin of tooth 11 level with tooth 21, full papillae on both sides with no black triangles, and no grey show-through at the cervical area.
Form, incisal translucency and shade A2 blend with the adjacent incisor. The intra-oral photo at abutment placement shows the soft tissue closing around the transmucosal zone without blanching, confirming that 0.5 mm of pressure was appropriate.
Lessons for similar cases
- Send the scan of the provisional together with the scan-body scan. Without the established profile the lab can only design the transmucosal zone to a default geometry, and the tissue outcome becomes unpredictable.
- State the desired tissue pressure (0.3, 0.5 or 0.8 mm) instead of “snug”; every clinician has a different habit and the lab should not decide this alone.
- Photograph the adjacent teeth with a shade tab so the lab picks a multilayer disc of the right opacity and reproduces the enamel character of tooth 21 on tooth 11.
See the implant restorations we produce, or send a case via WhatsApp +84 902 945 585.
Written for dentists and technicians. Khai Nguyen Dental Lab manufactures to clinical prescription only and does not sell directly to patients.