Victor Le – Digital Communications Manager, Khai Nguyen Dental Lab

Victor Le

Digital Communications Manager, Khai Nguyen Dental Lab

Digital Communications Manager at Khai Nguyen Dental Lab, with five years in communications and technical content for the dental laboratory field, responsible for editing technical articles together with the lab's technician team.

Articles by Victor Le

The imes-icore CORiTEC 350i PRO at Khai Nguyen: What It Changes for Your Cases

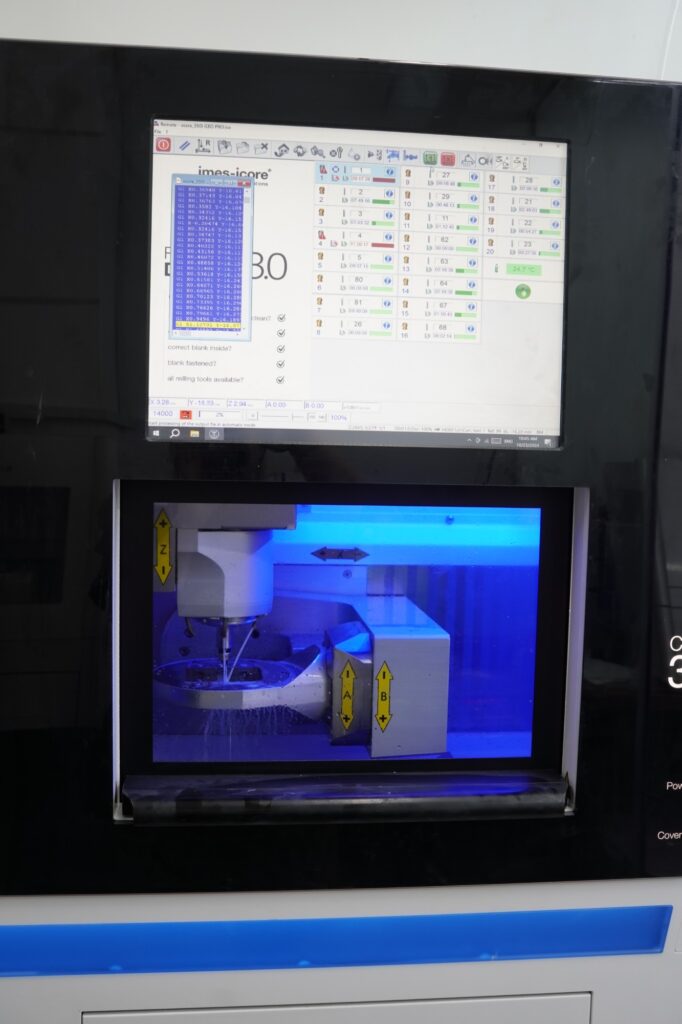
Milling chamber of the imes-icore CORiTEC 350i PRO at Khai Nguyen Dental Lab during wet milling, showing the Z, X, A and B axes

Summary: Khai Nguyen Dental Lab has added an imes-icore CORiTEC 350i PRO five-axis milling machine. Rather than a product announcement, this article answers what a referring dentist actually wants to know: what it changes in tolerance, in the range of materials we can take in one case, and in turnaround.
Why the frame matters more than spindle speed

Error in a milled restoration comes less from software than from vibration. Every vibration during cutting is transferred onto the surface and onto the margin — exactly where precision matters most.

The CORiTEC 350i PRO uses a one-piece machine frame made of polymer concrete, a material that damps vibration far better than welded steel or extruded aluminium frames. That is why this class of machine holds its stability when cutting hard materials such as pre-sintered zirconia or CoCr alloy.

The machine weighs roughly 180–210 kg at 758 × 790 × 857 mm — a figure worth noting because most of that mass is the frame itself. Full specifications are on the imes-icore product page.

Simultaneous five-axis machining

Simultaneous five-axis is not the same as indexed five-axis. In simultaneous mode all five axes move together throughout the tool path, letting the bur approach the surface at an optimal angle at every point.

This matters concretely for three groups of cases:

  • Preparations with slight undercuts and complex margins — tool paths follow the real geometry instead of approximating it.
  • Restorations with angulated screw channels — an inclined channel needs an inclined axis to cut the internal wall cleanly.
  • Anatomic occlusal morphology — grooves and fossae are reproduced more crisply instead of being rounded off by the bur.

The manufacturer reports that high-resolution dynamic servo motors with absolute measuring systems deliver up to roughly 20% faster machining than the previous generation at the same level of precision.

Material range: wet and dry milling on one machine

  • Dry milling — zirconia, aluminium oxide, wax, PMMA, PEEK, composite.
  • Wet milling — glass ceramics and lithium disilicate, CoCr, titanium, pre-milled abutments.
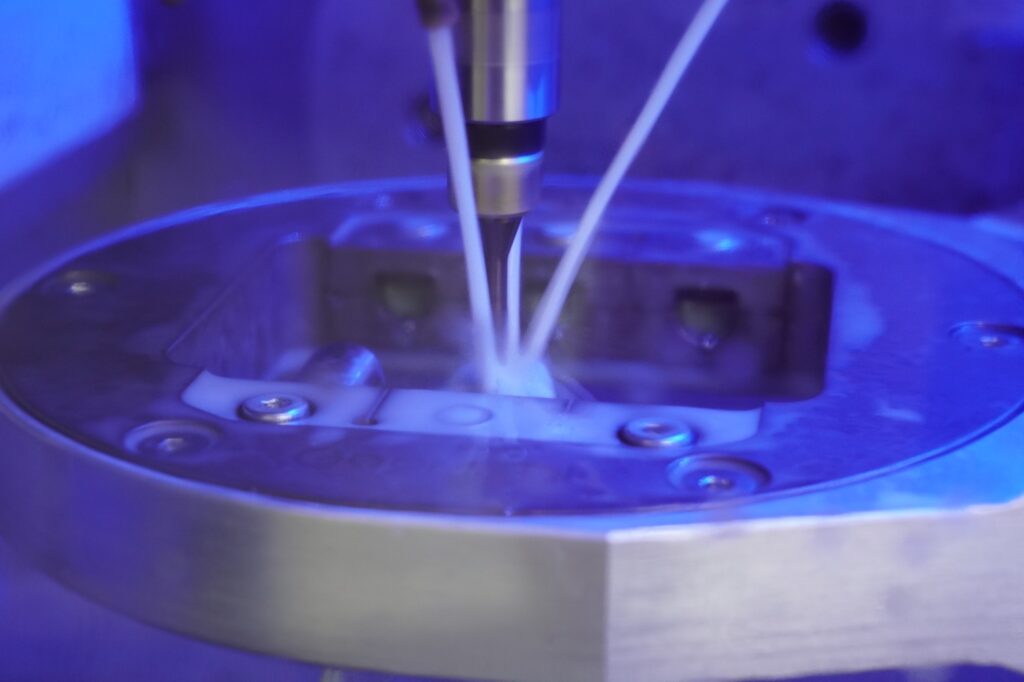
What this means for a case you send us: a mixed case — say lithium disilicate veneers anteriorly with zirconia crowns posteriorly and an implant restoration — does not have to be split across separate machines and separate workflows. Fewer handovers means fewer places for error to accumulate.

Four features that affect consistency between cases

Auto-calibration

The machine runs its own calibration routine rather than depending on a manual schedule. In production terms this is the difference between “the first case of the month and the last one match” and “we have to remember to do it”.

Integrated temperature compensation

Chamber temperature changes cause mechanical expansion at the micrometre scale — enough to affect a margin. Integrated compensation corrects for this in real time.

Zero-point clamping system

Blanks are clamped to one defined origin, so coordinates do not have to be re-established at every blank change. One fewer manual step is one fewer source of error.

Automatic cleaning

Zirconia dust left in the chamber interferes with clamping the next blank. An automatic cleaning cycle keeps machining conditions consistent from case to case.

What changes for your cases

  • A wider material range within one case. Mixed veneer, crown and implant cases run through one chain.
  • Crisper morphological detail in grooves, fossae and transitions — relevant for monolithic restorations with no external layering.
  • Higher throughput for multi-unit and rush cases.
  • Unchanged: input data still decides the outcome. A margin that is not readable on the impression or scan file cannot be rescued by any machine. Where error actually accumulates in the digital chain is covered in our materials comparison and in our accuracy notes.

FAQ

Will restorations fit better?

Better in the part the machine is responsible for — cutting stability, margin definition, repeatability between cases. The part that depends on impression quality and preparation design is unchanged.

Does it affect turnaround?

Yes, mainly on multi-unit cases and cases needing several material types, because fewer transfers between machines are required.

Does anything change in how we send cases?

No. Requirements for impressions, scan files and case documentation stay the same.

Do you accept milling from a design file we supply?

Yes. Contact the lab to agree on file format, implant system and blank type before sending.

Written for dentists and technicians. Khai Nguyen Dental Lab manufactures to clinical prescription only and does not sell directly to patients.
Minimum Veneer Thickness: How Thin Is Enough

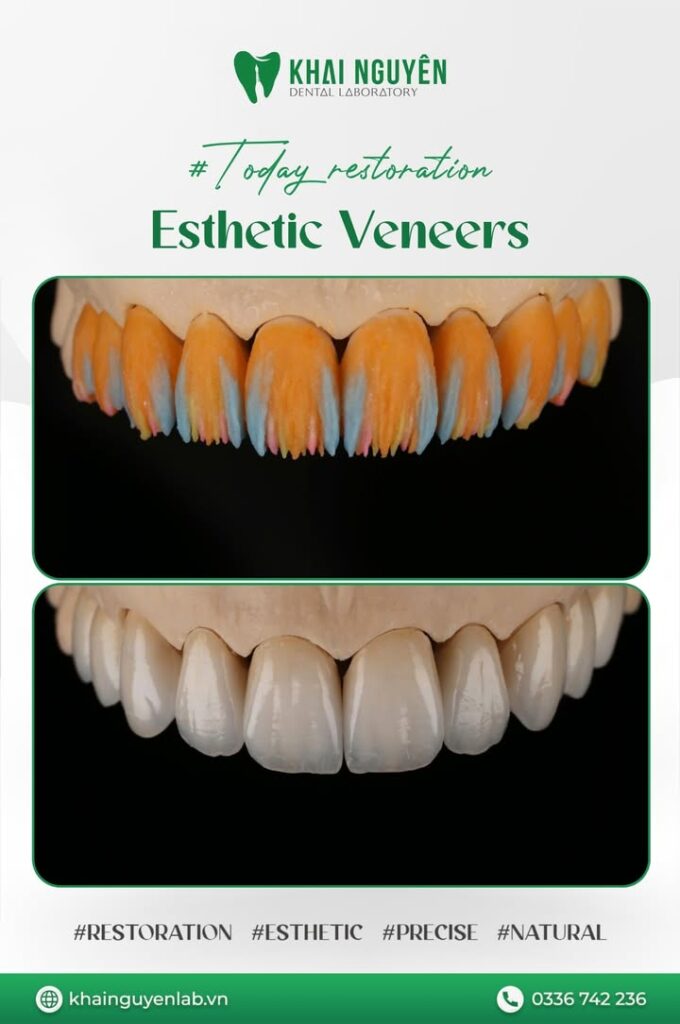
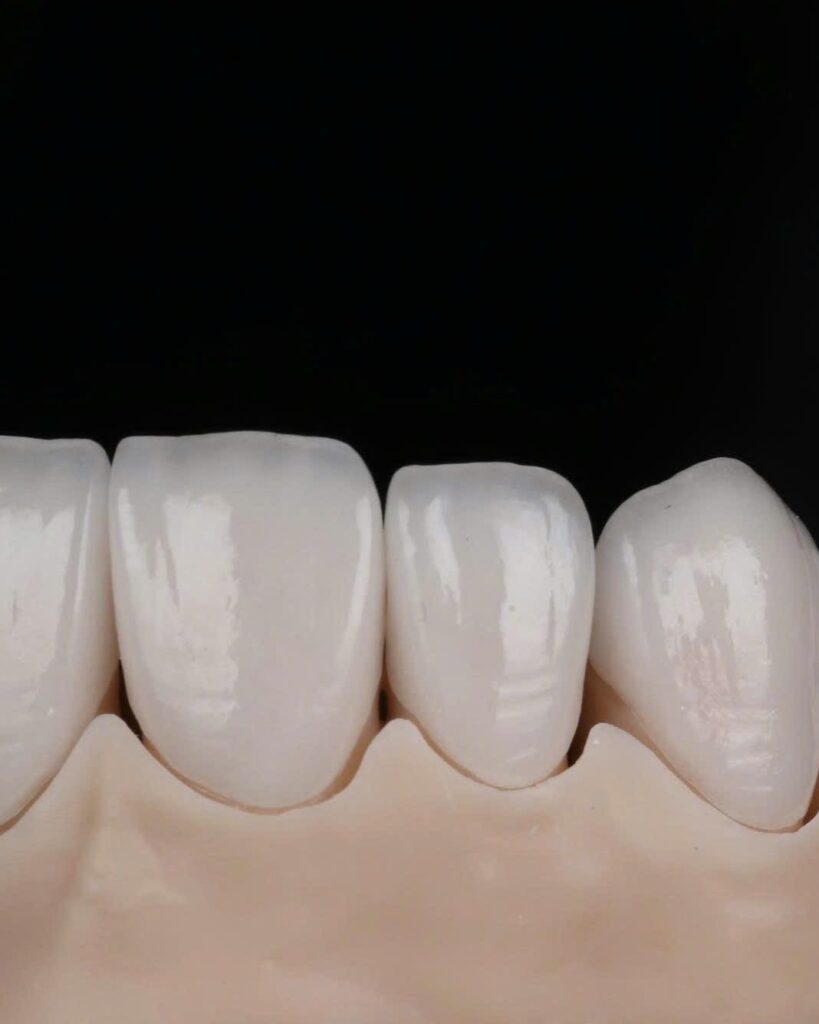
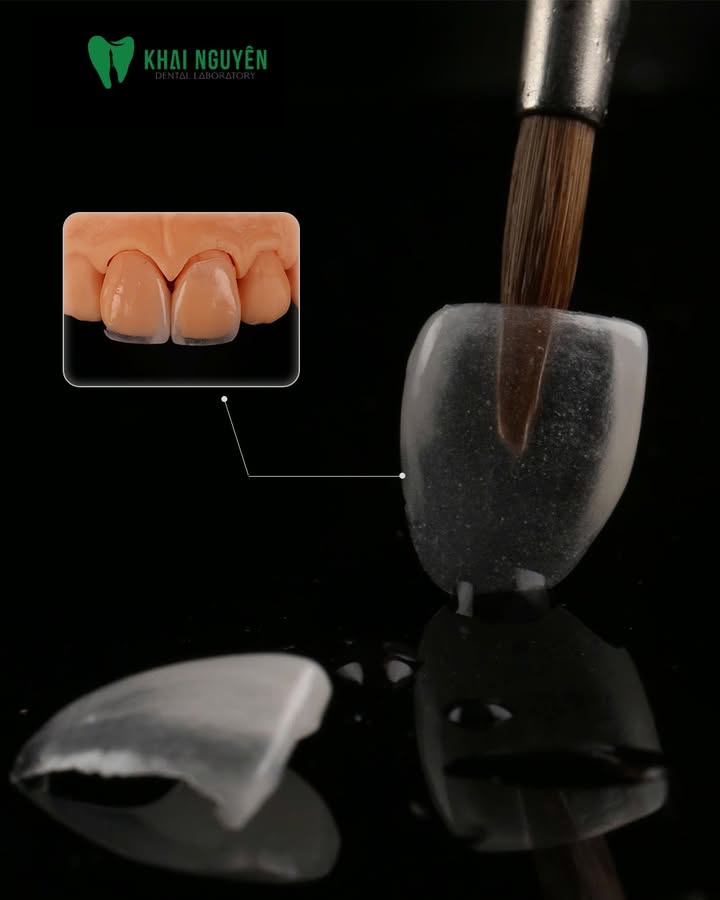
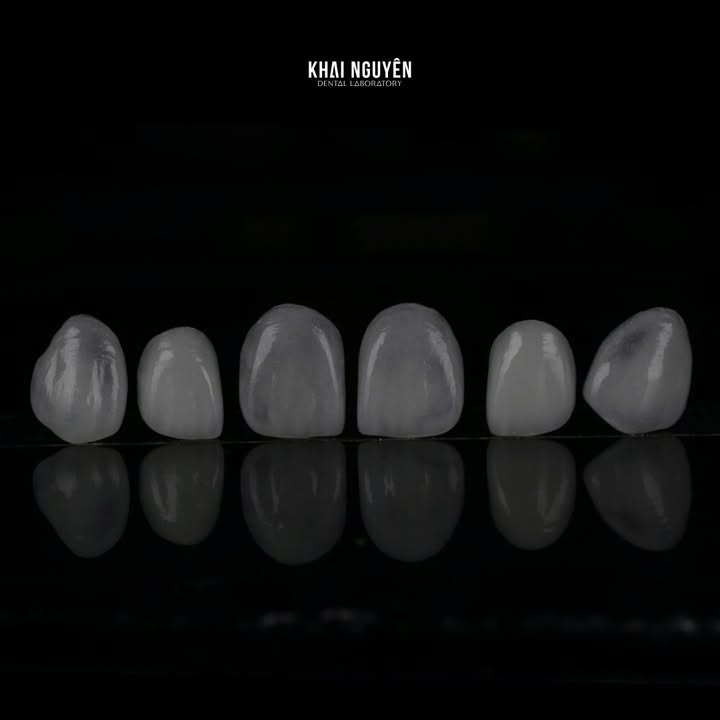
Close-up of hand-layered feldspathic veneers, enamel texture and translucency

The question “how thin can a veneer go” is usually asked the wrong way round. There is no single correct figure, because minimum thickness is not a property of the material. It is what falls out of three things together: how far the shade has to move, what colour the preparation is, and how much restorative space actually exists.

The 0.2 mm per shade group rule

The literature offers a working rule: each shade group change needs a minimum of 0.2 mm, and ideally 0.3 mm, of ceramic thickness.

A worked example makes it concrete. Moving from A3 to A0 is three shade group changes, so the minimum is 0.6 mm and the ideal is 0.9 mm. If the preparation allows only 0.3 mm and the plan still calls for three groups, the arithmetic does not close. That is not a limitation of the laboratory. It is an optical limit of the ceramic layer.

The threshold for masking a severely discoloured preparation

For severe discolouration, published work reports that roughly 0.8 mm of multilayer porcelain is required to mask it. That figure is worth remembering, because it sits a long way from the ultra-thin veneer patients expect after seeing advertising.

When the preparation is dark there are three routes: reduce further to create the space, change to a material with better masking, or revise the target shade to something achievable. There is no fourth route.

Why 0.5 mm keeps appearing

Most veneer preparations reduce enamel by about 0.5 mm. The number is not arbitrary: it is enough for a minimum ceramic thickness while avoiding a restoration that ends up over-contoured relative to the original tooth. Reduce less and either the ceramic is too thin, or the veneer builds out beyond the natural outline.

The literature adds a fabrication note: below 0.3 mm is very difficult to produce, and for most materials 0.5 mm is the realistic minimum.

Minimum workable thickness by material

Material Workable thickness Note
Hand-layered feldspathic 0.2–0.3 mm The thinnest, but masks almost nothing
Lithium disilicate (e.max) 0.4–0.5 mm Higher-opacity ingots available for masking
Zirconia 0.5 mm and above Best masking, lower translucency

This table describes what can be fabricated, not what should be prescribed. Being able to make 0.2 mm does not mean 0.2 mm is the right answer.

When 0.2 mm is the right answer

We produced a 0.2 mm ultra-thin feldspathic veneer on tooth 21. What matters there is not the number but why that case allowed it.

It was a diastema closure. The existing tooth shade was already correct, so no shade group had to be crossed and nothing had to be masked. The entire 0.2 mm went into form rather than colour. Once the problem is form alone, the thin limit drops a long way.

Move that same case to a patient with an A4 preparation who wants 1M1, with the same material and the same technician, and 0.2 mm becomes impossible. See masking a dark A4 preparation to 1M1 for the opposite situation.

What to send so the lab can answer precisely

  1. The preparation shade after cutting, photographed with a shade tab, taken before the tooth dehydrates.
  2. Measured restorative space at the thickest and thinnest point, measured rather than estimated.
  3. The target shade agreed with the patient.

With those three figures the lab can say immediately how thin the case can go, or how much further reduction it needs. Without one of them, any answer is a guess.

See feldspathic veneers, feldspathic or e.max, or contact our team.

Written for dentists and technicians. Khai Nguyen Dental Lab manufactures to clinical prescription only and does not sell directly to patients.
Feldspathic or e.max Veneers: How to Choose

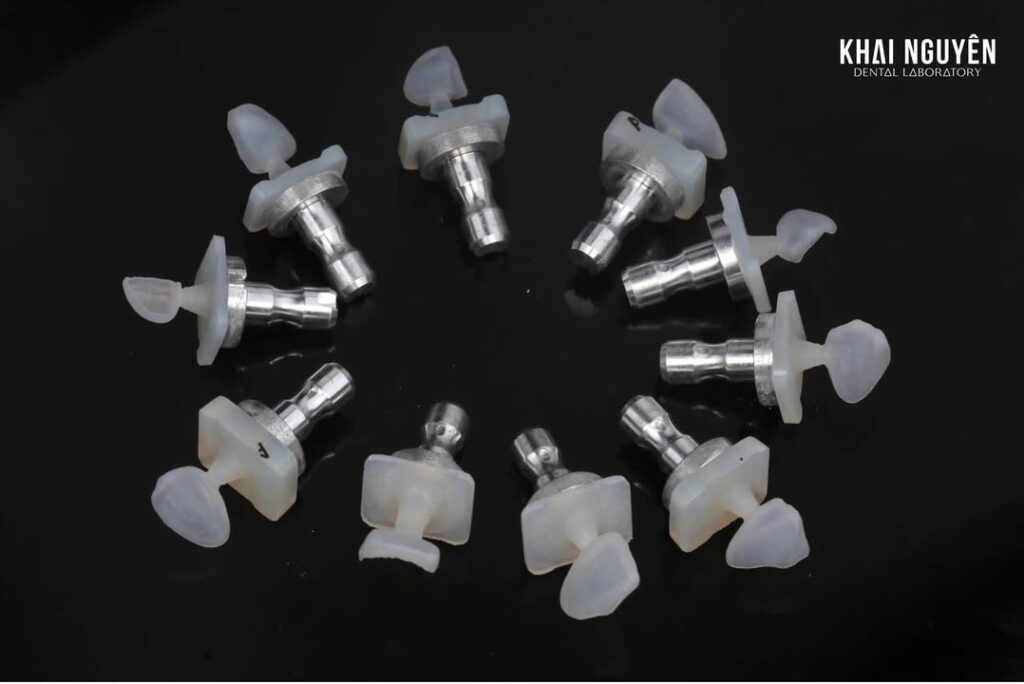
Veneer feldspathic đắp tay cho răng 11 và 21

Almost every anterior veneer case passes through this question: prescribe feldspathic or e.max. This note does not answer with “which is better”, because both are good inside their own indication. It sets out a decision procedure instead.

The core differences

Criterion Feldspathic IPS e.max (lithium disilicate)
Flexural strength about 60–90 MPa about 360–400 MPa
Minimum workable thickness 0.2–0.3 mm 0.4–0.5 mm
Translucency highest, closest to natural enamel high, several translucency levels available
Fabrication hand layered, no CAD/CAM pressed or milled, can be cut back and layered
Ability to mask a preparation limited good, higher-opacity ingots available
Dependence on the bond total high, with a margin from material strength

When feldspathic is the right call

When the enamel is intact, the preparation is not badly discoloured, and the change required is moderate: closing a diastema, refining form, lifting shade a little. In this group, being able to build at 0.2 to 0.3 mm allows a non-prep or minimal-prep approach, and the high translucency gives the closest match to natural enamel.

Feldspathic is particularly suited to one or two units sitting between natural teeth, because the restoration then has to reproduce exactly how the adjacent enamel scatters light.

When e.max is the safer choice

When at least one of the following applies:

  • A dark preparation has to be masked. At 0.3 mm, feldspathic does not have the material to block the underlying colour. e.max offers higher-opacity ingots for this.
  • Generous restorative space. If the preparation is already 0.5 mm or more, the thinness advantage of feldspathic no longer applies, while the higher strength of e.max is a real gain.
  • Bruxism or heavy occlusal load. Both materials call for a protective splint, but e.max has the wider safety margin.
  • The finish line reaches dentine. Where the bonding substrate is no longer entirely enamel, choose the material that depends less on the bond.

Three figures that decide it

The specific thickness thresholds for each level of shade change are in minimum veneer thickness.

In practice three numbers settle the material choice, and the lab needs all three before production starts:

  1. The actual preparation shade, photographed with a shade tab. Not the original tooth shade, the shade of the preparation once it is cut.
  2. Measured restorative space at the thickest and the thinnest point.
  3. The target shade agreed with the patient.

If the gap between preparation shade and target shade is large while the restorative space is tight, no material resolves that, and the treatment plan needs revisiting.

Cases

See our 0.2 mm ultra-thin feldspathic case for where the thin limit sits, and masking a dark A4 preparation to 1M1 for the situation that forces a change of material.

Material detail is on the feldspathic veneer page and the IPS e.max Press page, or see the full ceramic comparison.

Written for dentists and technicians. Khai Nguyen Dental Lab manufactures to clinical prescription only and does not sell directly to patients.
Why a Restoration Must Follow the Approved Wax-Up

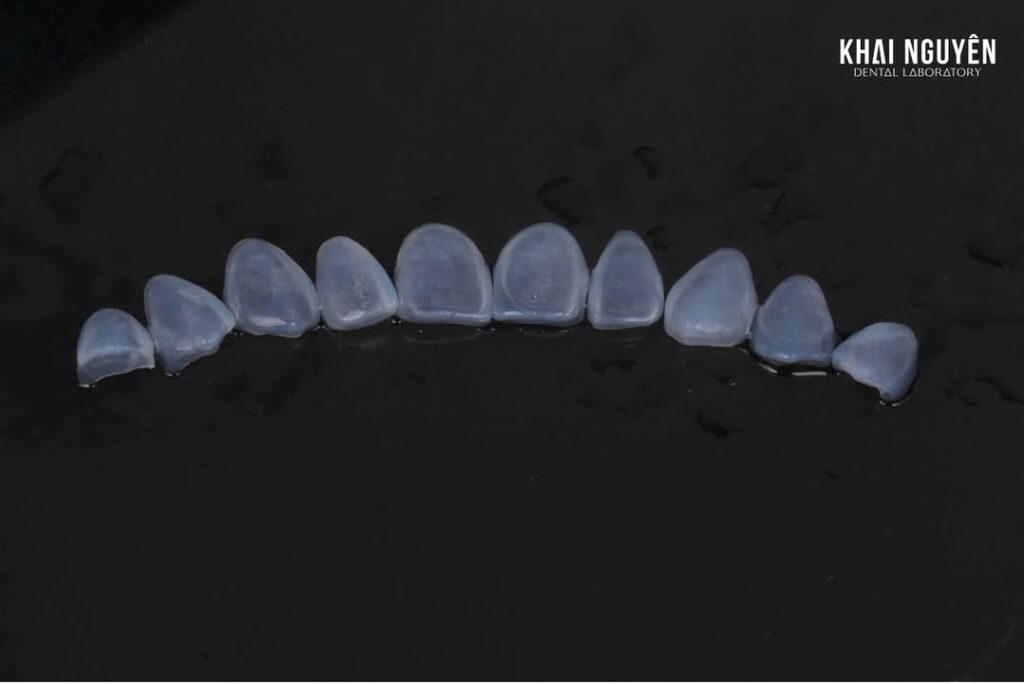
Veneer 10 răng hàm trên bằng Amber Mill, màu 1M1 đến 1M2

A ten-unit upper veneer case in Amber Mill, shade 1M1 to 1M2. What makes this case worth recording is that the finished restoration follows the wax-up design exactly.

Case parameters

  • Restoration: ten upper veneers
  • Material: Amber Mill
  • Shade: 1M1 to 1M2
Veneer 10 răng hàm trên bằng Amber Mill, màu 1M1 đến 1M2
Case image by Khai Nguyen Dental Lab.

Why following the wax-up matters

In an esthetic workflow, the wax-up is the design the clinician and patient agree on before any tooth is prepared. If the final restoration drifts from it, everything that was agreed loses its force: the patient expected one shape and receives another.

In a CAD/CAM workflow the wax-up is digitised and becomes the reference for every step that follows. The restoration is milled from that same dataset, so the difference between the approved design and the delivered result is close to zero.

The practical benefit

When the finished work reproduces the original design, quality control becomes straightforward: compare the restoration against the wax-up rather than judging it subjectively. Chair time at try-in also shortens, because the form was approved in advance.

What clinicians can use from this

On a multi-unit esthetic case, time invested in the wax-up and mock-up early saves more time later. Sending the lab a wax-up the patient has already approved, together with intraoral mock-up photographs, is the fastest route to a restoration that meets expectations.

See our esthetic restorations range, or contact our team.

Written for dentists and technicians. Khai Nguyen Dental Lab manufactures to clinical prescription only and does not sell directly to patients.
See the full case record with the spec table, image source and step-by-step workflow: Case Study: Ten Amber Mill Veneers in 1M1–1M2 Following the Approved Wax-Up.

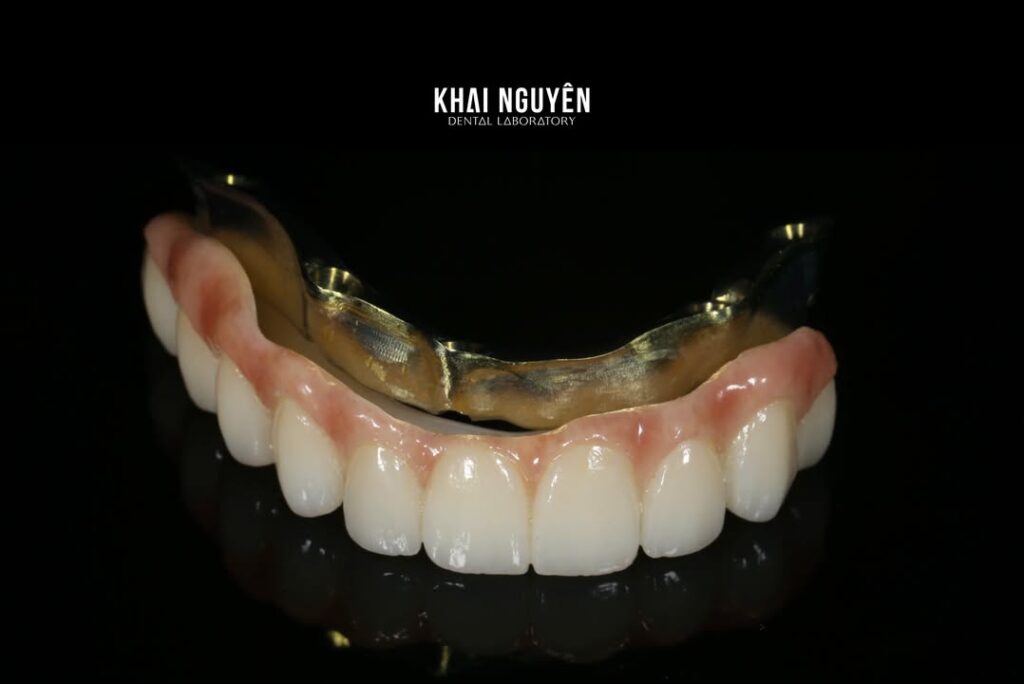
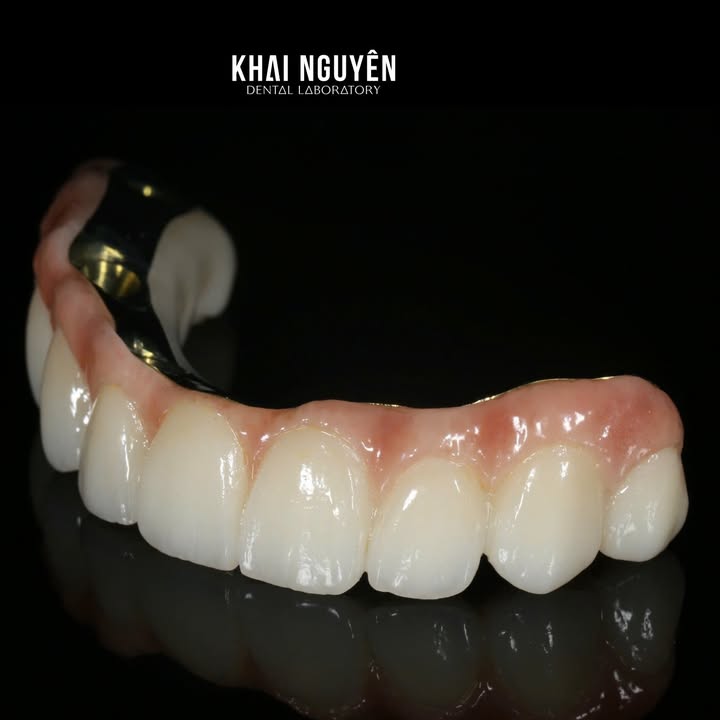
Bar-Supported Implant Restorations and Passive Fit

Phục hình implant trên thanh bar

Bar-supported implant restorations demand close coordination between clinic and laboratory, and precision at every step.

Why a bar is unforgiving on tolerance

On a natural tooth, the periodontal ligament allows several tens of microns of movement, enough to absorb part of a restoration’s discrepancy. An implant integrates directly with bone and has almost none of that capacity.

A bar joining several implants therefore has to seat passively: place it and it sits, without tightening screws to draw it into position. If it has to be pulled in, that residual load stays in the system and shows up later as a loosening screw, a fractured screw, or bone loss around the implant.

Phục hình implant trên thanh bar
Case image by Khai Nguyen Dental Lab.

Where the process is controlled

Accuracy on a bar case does not come from one step but from a chain: recording implant positions by impression or scan, transferring them to the model without distortion, fabricating the bar, then verifying fit before any esthetic work begins. An error at any stage carries into the next.

At Khai Nguyen these cases follow a workflow with a checkpoint at each stage, because catching a discrepancy at the bar stage costs far less than finding it after the ceramic is on.

What clinicians can use from this

On a bar case, the quality of the implant position record drives most of the result. With a conventional impression, splint the impression copings together. With a digital workflow, use scan bodies matched to the system and verify with a confirmation scan.

See implant restorations, or contact our team.

Written for dentists and technicians. Khai Nguyen Dental Lab manufactures to clinical prescription only and does not sell directly to patients.
A Ten-Unit Feldspathic Case and Enamel-Like Translucency

Ca feldspathic 10 răng, tái tạo hiệu ứng trong mờ như men răng thật

A ten-unit feldspathic case, which belongs to the most demanding esthetic group a laboratory receives.

Why ten units is harder than ten times one unit

A single feldspathic veneer is difficult because it has to match its neighbours. With ten units the problem inverts: there is no natural tooth left to match, but now the lab has to create deliberate difference between the teeth.

No two teeth in a natural dentition are identical. Central incisors are brighter and more translucent at the edge; lateral incisors are smaller and usually more translucent throughout; canines are more saturated with a pronounced facial convexity. Build all ten to one shade recipe and the result is perfectly uniform, and therefore reads as false.

Ca feldspathic 10 răng, tái tạo hiệu ứng trong mờ như men răng thật
Case image by Khai Nguyen Dental Lab.

The hardest part: translucency

Natural enamel is neither transparent nor opaque. It scatters light, producing a brighter incisal zone with a thin halo, and lets the dentine colour beneath show through cervically. In hand-layered ceramic that effect is built by stacking materials of differing opacity in the right order, and there is no way to correct it after firing.

What clinicians can use from this

For a multi-unit anterior case, send the lab natural smile photographs, not only retracted intraoral views. Smile line, tooth display in speech and the relationship with the lower lip are only visible in a portrait, and they determine the length and inclination of all ten units.

See feldspathic veneers, or contact our team.

Choosing between the two materials? See feldspathic or e.max veneers: how to choose.

Written for dentists and technicians. Khai Nguyen Dental Lab manufactures to clinical prescription only and does not sell directly to patients.
Full-Cutback on Multi Zirconia: Layering the Facial Surface

Phục hình Multi Zirconia kỹ thuật full-cutback đắp sứ mặt ngoài

A case using the full-cutback technique: a Multi Zirconia blank with the facial surface cut back and ceramic layered onto the reduced area.

What full-cutback is, and how it differs from monolithic

A monolithic zirconia restoration is milled from the blank, then stained and glazed on the surface. It is fast and strong, but the colour effect sits on the surface, so optical depth is limited.

In a full-cutback, the technician reduces the facial aspect of the zirconia framework and layers ceramic over that area. The interior of the tooth stays dense load-bearing zirconia while the visible surface becomes multi-layered ceramic with genuine depth.

Phục hình Multi Zirconia kỹ thuật full-cutback đắp sứ mặt ngoài
Case image by Khai Nguyen Dental Lab.

Why a multilayer blank

A multilayer blank already carries shade and translucency bands through its vertical axis. When the facial surface is cut back, the remaining core still holds the gradient from cervical to incisal, so the layered ceramic does not have to carry the whole colour effect and only adds the finest part of it.

The trade-off to know

Full-cutback delivers higher esthetics than monolithic, but layered facial ceramic is less durable than dense zirconia and needs sufficient space. In heavy load-bearing areas, or for a patient who brings a parafunctional habit, consider cutting back less, or keeping the posterior units monolithic.

What clinicians can use from this

When prescribing, state the priority plainly: maximum esthetics or maximum durability. The lab will then propose a full cutback, a partial cutback limited to the incisal third, or a monolithic result, depending on the restorative space and the patient’s functional habits.

See our zirconia range, or contact our team.

Written for dentists and technicians. Khai Nguyen Dental Lab manufactures to clinical prescription only and does not sell directly to patients.
Mixing Restoration Types in One Case: Two Challenges

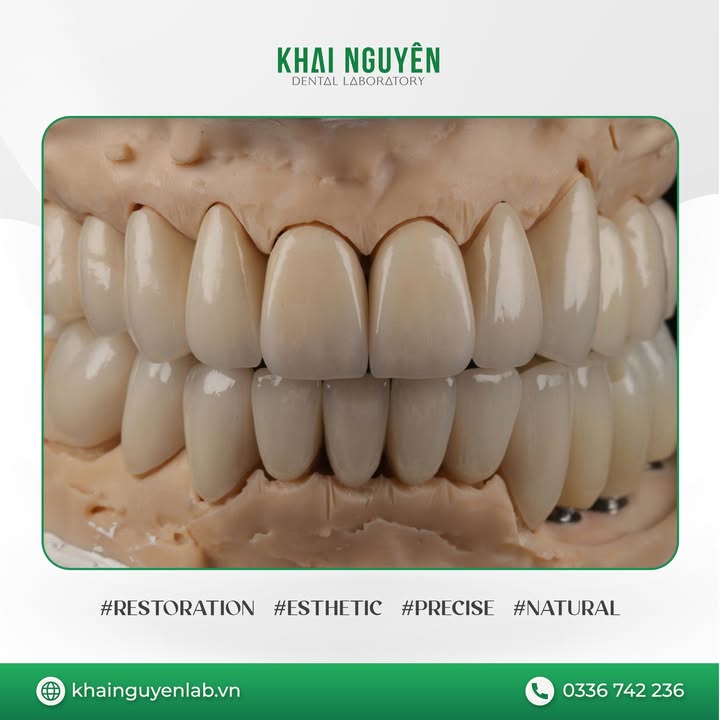
Ca nâng khớp toàn hàm kết hợp veneer, onlay, mão và phục hình trên implant

A full-mouth case with an increase in vertical dimension, recently completed at Khai Nguyen, combining veneers, onlays, ceramic crowns and implant-supported restorations in one plan.

Two challenges when a case mixes restoration types

Controlling the occlusion. Raising the vertical dimension changes the whole inter-arch relationship. Every group has to be built to the same occlusal plane and the same guidance, otherwise one group contacts early and another sits out of occlusion.

Keeping shade consistent across different restoration types. This part is routinely underestimated. Veneers are thin, so the preparation shade shows through strongly. Onlays are thicker occlusally. Crowns cover the whole preparation and can mask the substrate. Implant restorations have no natural preparation beneath them at all, only an abutment. Those four groups start from completely different backgrounds, and the result has to read as one set of teeth.

Ca nâng khớp toàn hàm kết hợp veneer, onlay, mão và phục hình trên implant
Case image by Khai Nguyen Dental Lab.

How the lab handles it

The case is planned as a whole rather than built group by group and assembled afterwards. The technician fixes the occlusal plane and the target shade for the entire arch first, then works backwards to the thickness and opacity each group needs so that all of them arrive at the same colour.

What clinicians can use from this

For a mixed case, three things should be settled before production: how much the bite is being raised, the actual preparation shade in each zone, and the target shade. A wax-up or mock-up the patient has already approved shortens try-in considerably.

See our restorations range, or contact our team.

Another bite-raising case: full-arch vertical dimension rehabilitation with 20 ZirCAD Prime crowns and LiSi overlays.

Written for dentists and technicians. Khai Nguyen Dental Lab manufactures to clinical prescription only and does not sell directly to patients.
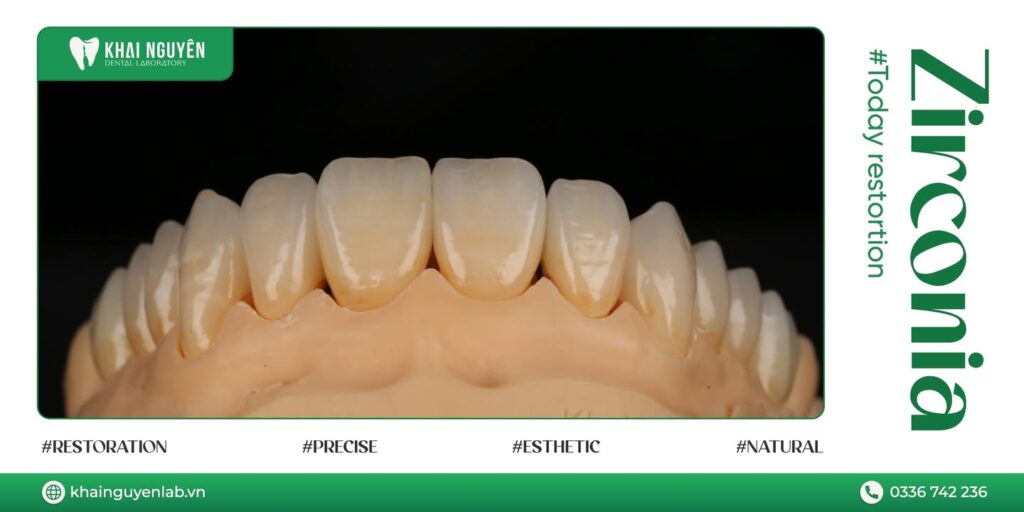
See the full case record with the spec table, image source and step-by-step workflow: Full-Mouth Rehabilitation Combining Veneers, Onlays, Crowns and Implants: Occlusion Control and Shade Consistency.

An I-Bar Under Zirconia for Long-Span and Cantilever Bridges

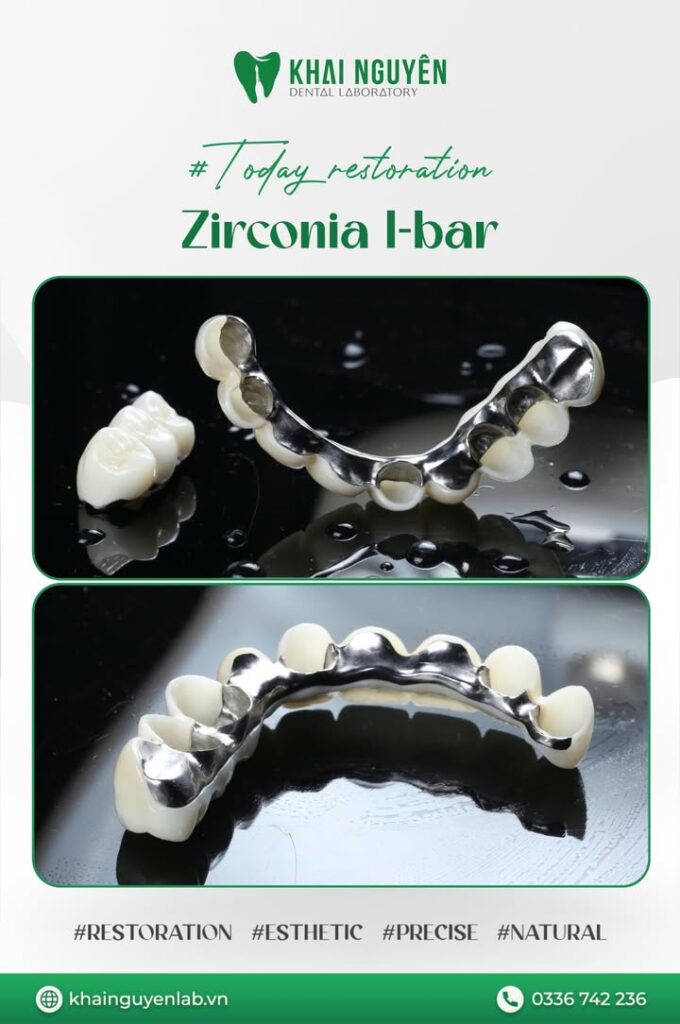
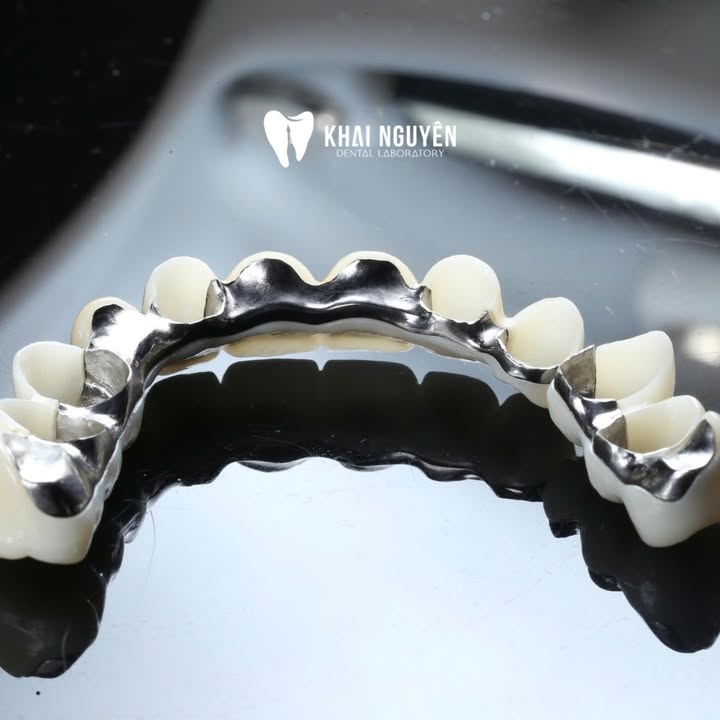
Khung I-bar kim loại kết hợp mão zirconia cho cầu dài

For restorations with a long span or a cantilever, where the restorative space allows it, an I-bar under zirconia is an option worth considering.

The problem with long spans and cantilevers

Deflection in a bridge span rises with the cube of the span length. Double the span and deflection increases roughly eightfold. With a cantilever, load also arrives off-axis on the abutment, which raises stress at the connector.

Zirconia on its own handles compression very well but is brittle under the tensile bending that occurs at connectors. That is why fractures in long-span bridges usually appear at the connector rather than mid-span.

Khung I-bar kim loại kết hợp mão zirconia cho cầu dài
Case image by Khai Nguyen Dental Lab.

How the I-bar addresses it

Three points make this solution worth considering:

  • Load bearing. The metal acts as a reinforcing framework, reducing the risk of fracture at the connector.
  • Stable esthetics. The zirconia facial surface masks the metal effectively and still meets esthetic requirements in conversation range.
  • An additional treatment option. It gives the clinician a further safe route when planning complex long-span or cantilever cases.

When it applies

The condition is sufficient restorative space. The metal framework needs a minimum thickness, and the zirconia facing needs its own. If the interocclusal space is tight, the trade-off between strength and esthetics has to be settled before production, not at the finishing stage.

What clinicians can use from this

When sending a long-span case, state the span length, whether there is a cantilever, and the measured interocclusal space. Those three figures are enough for the lab to advise whether monolithic zirconia is sufficient or a reinforcing framework is warranted.

See our materials and restorations range, or contact our team.

Written for dentists and technicians. Khai Nguyen Dental Lab manufactures to clinical prescription only and does not sell directly to patients.
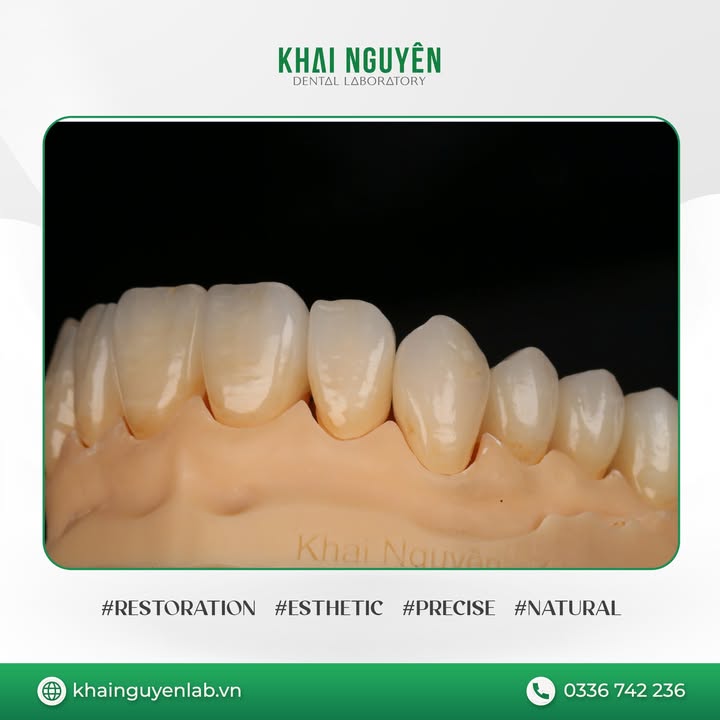
The Four Stages That Decide a Pressed Veneer Case

Veneer GC LiSi Press hoàn thiện tại Khai Nguyên Dental Lab

A GC LiSi Press veneer case recently completed at Khai Nguyen. This note records the sequence of steps behind it.

Four stages that decide the result

Adjusting the coping for fit. Before shade enters the conversation, the restoration has to seat correctly on the preparation. This is settled at the framework stage, because any discrepancy left afterwards gets covered by ceramic and can no longer be corrected.

Hand layering. LiSi Press provides a good translucent base, but the shade transition and the liveliness of the incisal edge still have to be placed layer by layer by the technician.

Shaping the form. Form decides whether a veneer looks natural more than shade does. Length, outline, facial convexity and contact point position all have to suit the patient’s face and smile line.

Creating surface texture. Natural teeth are not flat. Fine horizontal ripples and vertical grooves scatter light instead of reflecting it as one bright patch. Skip this and the veneer will be evenly coloured yet still read as artificial.

Veneer GC LiSi Press hoàn thiện tại Khai Nguyên Dental Lab
Case image by Khai Nguyen Dental Lab.

What this shows

None of the four stages rescues a mistake from the one before it. A coping that does not seat makes good shade irrelevant; wrong form cannot be saved by texture. That is why the lab checks at each stage rather than only inspecting the finished unit.

What clinicians can use from this

On a high-esthetic case, ask the lab for photographs at the framework stage or before glazing. A few minutes reviewing an image then is far cheaper than one remake.

See GC LiSi Press, or our ceramic materials comparison.

Written for dentists and technicians. Khai Nguyen Dental Lab manufactures to clinical prescription only and does not sell directly to patients.
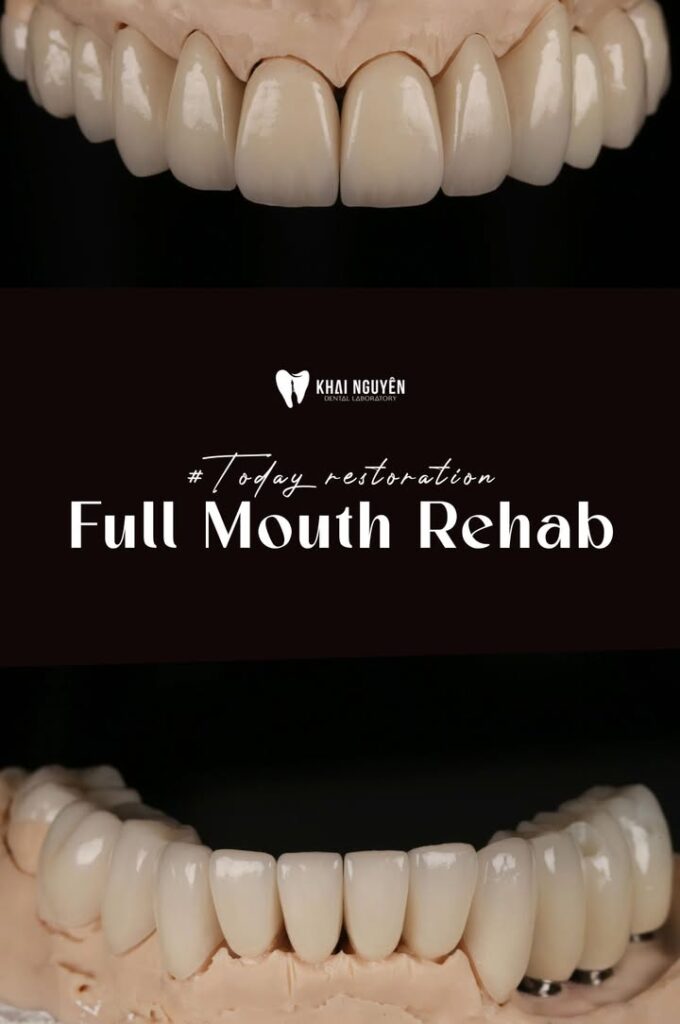
See the full case record with the spec table, image source and step-by-step workflow: Case Study: Ten GC Initial LiSi Press Veneers in BL2, Teeth 14 to 24.


WhatsApp