Victor Le – Digital Communications Manager, Khai Nguyen Dental Lab

Victor Le

Digital Communications Manager, Khai Nguyen Dental Lab

Digital Communications Manager at Khai Nguyen Dental Lab, with five years in communications and technical content for the dental laboratory field, responsible for editing technical articles together with the lab's technician team.

Articles by Victor Le

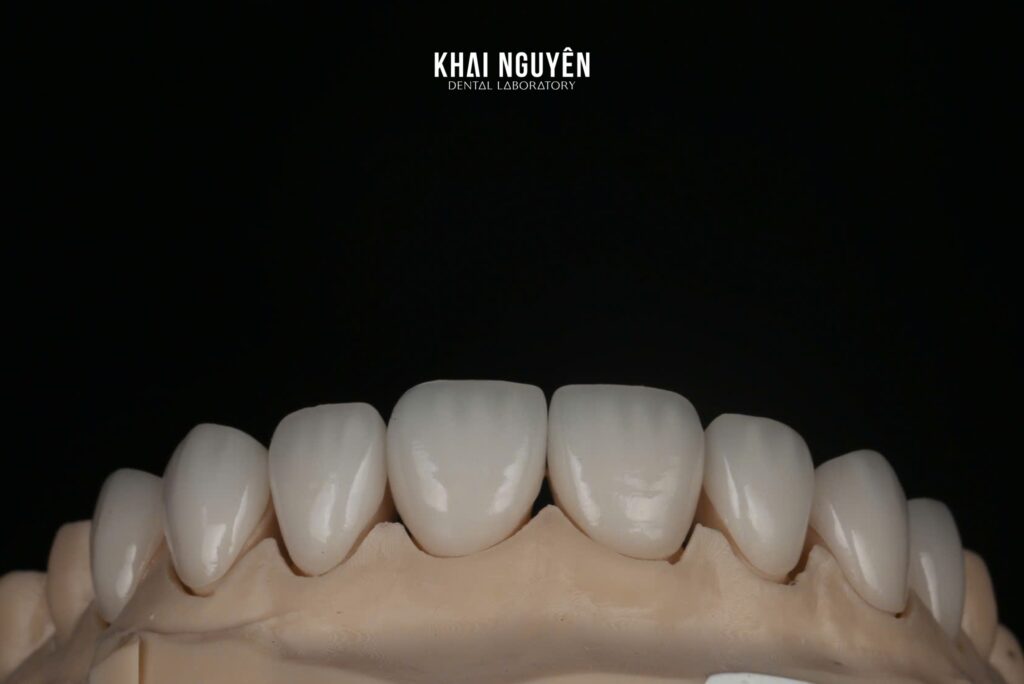
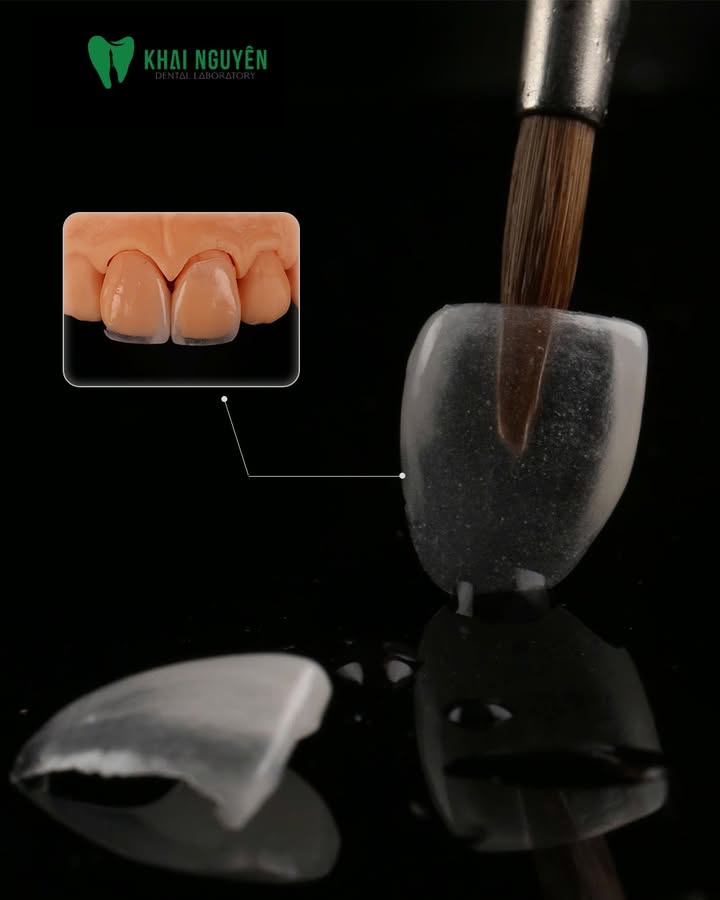
Feldspathic Veneers on Teeth 11 and 21, Layered by Hand

Veneer feldspathic đắp tay cho răng 11 và 21

Two central incisors, two hand-layered feldspathic veneers. It sounds contained, and it is the most demanding esthetic group a laboratory takes on.

Why teeth 11 and 21 are difficult

On a full arch, the lab sets its own shade and form reference and applies it throughout. On 11 and 21 the reference is already there: the patient’s own 12 and 22. The two new veneers have to match them on base shade, incisal translucency, cervical saturation and the way the surface catches light.

There is a second factor. The central incisors sit at the middle of the smile and mirror each other. A few tenths of a millimetre of difference in length or axial inclination shows immediately, while the same deviation on a molar goes unnoticed.
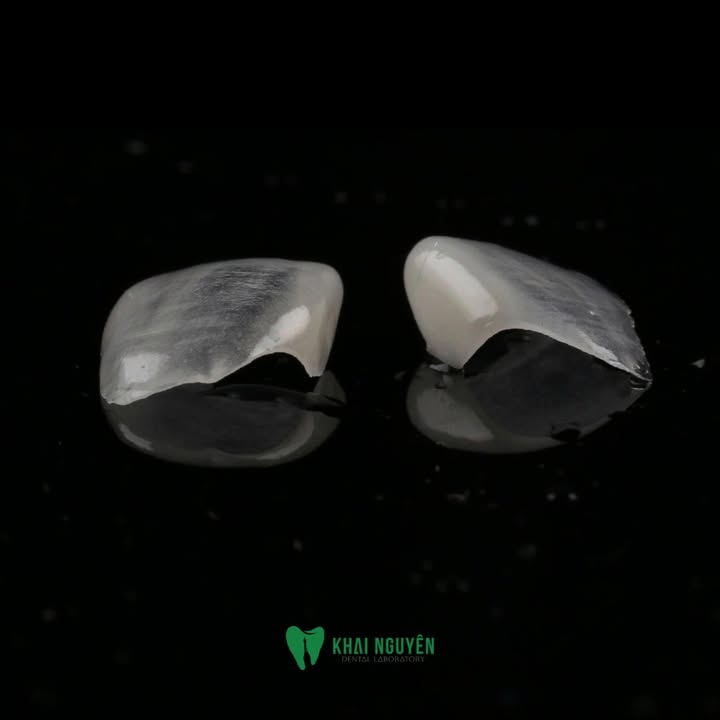
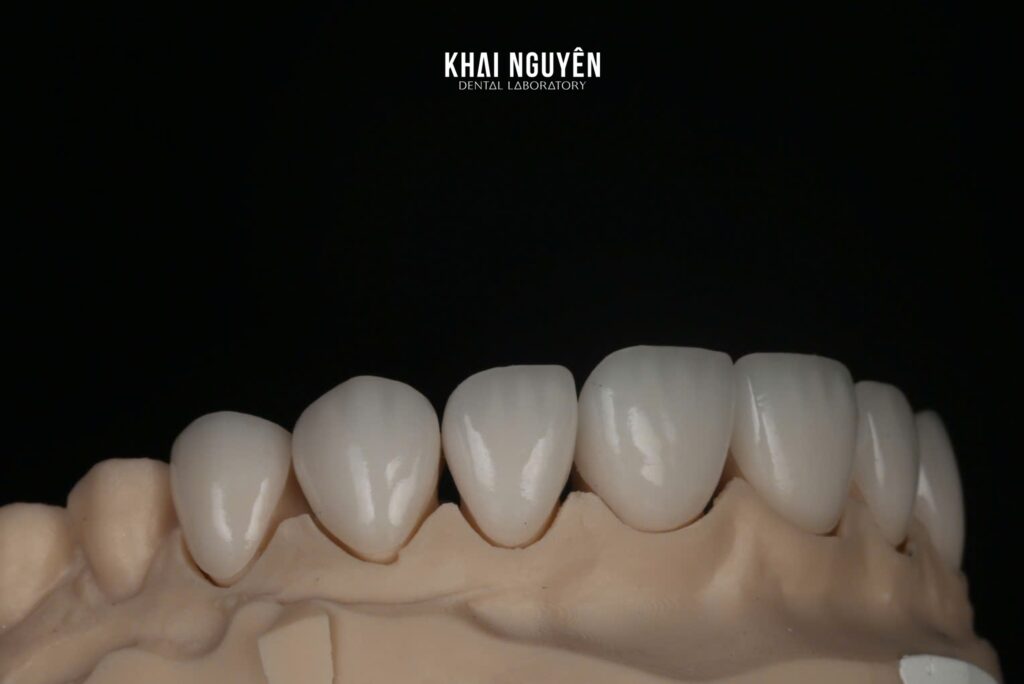
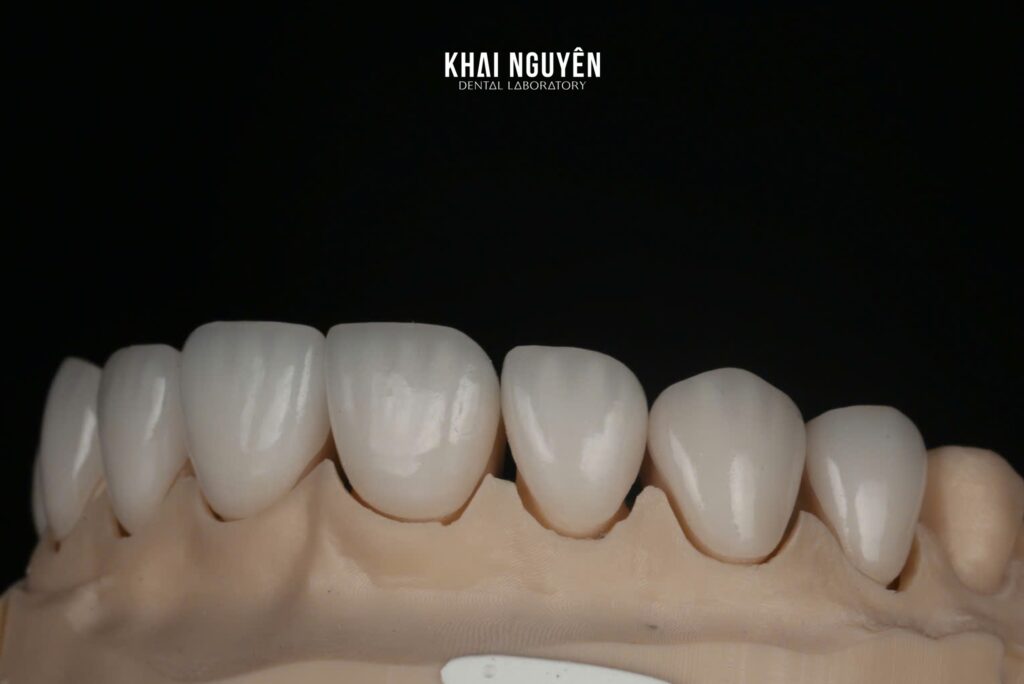
Veneer feldspathic đắp tay cho răng 11 và 21
Case image by Khai Nguyen Dental Lab.

Why feldspathic, and why hand layering

Feldspathic ceramic produces the closest optical match to natural enamel and can be made very thin, which preserves tooth structure. In exchange it lacks the strength of lithium disilicate or zirconia and depends entirely on the quality of the bond.

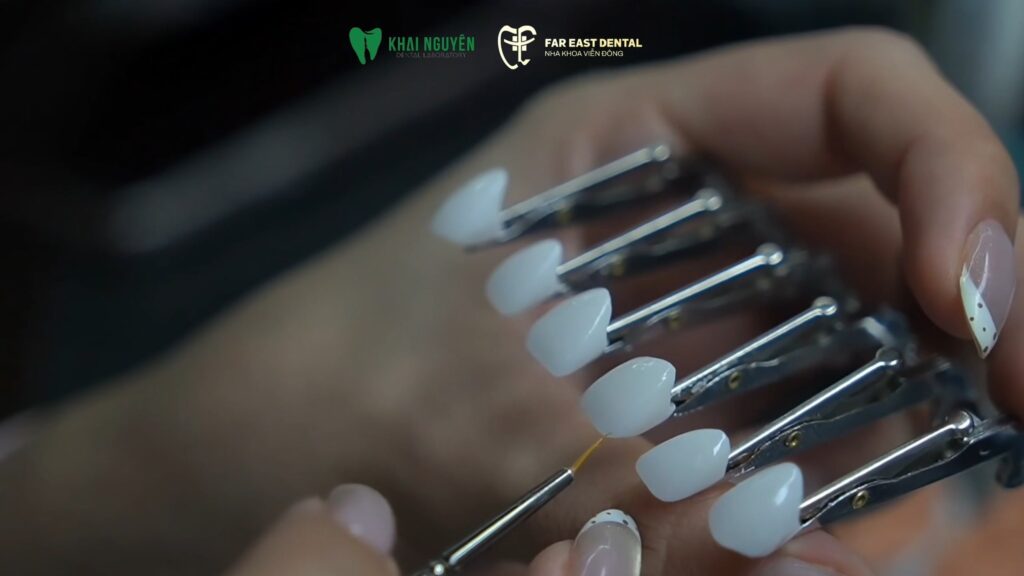
Layering by hand lets the technician place opacity at the cervical, the transition through the body, and translucency with a halo effect at the incisal edge the way natural enamel behaves. That is the part a machine does not replace.

What clinicians can use from this

On a two-central case, the shade photographs matter more than the written shade. Take them with the shade tab in frame, before the teeth dehydrate, and add an angled view so the lab can read incisal translucency.

See feldspathic non-prep veneers, or contact our team.

Choosing between the two materials? See feldspathic or e.max veneers: how to choose.

Written for dentists and technicians. Khai Nguyen Dental Lab manufactures to clinical prescription only and does not sell directly to patients.
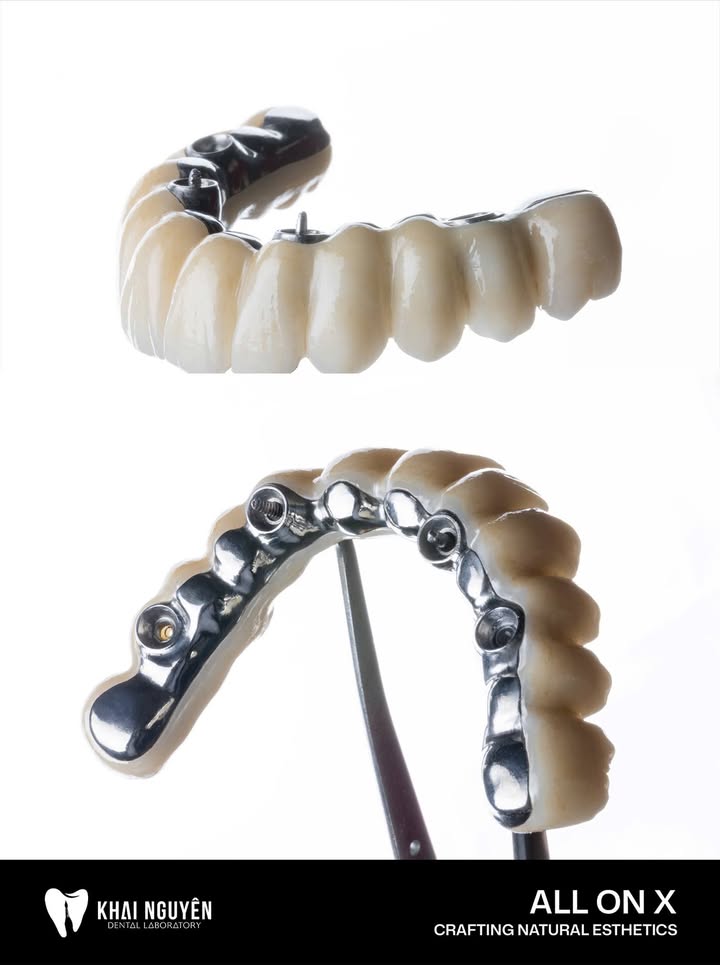
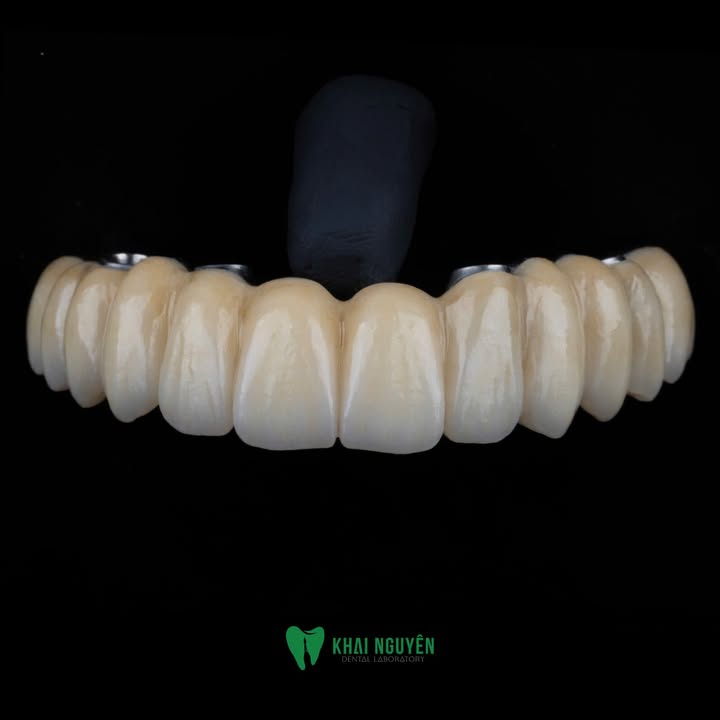
All-on-4 in FP1: Why the Tissue Surface Is Polished

Phục hình All-on-4 FP1 trên phôi zirconia màu A2

An All-on-4 case in the FP1 configuration, recently completed at Khai Nguyen on Aidite 3D Pro zirconia in shade A2.

How FP1 differs from the rest

In the classification of full-arch implant restorations, FP1 replaces the clinical crown only, not the gingiva. The restoration therefore has to terminate against the patient’s own soft tissue, which makes the ceramic-to-tissue interface the most important detail in the case.

In FP2 and FP3 designs, pink ceramic covers the transition zone. In FP1 there is nothing to hide behind. If the tissue surface is rough or has a microgap, plaque accumulates exactly where the patient finds it hardest to clean.

Phục hình All-on-4 FP1 trên phôi zirconia màu A2
Case image by Khai Nguyen Dental Lab.

Why the lab polishes the tissue surface so carefully

On FP1 cases our team polishes the tissue-contacting surface with particular care, for biological safety and to keep the restoration cleansable. Properly polished zirconia has a far lower surface roughness than a glazed-only surface, and that roughness directly affects how much plaque accumulates around the restoration over time.

None of this shows in a smile photograph, yet it largely decides how healthy that restoration still is several years later.

What clinicians can use from this

When planning an All-on-X case, agree the FP1, FP2 or FP3 route with the lab early, because the choice changes both the design and the amount of finishing work involved. Photographs of the healed soft tissue and information about the smile line let the lab decide where the restoration should terminate.

See implant bridges and crowns, or contact our team.

Written for dentists and technicians. Khai Nguyen Dental Lab manufactures to clinical prescription only and does not sell directly to patients.
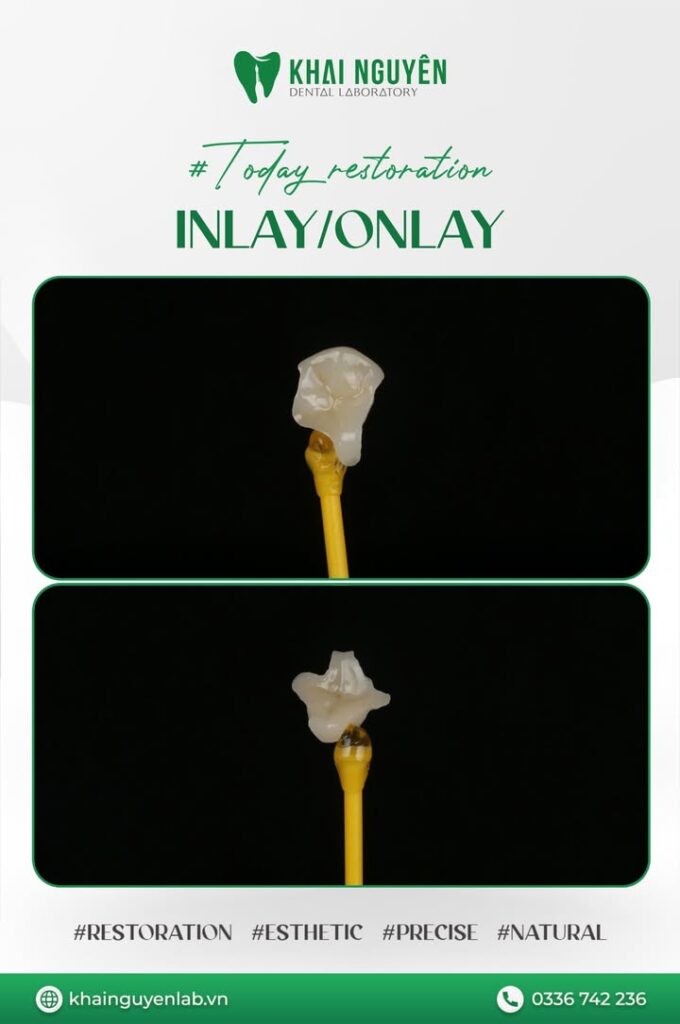
A Ceramic Inlay Case: Marginal Fit and Occlusal Anatomy

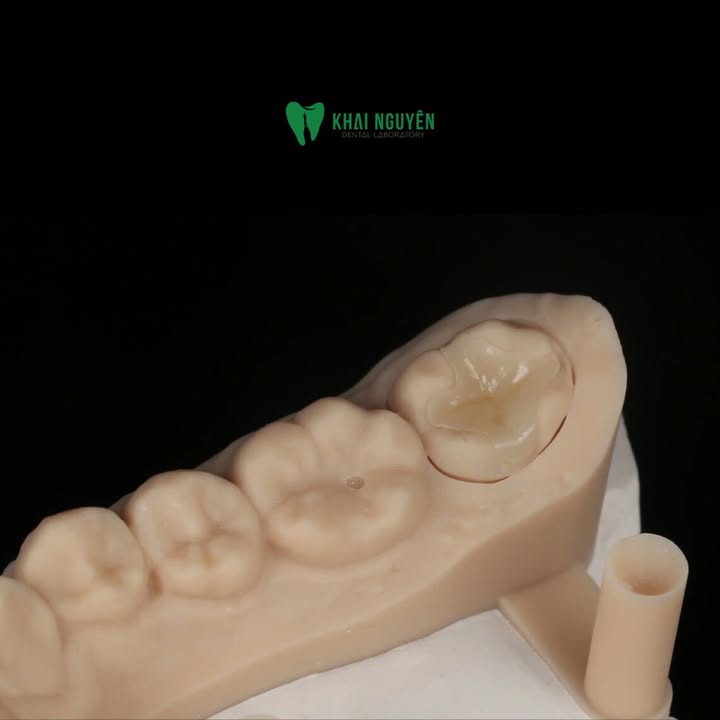
Inlay sứ đặt trên mẫu, kiểm tra độ khít sát và giải phẫu mặt nhai

Not every case is a full smile makeover. Every so often the bench comes back to a small restoration such as a single inlay, and this group has a difficulty of its own.

Why inlays and onlays are harder than they look

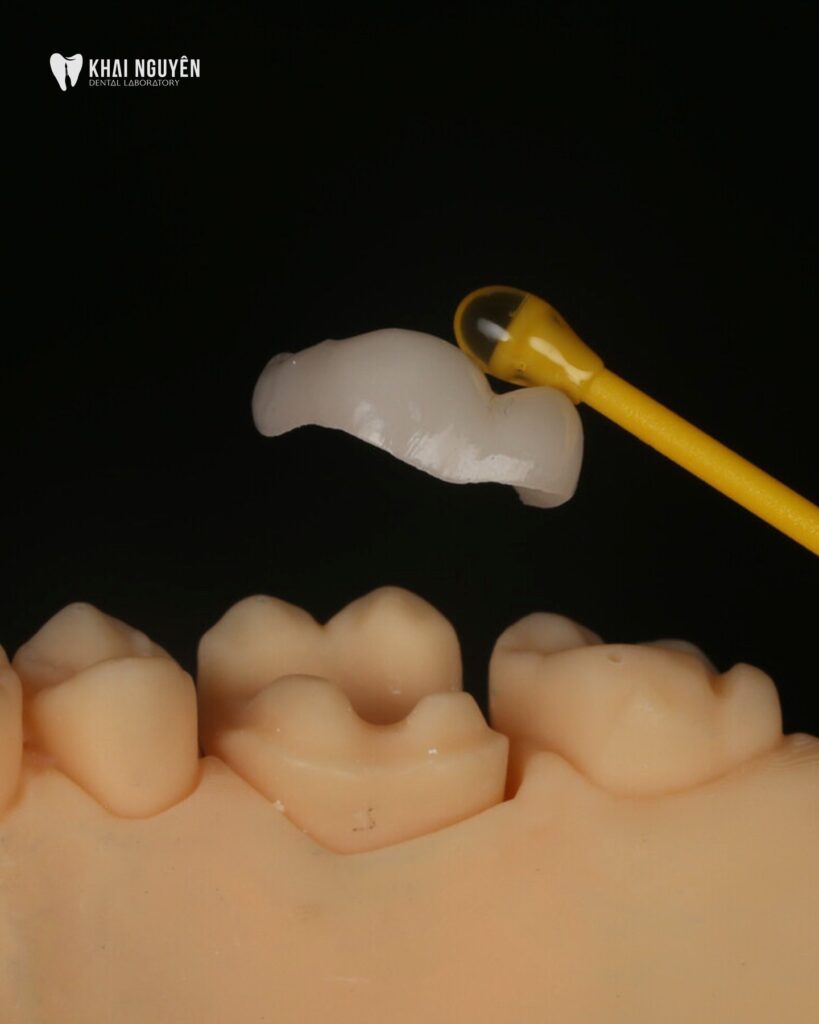
An inlay looks simple because it is one piece of ceramic. Being small is exactly what removes the margin for error. A crown wraps the preparation and has walls that can absorb a discrepancy; an inlay sits inside the cavity, so its finish line is exposed on the occlusal surface, where the patient’s tongue touches it every day and where food packs if the fit is not right.

Two requirements have to be met at once. First, marginal fit around the entire cavity outline, not at a few points. Second, occlusal anatomy that continues into the remaining tooth structure: grooves, marginal ridges and cusps have to follow the direction of that particular tooth rather than a standard shape pulled from a library.

Inlay sứ đặt trên mẫu, kiểm tra độ khít sát và giải phẫu mặt nhai
Case image by Khai Nguyen Dental Lab.

What the lab does

The technician starts by reading the cavity form the clinician prepared, then rebuilds the missing structure along the existing groove and cusp directions. When the ceramic seats cleanly and the junction almost disappears, it means both the preparation and the fabrication were right.

What clinicians can use from this

For inlays and onlays, impression quality drives most of the outcome. A clear finish line, a cavity without unnecessary sharp internal angles, and a shade photograph taken before the tooth dehydrates all help the lab considerably. If the cavity is too shallow in a load-bearing area, raise it with the lab before production rather than at try-in.

See onlay, inlay and overlay, or contact our team about a specific case.

Written for dentists and technicians. Khai Nguyen Dental Lab manufactures to clinical prescription only and does not sell directly to patients.
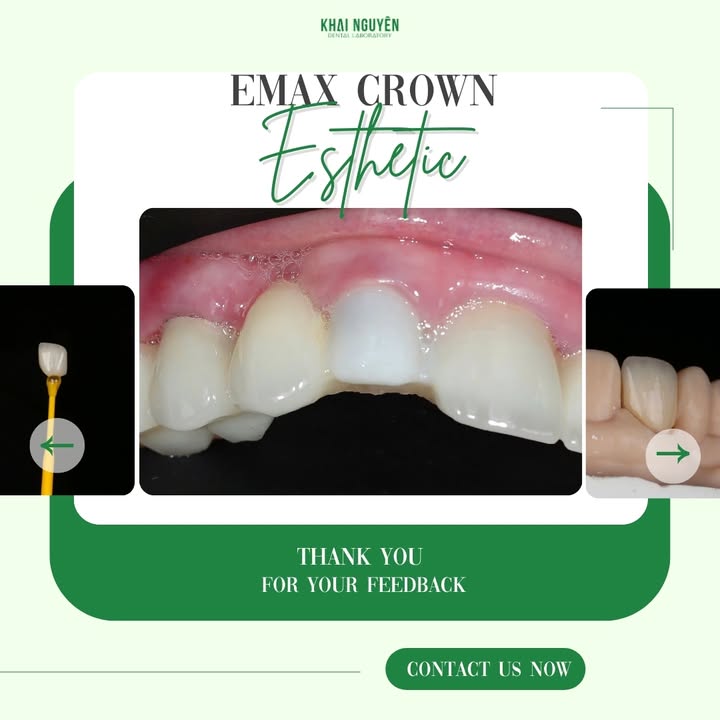
A Single e.max Crown Between Natural Teeth, with Dr Mai Tran

Single IPS e.max crown on an upper anterior tooth between natural neighbours

Khai Nguyen Dental Lab would like to thank Dr Mai Tran and the team at Duc Nhan Dental for their trust and for sharing an interesting clinical case.

A single crown between two natural teeth

This case was a single IPS e.max crown on an upper anterior tooth, sitting between natural teeth on both sides. It sounds simple, and it is the hardest group of cases there is in esthetic terms.

The reason is that there is nowhere to hide an error. On a full arch, the lab sets its own reference for shade and form and applies it across the whole arch. On a single unit, the reference is already sitting next to it: the natural neighbours. The restoration has to match them on base shade, incisal translucency, cervical saturation, form, and even how the surface catches light. Miss any one of those and it shows immediately.

What the lab had to do

The case demanded maximum precision to secure marginal fit and to produce a result that reads continuously with the adjacent teeth. The technician works from the clinician’s shade photographs, builds form from the contralateral tooth, and finishes the surface so that the new crown is neither brighter nor duller than the two natural teeth beside it.

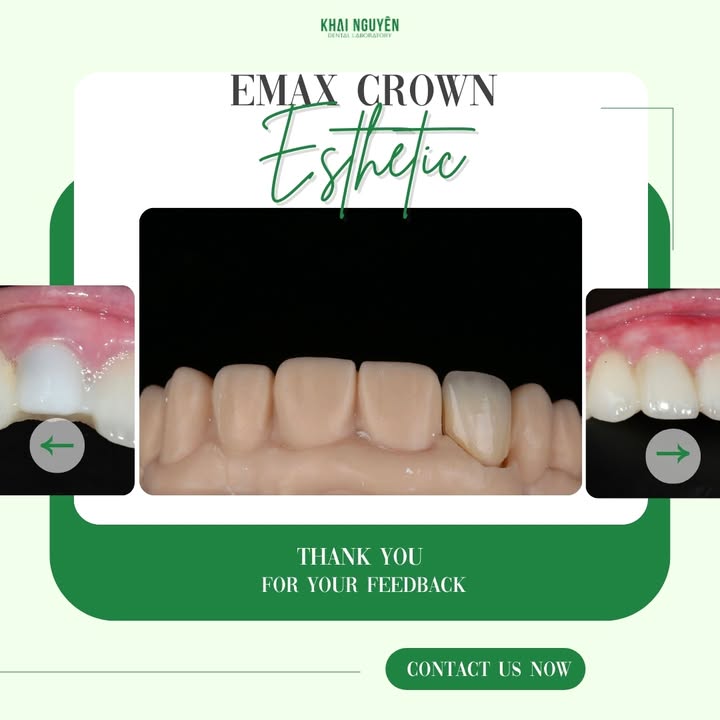
The same e.max crown on the model before delivery
The e.max crown on the model before delivery.

What we take from this case

A single anterior crown is the best test of a laboratory there is. If you want to assess the esthetic capability of a new partner, sending a case like this tells you far more than sending a full arch.

The condition is that the shade photographs have to be good. Images taken with the shade tab in frame, under consistent lighting, from both a straight and an angled view, help the lab enormously.

See IPS e.max CAD, or contact our team to send a trial case.

More cases with partner clinics: Full-arch ZirCAD Prime – Far East Dental · Full-arch e.max veneers and bite raising – Dr Sai Aom Kham · Anterior veneers – Nhan Tam Dental · All-on-X on titanium thimbles – Paris Dental.

Written for dentists and technicians. Khai Nguyen Dental Lab manufactures to clinical prescription only and does not sell directly to patients.
All-on-X on Titanium Thimbles with Paris Dental

All-on-X restoration on titanium thimbles, clinical feedback from Paris Dental

Khai Nguyen Dental Lab would like to thank the clinicians at Paris Dental for their trust, and for sending back the clinical images taken after delivery.

The case

This was an All-on-X full-arch implant restoration, built on titanium thimbles as the connection between the implants and the ceramic superstructure.

Why the connection matters

In full-arch implant work, error does not distribute the way it does on natural abutments. One implant that is not passively seated loads the whole framework, and the consequence usually appears later as a loosening screw or a ceramic fracture rather than at the moment of delivery.

Using intermediate titanium thimbles separates the metal interface with the implant from the ceramic outside it. That lets the lab control fit at the contact surface while keeping enough room to build form and shade in the esthetic layer. It is the reason this family of solutions is used so often on full-arch cases that have to deliver both durability and esthetics.

Why clinical feedback is worth having

The post-delivery images the clinician sent back are valuable data for a lab. A restoration on the model and the same restoration in the mouth sit in completely different lighting, and only a clinical photograph shows how shade, translucency and the relationship with lip and gingiva actually read.

We are grateful for feedback like this, because it is how a lab calibrates its shade work for the cases that follow.

See implant bridges and crowns, or contact our team about a specific case.

More cases with partner clinics: Full-arch ZirCAD Prime – Far East Dental · Full-arch e.max veneers and bite raising – Dr Sai Aom Kham · Anterior veneers – Nhan Tam Dental · Single e.max crown – Dr Mai Tran.

Written for dentists and technicians. Khai Nguyen Dental Lab manufactures to clinical prescription only and does not sell directly to patients.
Anterior Veneers with Nhan Tam Dental and Dr Bui Le My Hanh

After: anterior veneers fitted, Khai Nguyen Dental Lab with Nhan Tam Dental

Khai Nguyen Dental Lab would like to thank Dr Bui Le My Hanh and Nhan Tam Dental for the collaboration, and in particular for the preparation and clinical work that gave the restoration a sound foundation.

The starting point

The patient presented with uneven wear across the upper anterior teeth, discolouration, and inconsistent form from tooth to tooth. The incisal edges had lost their natural curve, and the teeth differed in both length and brightness.

Before: worn and discoloured upper anterior teeth
The anterior segment before treatment.

The solution and the lab’s part in it

The treatment plan called for veneers on the anterior segment. In worn-dentition cases like this, the hard part for the lab is not shade but form: rebuilding length and the incisal curve so it sits correctly against the smile line, while respecting the restorative space the clinician has prepared.

The result after cementation shows an even gingival contour, a continuous incisal curve, and a surface that reflects light naturally. That is where a veneer case succeeds or fails. It is not about how white the result is, but whether it reads as natural dentition.

A second case with Nhan Tam Dental

Earlier, the two teams also worked together on a combined case involving veneers, ceramic crowns and implant-supported restorations. Cases that mix restoration types call for consistent shade and form across groups with very different thicknesses, and that is only achievable when clinic and lab discuss the plan in detail before production starts.

What we take from this case

In anterior wear cases, the clinician’s preparation largely determines how much room the lab has to work with. When the restorative space is sufficient and even, the technician can concentrate on form and surface effect rather than fighting a lack of thickness.

See feldspathic non-prep veneers, or contact our team to discuss your own case.

More cases with partner clinics: Full-arch ZirCAD Prime – Far East Dental · Full-arch e.max veneers and bite raising – Dr Sai Aom Kham · All-on-X on titanium thimbles – Paris Dental · Single e.max crown – Dr Mai Tran.

Written for dentists and technicians. Khai Nguyen Dental Lab manufactures to clinical prescription only and does not sell directly to patients.
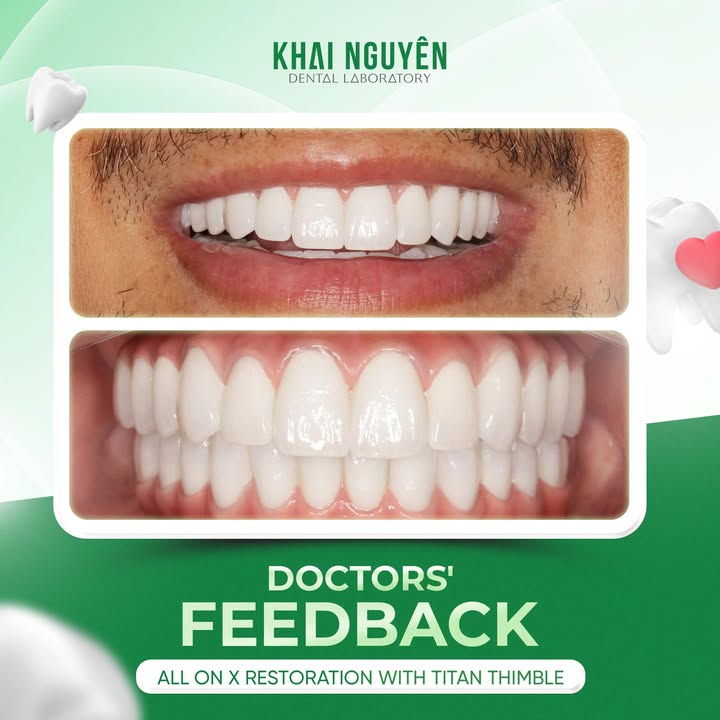
Full-Arch e.max Veneers and Bite Raising with Dr Sai Aom Kham

Full-arch IPS e.max veneers in shade 1M2 on ND2 preparations, Khai Nguyen Dental Lab

Khai Nguyen Dental Lab would like to thank Dr Sai Aom Kham for the trust placed in our team on the two cases below.

Case one: full-arch e.max veneers with bite raising

This case carried two overlapping goals: improve the esthetics of the smile and raise the vertical dimension at the same time. The prescription called for a final shade of 1M2 over ND2 preparations.

That pairing is the hard part. ND2 is a discoloured preparation, darker than natural dentine, while 1M2 is a bright and translucent target. The thinner the veneer, the more the preparation shade drives the final result. In cases like this the lab has to balance three things: the thickness actually available, the opacity of the internal layer needed to block the underlying shade, and enough translucency at the incisal edge that the restoration does not end up looking dead. Raising the bite at the same time means form and inter-arch relationship have to be planned from the start, not adjusted at the finish.

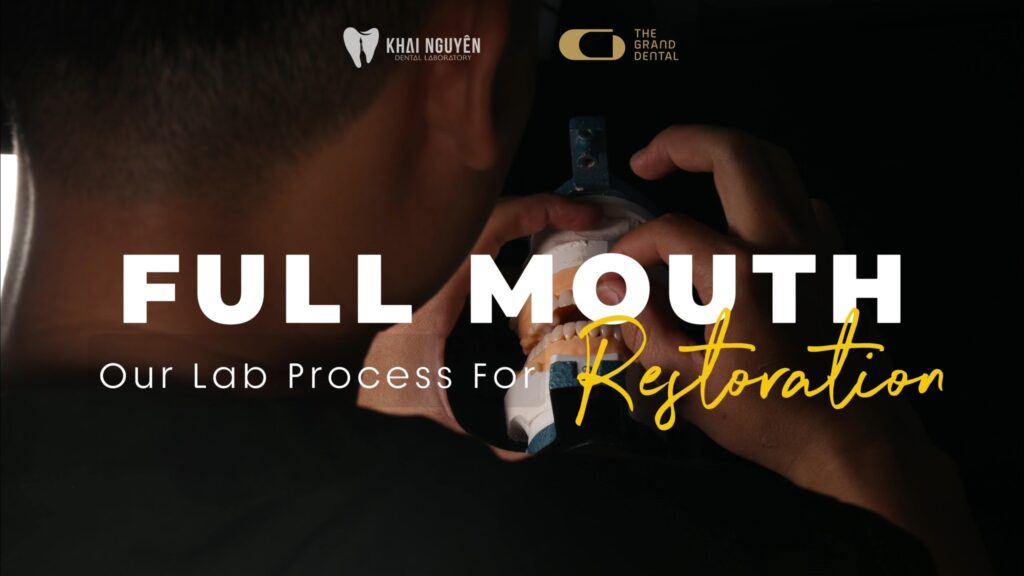
Case two: full-mouth rehabilitation combining several solutions

The second case was completed with The Grand Dental and combined veneers, ceramic crowns and implant-supported restorations in a single treatment plan.

When several restoration types appear in one case, occlusion and overall esthetics have to be calculated up front, because each group has different thickness, translucency and shade behaviour. Our technicians work closely to the prescription so colour and function stay consistent across the whole restoration rather than each group drifting on its own.

Full-mouth rehabilitation with bite raising, Khai Nguyen Dental Lab and The Grand Dental
The full-mouth rehabilitation completed with The Grand Dental.

What we take from these cases

Both belong to the harder group because they combine an esthetic demand with a change in occlusion. Our experience is to settle three things before production starts: the actual preparation shade, the target shade, and how much the bite is being raised. Those three numbers drive almost every material and thickness decision that follows.

See IPS e.max Press or our comparison of dental ceramic materials when planning a similar case.

More cases with partner clinics: Full-arch ZirCAD Prime – Far East Dental · Anterior veneers – Nhan Tam Dental · All-on-X on titanium thimbles – Paris Dental · Single e.max crown – Dr Mai Tran.

Written for dentists and technicians. Khai Nguyen Dental Lab manufactures to clinical prescription only and does not sell directly to patients.
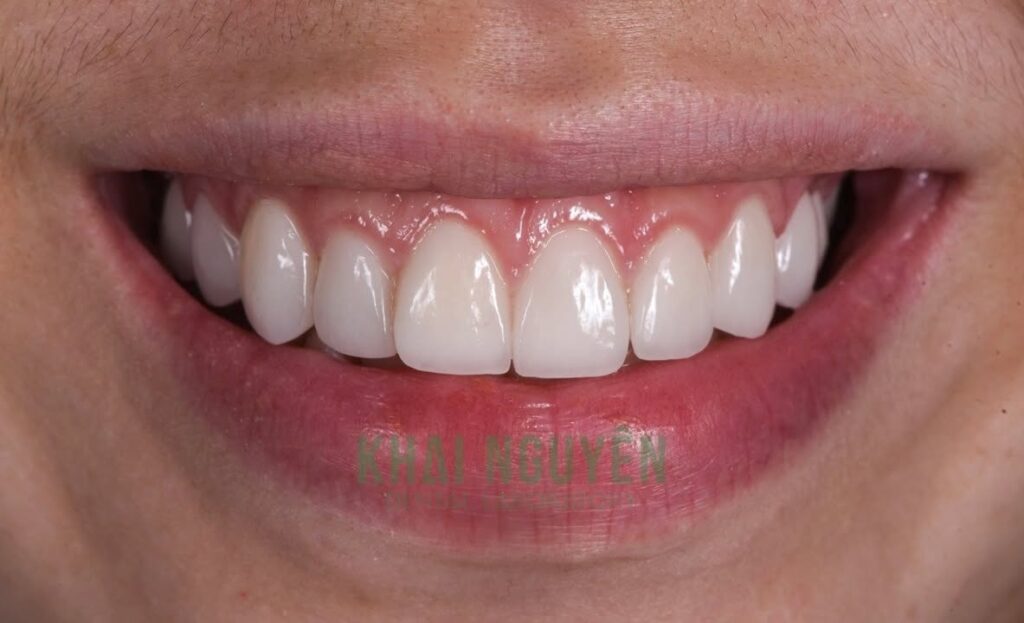
Full-Arch ZirCAD Prime Restoration with Far East Dental

Phục hình toàn hàm bằng IPS e.max ZirCAD Prime với chuyển sắc Gradient Technology

Khai Nguyen Dental Lab would like to thank Dr Nguyen Ngoc Trung Hau and Far East Dental (Nha khoa Viễn Đông) for choosing the lab as their partner on this full-arch case.

What the case called for

This was a full-arch restoration with a high esthetic demand. The clinician set out a problem that is familiar but never trivial in full-arch work: the restoration had to be bright enough to meet the patient’s expectation, yet still carry a natural gradient from cervical to incisal rather than reading as one flat block of colour.

Material and how the lab handled it

Our team selected IPS e.max ZirCAD Prime discs for the case. The strength of this disc is its Gradient Technology: translucency and shade are built into the blank vertically, shifting from the cervical zone toward the incisal edge inside the material itself rather than depending entirely on an external layer.

On a full arch that matters in practice. The technician positions the blank on the correct axis and in the correct shade band, and the whole arch starts from a consistent gradient instead of the effect having to be rebuilt unit by unit. What remains is controlling form, surface texture and the finish line so the arch reads as one piece.

What this case shows

In full-arch work, how well the clinic and the lab communicate decides most of the outcome. The clinician holds the patient’s expectations and the clinical conditions; the lab holds the limits and strengths of each material. When both sides agree the shade target and the level of translucency early, material selection becomes far simpler than correcting shade at the finishing stage.

If you are weighing up materials for a similar case, see our materials and restorations range, or read how Vietnam dental lab outsourcing works end to end.

More cases with partner clinics: Full-arch e.max veneers and bite raising – Dr Sai Aom Kham · Anterior veneers – Nhan Tam Dental · All-on-X on titanium thimbles – Paris Dental · Single e.max crown – Dr Mai Tran.

Written for dentists and technicians. Khai Nguyen Dental Lab manufactures to clinical prescription only and does not sell directly to patients.
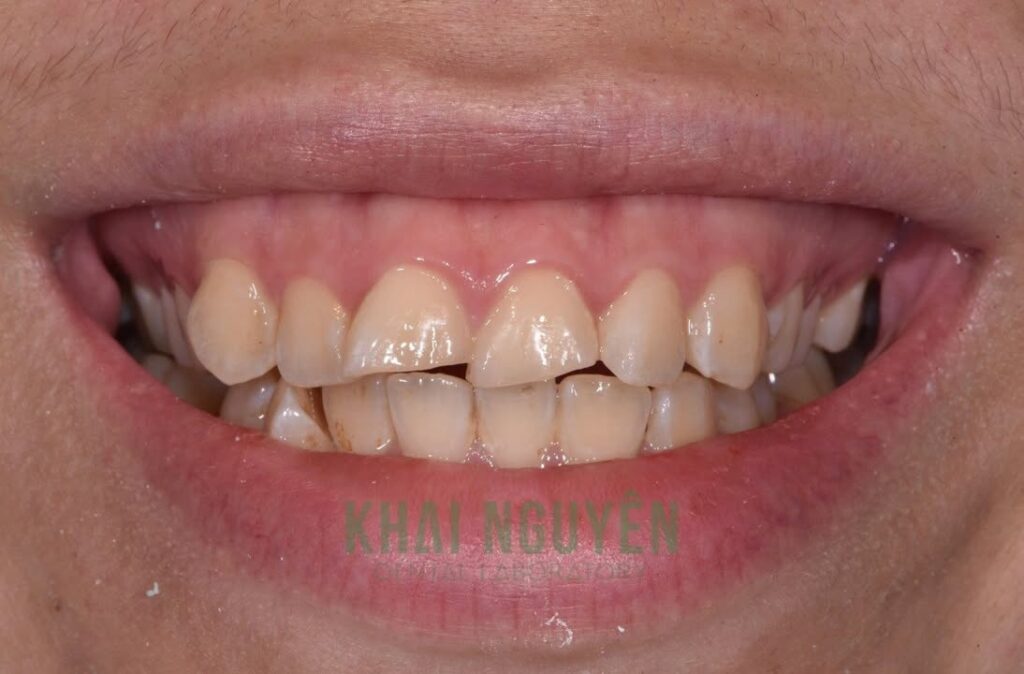
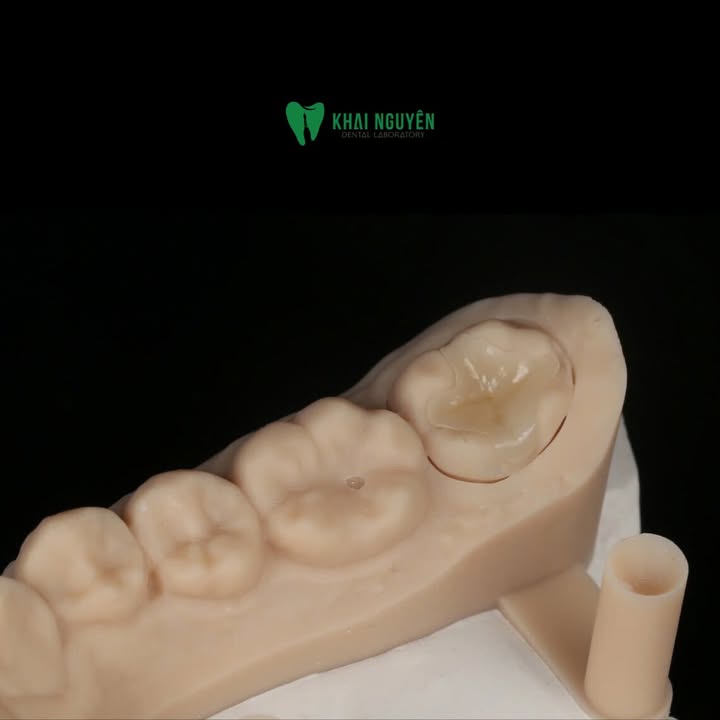
Case Study: e.max Ceramic Inlays, Onlays and Overlays, Built for Marginal Fit and a Seamless Transition

Ceramic overlay seated on the model at Khai Nguyen Dental Lab, showing the marginal fit against the adjacent teeth

Case fabricated at Khai Nguyen Dental Lab to the treating dentist’s prescription. Photos were taken by the lab on the model and published on Instagram @khainguyendentallab on 12 January 2026 and on Facebook on 16 June 2026. No patient-identifying information is included. Written for dentists and dental technicians.

Case summary

Indication Indirect posterior restorations: ceramic inlays, onlays and overlays
Material IPS e.max Press or IPS e.max CAD, chosen by cavity form and esthetic demand
Technical priorities Marginal fit, occlusal anatomy continuous with the remaining tooth, seamless transition zone
Typical in-lab time 2 to 3 working days
Photo sources Instagram, 12 January 2026 and Facebook, 16 June 2026

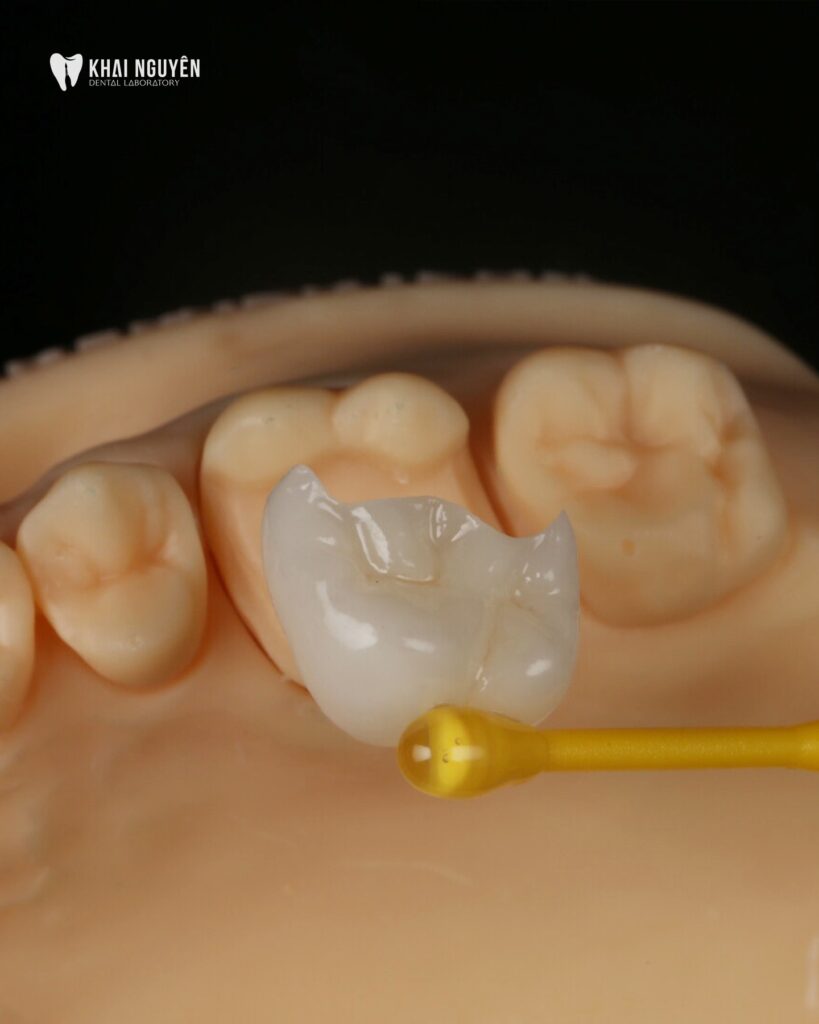
Photo above: a ceramic overlay seated on the model, with the margin closing against the adjacent teeth.

Why a small case is a hard case

Inlays and onlays are often treated as simple work: one unit, no anterior esthetics. At the bench the opposite is true. The smaller the restoration, the less error it tolerates. A posterior crown that is 50 microns short at the margin can still be compensated by cement, and a subgingival finish line hides much of it. An inlay that is 50 microns short leaves that gap on the occlusal surface, where the patient feels it with the tongue and where plaque collects.

Three requirements the lab has to meet at once:

  • Marginal fit. An inlay preparation has several walls and angles; the restoration must seat along one path without binding, and close everywhere along its perimeter.
  • Anatomy continuous with the remaining tooth. Unlike a crown, an inlay or onlay replaces only part of the tooth, so cusps, grooves and marginal ridges have to run without a break into the remaining natural enamel.
  • A seamless transition zone. This is the criterion Khai Nguyen treats as the most important for this group: the boundary between ceramic and enamel should be invisible in colour, in gloss and in surface form.

e.max Press or e.max CAD

Both are lithium disilicate with comparable flexural strength, and both bond with the same etch-and-silane protocol. They differ in how the shape is produced:

  • e.max Press goes through a wax stage, so the technician builds cusps, grooves and proximal contacts by hand on the model. That helps with complex cavities, thin walls, or when occlusal contacts need fine adjustment. After pressing, the unit can be cut back and layered when the case needs depth of colour.
  • e.max CAD is milled from a block: fast and consistent, suited to clearly defined cavities and to shorter turnaround. In exchange, secondary grooves and proximal contacts are refined after milling.

The lab chooses by cavity form rather than by default. Our ceramic materials comparison lists strength and minimum thickness for each family.

Lab workflow

  1. Assess the preparation before designing. Path of insertion, wall taper and margin quality are read first. If there is an undercut or a wall is too thin, the lab reports back before production instead of compensating with a thicker restoration.
  2. Design to the remaining tooth. Cusps and grooves are built to run into the natural enamel; no default tooth library is used at the junction.
  3. Press or mill, then try on the model to confirm a single path of insertion and a closed margin.
  4. Contacts and occlusion. Proximal contacts are adjusted against the neighbouring teeth, and static and excursive occlusion are checked on the articulator.
  5. Surface finishing. Occlusal texture is created, then the unit is polished mechanically, with thick glaze avoided on contact areas so the opposing tooth is not abraded. See glazing vs polishing.

Feedback from the clinic

In September 2025 Dr Nguyen Thanh Dung noted the naturalness and continuity of the transition zone in the inlay and onlay cases produced by the lab. That is the criterion the lab pursues for this group of restorations, because it is what the patient feels with the tongue every day and where discolouration appears first over time.

Lessons for inlay and onlay cases

  • Prepare a clear path of insertion. An undercut forces the lab to compensate with a thick cement layer, which reduces fit and increases the risk of debonding.
  • State the material you want and why. Choose e.max CAD for speed, e.max Press for complex cavities or when layering is needed.
  • Send the opposing scan and a bite record. Inlays and onlays sit on the occlusal surface, so occlusion decides their lifespan; without the opposing arch the lab can only guess the contacts.
  • Re-polish after chairside adjustment. An adjusted area left unpolished is rough, stains and wears the opposing tooth.

See the inlay, onlay and overlay product page or send a case via WhatsApp +84 902 945 585.

Written for dentists and technicians. Khai Nguyen Dental Lab manufactures to clinical prescription only and does not sell directly to patients.
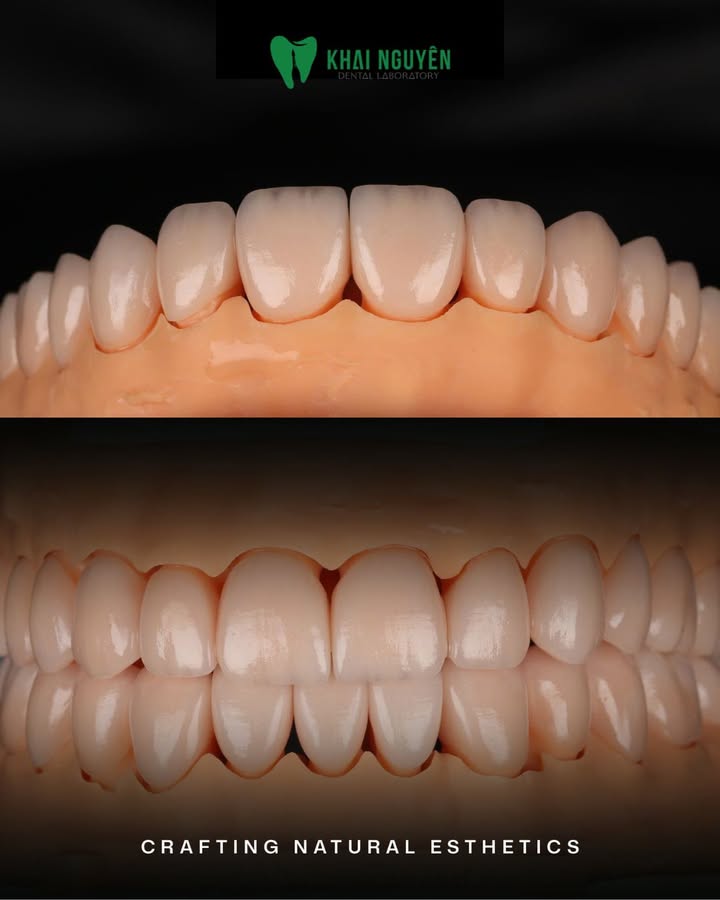
Case Study: Ten GC Initial LiSi Press Veneers in BL2, Teeth 14 to 24

GC Initial LiSi Press veneers teeth 14 to 24, shade BL2, frontal view on the model

Case fabricated at Khai Nguyen Dental Lab to the treating dentist’s prescription, published on Instagram @khainguyendentallab on 11 June 2025. No patient-identifying information is included.

Case summary

Indication Ten pressed ceramic veneers, teeth 14 to 24
Material GC Initial LiSi Press
Shade BL2
Dentist A long-standing international partner of the lab (name not published)
Photo source Instagram @khainguyendentallab, 11 June 2025

Photo above: ten LiSi Press veneers in shade BL2 on the model, frontal view.

What the dentist asked for

The prescription was a smile arch from tooth 14 to 24 in bleach shade BL2 with natural incisal effects. This was an overseas case, so the lab had no chance to adjust shade chairside: every decision about translucency, form and surface texture had to be right first time. All communication was by photograph and written description.

Why LiSi Press for ten bright units

At BL2 the consistency between units matters more than elaborate effects on any single tooth: the eye immediately spots one unit off-tone in a row of ten. GC Initial LiSi Press has fine, evenly distributed lithium disilicate crystals, so translucency stays stable between pressings and across different thicknesses, which suits pressing many units at once. Compare the pressed systems in e.max Press vs LiSi Press vs Vintage LD Press.

For effects the case took a minimal approach: keep natural translucency in the incisal third, add light enamel striations, avoid pronounced dentin lobes. With bleach shades, strong effects make teeth look drawn rather than real.

Lab workflow

  1. Design all ten units in one file to unify incisal edge length, smile line and width proportions before pressing.
  2. Press in groups so units from the same pressing share thermal conditions, reducing shade differences between teeth.
  3. Light cut-back at the incisal third and translucent layering, keeping thickness minimal because bright-shade veneers need no thick masking layer.
  4. Selective mechanical polishing for a uniform micro-texture across the arch.
  5. Photograph from several angles before shipping, since a remote dentist needs to review before booking the seating appointment.

Lessons for multi-unit veneer cases sent from abroad

  • Agree incisal edge length by measurement or a wax-up photo before the lab presses, because changing length afterwards costs the whole pressing.
  • With bleach shades, ask for moderate effects. Write “light striations, translucent edge” rather than a generic “natural effects”. Read more on bleach shades and stain technique.
  • Request multi-angle photos before dispatch on international cases; it is the only inspection before the restorations reach the patient.

Send a multi-unit veneer case via WhatsApp +84 902 945 585 or read the ordering process.

Written for dentists and technicians. Khai Nguyen Dental Lab manufactures to clinical prescription only and does not sell directly to patients.
The technique behind this case: The Four Stages That Decide a Pressed Veneer Case.


WhatsApp