Victor Le – Digital Communications Manager, Khai Nguyen Dental Lab

Victor Le

Digital Communications Manager, Khai Nguyen Dental Lab

Digital Communications Manager at Khai Nguyen Dental Lab, with five years in communications and technical content for the dental laboratory field, responsible for editing technical articles together with the lab's technician team.

Articles by Victor Le

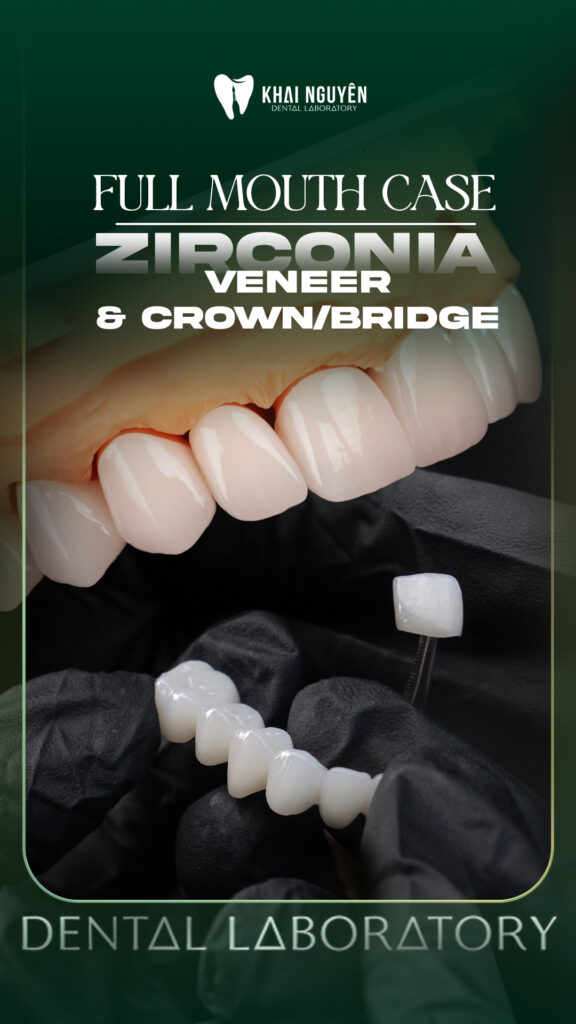
Case Study: Twelve-Unit ZirCAD Prime Zirconia Bridge and Crowns in A3 to A3.5

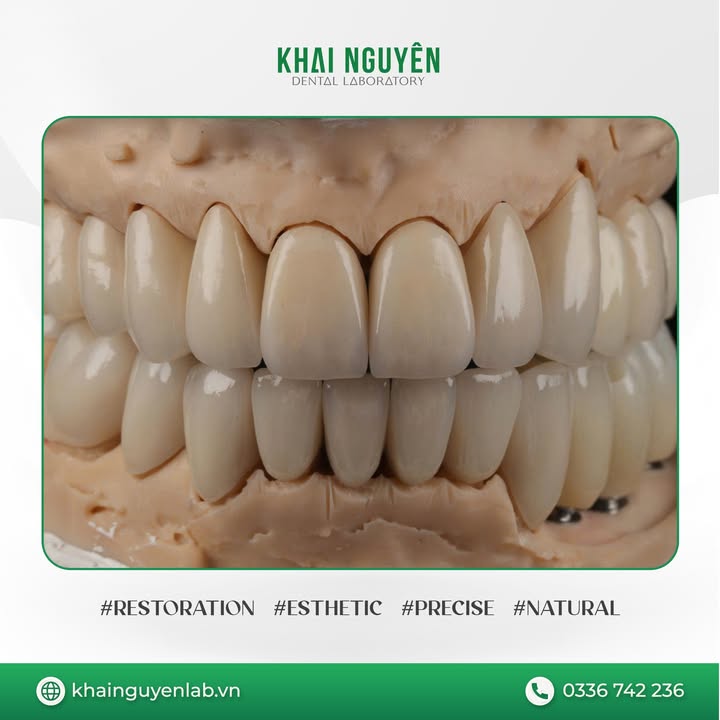
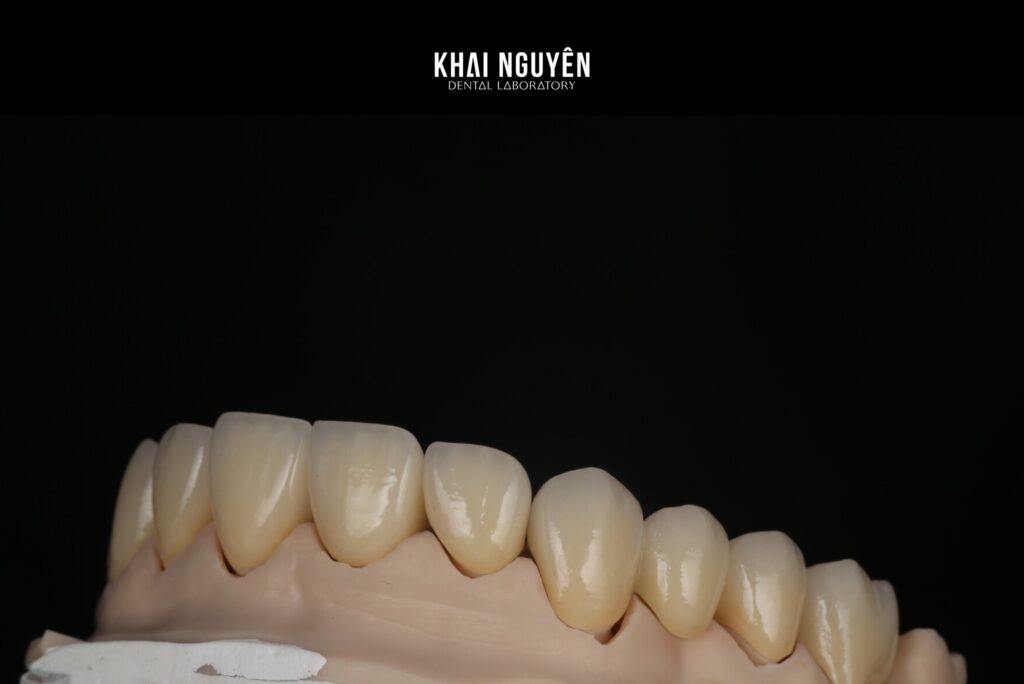
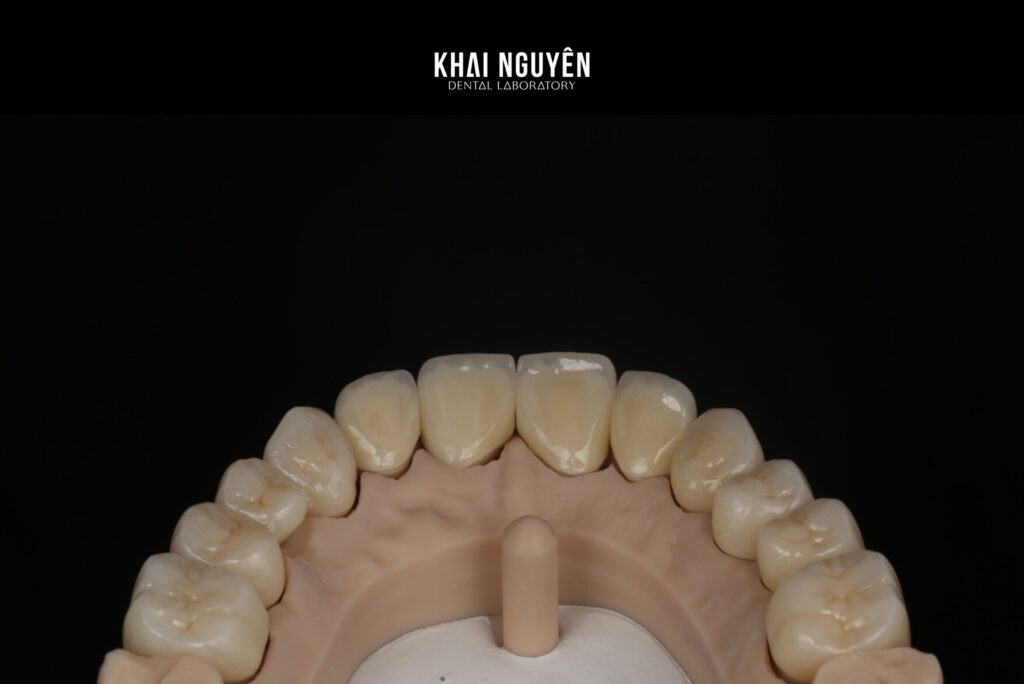
Twelve-unit ZirCAD Prime zirconia bridge and crowns, shade A3 to A3.5, frontal view

Case fabricated at Khai Nguyen Dental Lab to the treating dentist’s prescription, published on Instagram @khainguyendentallab on 20 June 2025. No patient-identifying information is included.

Case summary

Indication Twelve-unit restoration: zirconia bridge and crowns
Material IPS e.max ZirCAD Prime
Shade A3 to A3.5
Technical focus Uniform form, shade and surface texture across twelve units
Photo source Instagram @khainguyendentallab, 20 June 2025

Photo above: twelve zirconia bridge and crown units in shade A3 to A3.5 on the model, frontal view.

Why twelve units is harder than twelve times one unit

A single crown slightly off-tone against natural teeth is usually acceptable. In twelve adjacent units the eye compares the restorations with each other rather than with natural teeth, so any unit differing in gloss, translucency or form shows immediately. A long case also demands occlusal control across the whole arch and adequate connector cross-sections at the pontics.

Shade A3 to A3.5 is a warm range, common in middle-aged patients, and is not as forgiving as bleach shades: each tooth needs a gradient from a warm cervical zone to a translucent edge while the arch as a whole must not read as too yellow.

How the lab keeps twelve units consistent

  1. One design file for the whole case. Each tooth is built in relation to the others, never designed as separate crowns and merged later.
  2. Controlled disc nesting. With a multilayer ZirCAD Prime disc, the position of each unit inside the disc decides whether the cervical zone sits in the opaque layer and the incisal edge in the translucent one. Wrong nesting is a common reason a few units come out off-tone.
  3. Sinter in one batch so all units go through the same thermal cycle.
  4. Stain by arch, not by tooth. All twelve units are placed on the model and stained together, checked under neutral light after each firing.
  5. Static and excursive occlusion checked on the articulator before the surface is finished.

Lessons for multi-unit cases

  • Send a reliable bite record and facial photos. A twelve-unit case redefines the whole smile, so the lab needs references from the face, not only from the model.
  • State the shade range explicitly, for example A3 cervically and A3.5 on the body, if you want the gradient to run a specific way.
  • Consider a framework try-in for cases with long pontic spans, to check fit and occlusion before staining.

See also choosing zirconia discs by case and the three-unit zirconia bridge 11 to 13. WhatsApp +84 902 945 585.

Another full-arch zirconia case: full zirconia for a bruxing patient.

Written for dentists and technicians. Khai Nguyen Dental Lab manufactures to clinical prescription only and does not sell directly to patients.
Case Study: Full Zirconia Restoration for a Bruxing Patient with V-Shaped Cervical Wear

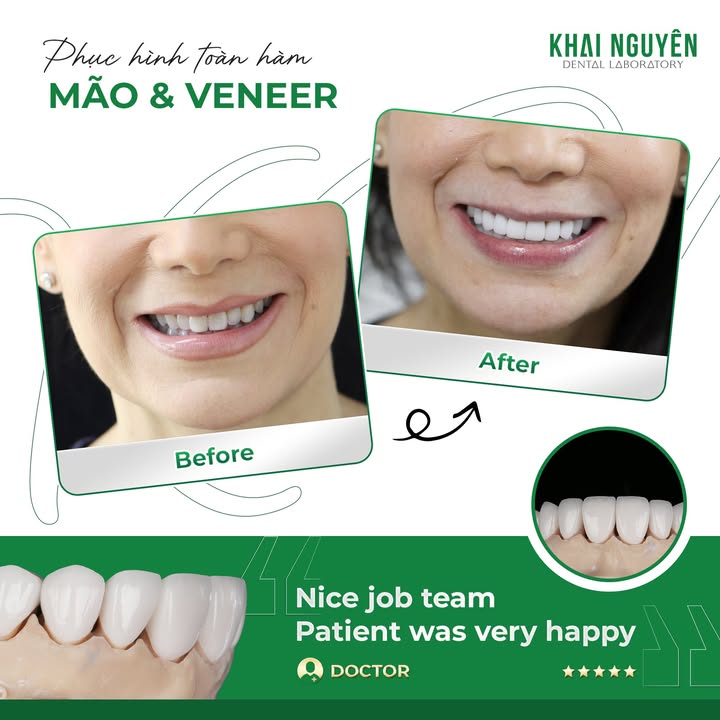
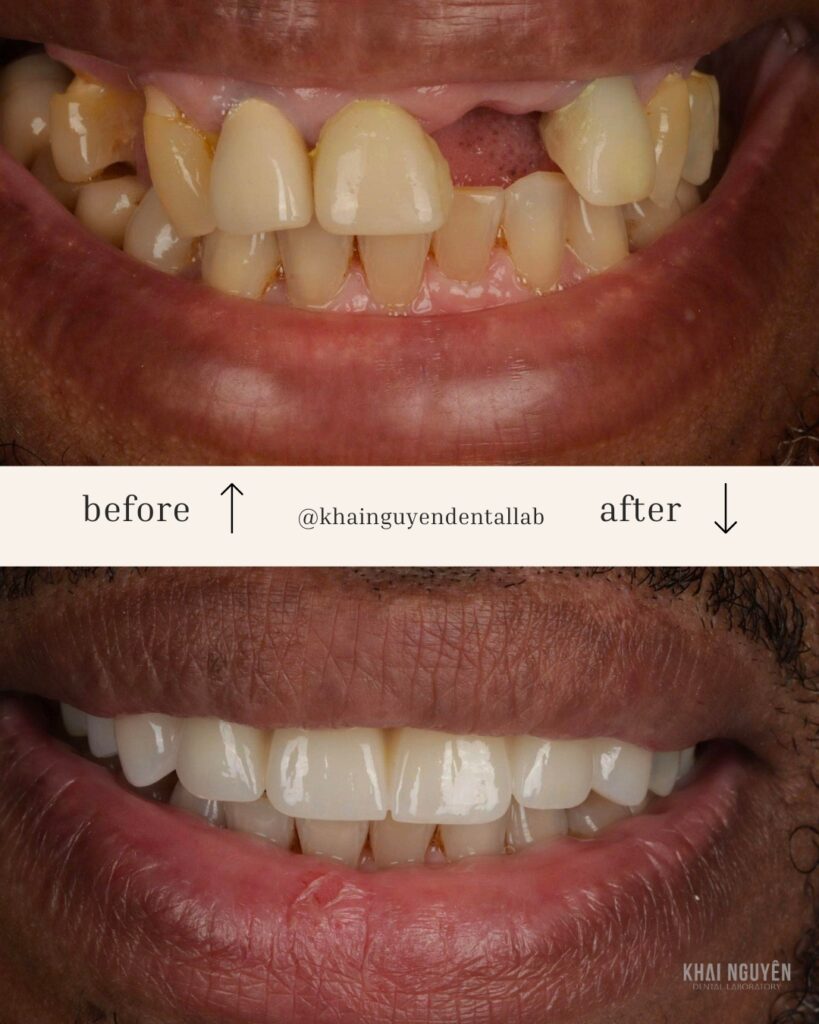
Before and after: full zirconia restoration for an international patient with bruxism and V-shaped wear, squared form and translucent incisal edges

Case fabricated at Khai Nguyen Dental Lab to the treating dentist’s prescription, published on Instagram @khainguyendentallab on 18 August 2025. The before-and-after photos were sent to the lab by the dentist as feedback. No patient-identifying information is included.

Case summary

Condition Bruxism with V-shaped cervical wear
Indication Full zirconia restoration of the arch
Dentist’s requirements Squared form, translucent incisal edges, natural surface texture
Patient International case
Photo source Instagram @khainguyendentallab, 18 August 2025

Photo above: before treatment (top) and after seating the full zirconia restoration (bottom).

Why zirconia for a bruxing patient

For a patient who grinds, strength comes first. Pressed lithium disilicate has a flexural strength around 400 to 500 MPa, enough for single units in an average patient but risky against repeated parafunctional load. Zirconia, depending on the disc, reaches 800 to 1,300 MPa and tolerates that load far better (see the materials comparison).

The objection to zirconia is that it looks opaque and artificial. The dentist’s requirements here, squared form, translucent incisal edges and natural texture, are exactly what stops zirconia reading as a white block. The lab used a multilayer disc for a built-in gradient, created the surface texture by hand and preserved translucency in the incisal third instead of thickening uniformly.

V-shaped cervical wear and what it means for the design

V-shaped lesions at the cervical margin indicate repeated flexural load, usually alongside bruxism. For the lab this tells two things: the patient generates high forces so a strong material is needed, and the finish line sits close to already damaged tissue, so the margin must be designed carefully to avoid creating a new weak point. The design also has to avoid premature contacts in excursion, since these are the source of the flexural load.

Lab workflow

  1. Occlusal analysis from the bite record and the opposing scan, identifying the main load-bearing areas.
  2. Squared form as requested with defined line angles, while load-bearing ridges are slightly rounded to distribute force.
  3. Multilayer disc selection, strong enough cervically and more translucent at the incisal edge.
  4. Hand-made surface texture after sintering, then thorough mechanical polishing instead of a thick glaze, because polished zirconia abrades opposing teeth less (see glazing vs polishing).
  5. Excursive contacts checked on the articulator and the case photographed before shipping.

Lessons for bruxing patients

  • Tell the lab the patient grinds. It changes disc selection, minimum thickness and the finishing method.
  • Consider a night guard alongside the restoration; the lab can make it from the same scan set (see occlusal splints).
  • Prefer polishing over thick glaze on occlusal surfaces, to reduce wear of the opposing teeth once glaze wears away.

Send a case for a bruxing patient via WhatsApp +84 902 945 585, or read how we handle international cases.

Another multi-unit zirconia case: twelve units of ZirCAD Prime crowns and bridges, A3–A3.5.

Written for dentists and technicians. Khai Nguyen Dental Lab manufactures to clinical prescription only and does not sell directly to patients.

Case Study: A 0.2 mm Ultra-Thin Feldspathic Veneer on Tooth 21 for Diastema Closure

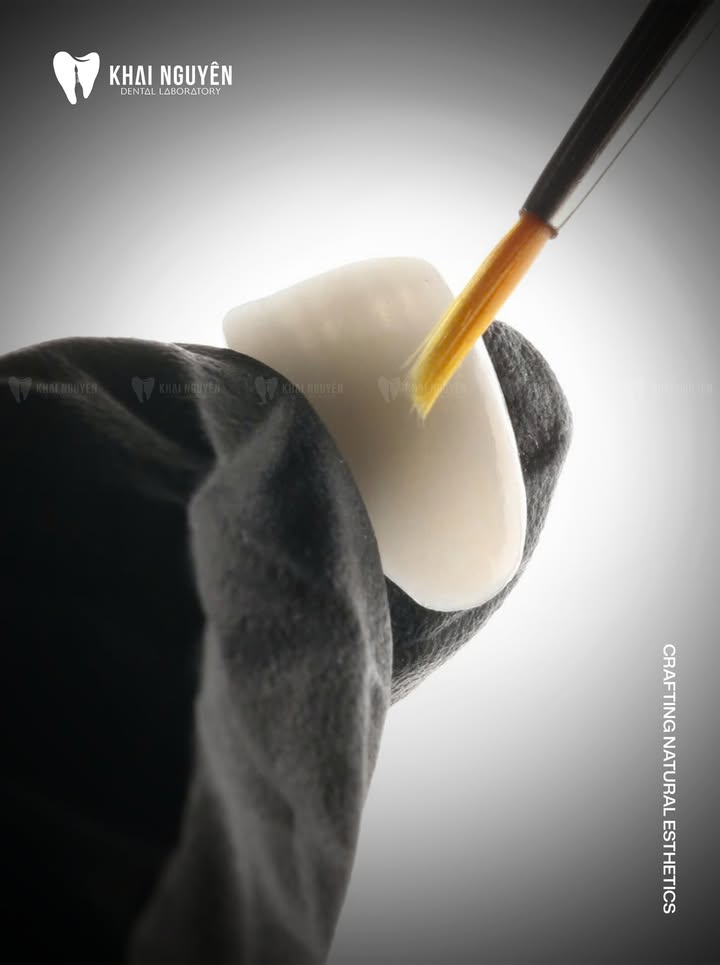
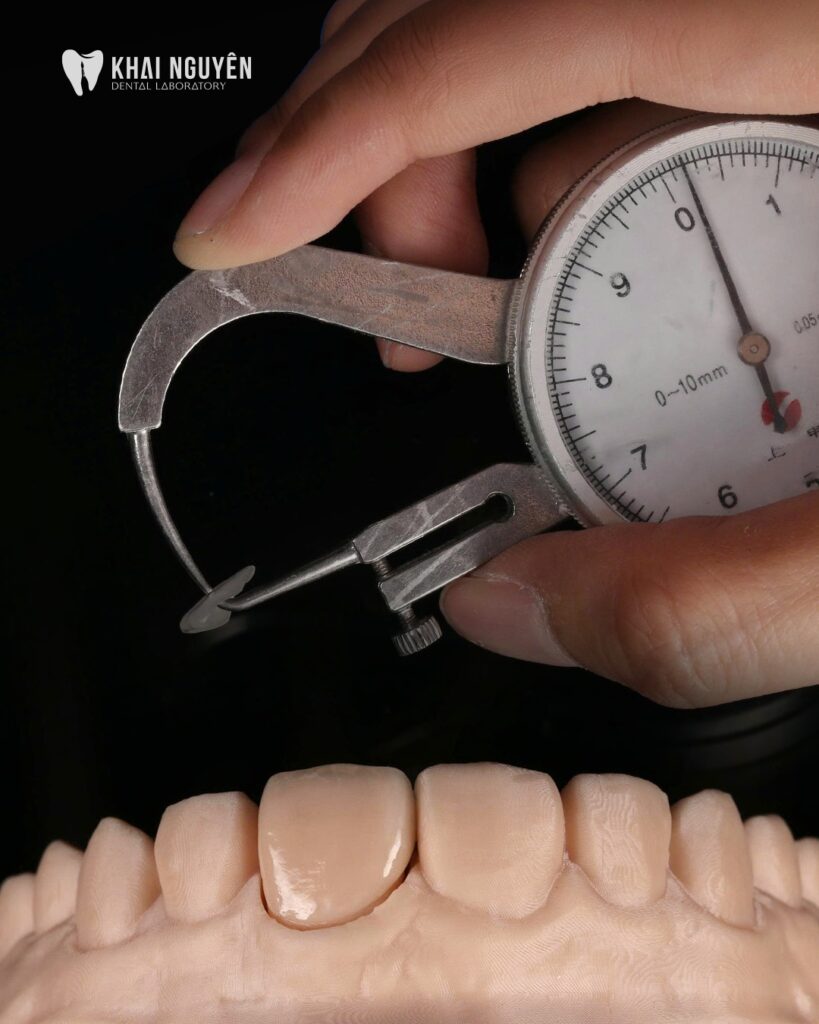
Ultra-thin 0.2 mm feldspathic veneer measured with a calliper, Khai Nguyen Dental Lab

Case fabricated at Khai Nguyen Dental Lab to the treating dentist’s prescription, published on Instagram @khainguyendentallab on 28 April 2026. No patient-identifying information is included.

Case summary

Indication A single veneer on tooth 21, closing a diastema and slightly lengthening the incisal edge
Material Hand-layered feldspathic porcelain
Thickness 0.2 mm (ultra-thin), measured with a calliper
Goal Seamless integration with tooth 11 in texture and translucency
Photo source Instagram @khainguyendentallab, 28 April 2026

Photo above: measuring the veneer with a calliper, reading 0.2 mm.

Why one veneer is harder than ten

When restoring a whole arch the ceramist sets the rules for shade and effects and applies them consistently. When restoring one tooth next to a natural one, the natural tooth sets the rules: the veneer must copy the translucency, enamel striations, white opacities and light reflection of the adjacent tooth 11. One detail wrong shows immediately, because the two central incisors sit side by side and are always compared directly.

This case added two form requirements: closing a diastema, so the veneer had to extend mesially, and slightly lengthening the incisal edge to balance tooth 11. Both change the width-to-length ratio, so they must be planned in advance to keep the tooth from looking oversized.

Why 0.2 mm

A thickness of 0.2 mm is close to the limit for a ceramic veneer. The advantages are almost no tooth reduction, bonding entirely to enamel, and retained natural translucency because the layer is too thin to mask colour. The conditions that come with it: the tooth must be bright and even in colour, since such a thin layer masks nothing; and the whole bonding surface must be enamel, with no exposed dentin.

Only feldspathic porcelain layered on a refractory die reaches this thickness together with real effects; pressed or milled blanks cannot go to 0.2 mm and still survive handling. In return, a veneer this thin is fragile before bonding, so transport and try-in must be careful.

Lessons for single ultra-thin veneers

  • Photograph the adjacent tooth in close-up from several angles and under different light sources. This is the most important document, more important than the shade code.
  • Check the substrate before prescribing 0.2 mm. With dark spots or an endodontically treated tooth, more thickness and a masking layer are needed.
  • Agree the tooth proportions after diastema closure in advance, and say whether a longer contact point is acceptable.
  • Prepare the bonding protocol for an ultra-thin veneer: gentle dry try-in, correct surface treatment and a cement chosen per the manufacturer’s instructions.

See the two-veneer diastema closure case for comparison. WhatsApp +84 902 945 585.

Choosing between the two materials? See feldspathic or e.max veneers: how to choose.

The thickness thresholds for each level of shade change are in minimum veneer thickness: how thin is enough.

Written for dentists and technicians. Khai Nguyen Dental Lab manufactures to clinical prescription only and does not sell directly to patients.

Case Study: Ten Amber Mill Veneers in 1M1–1M2 Following the Approved Wax-Up

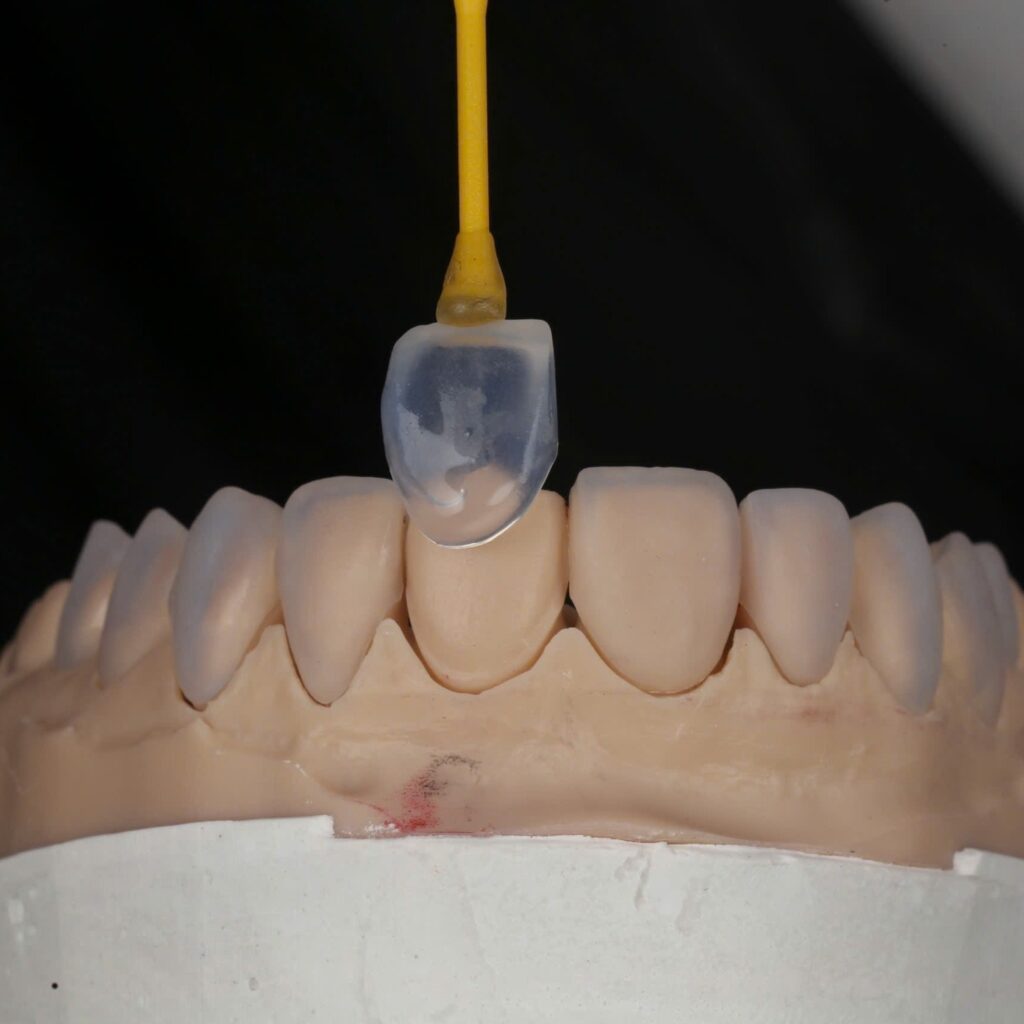
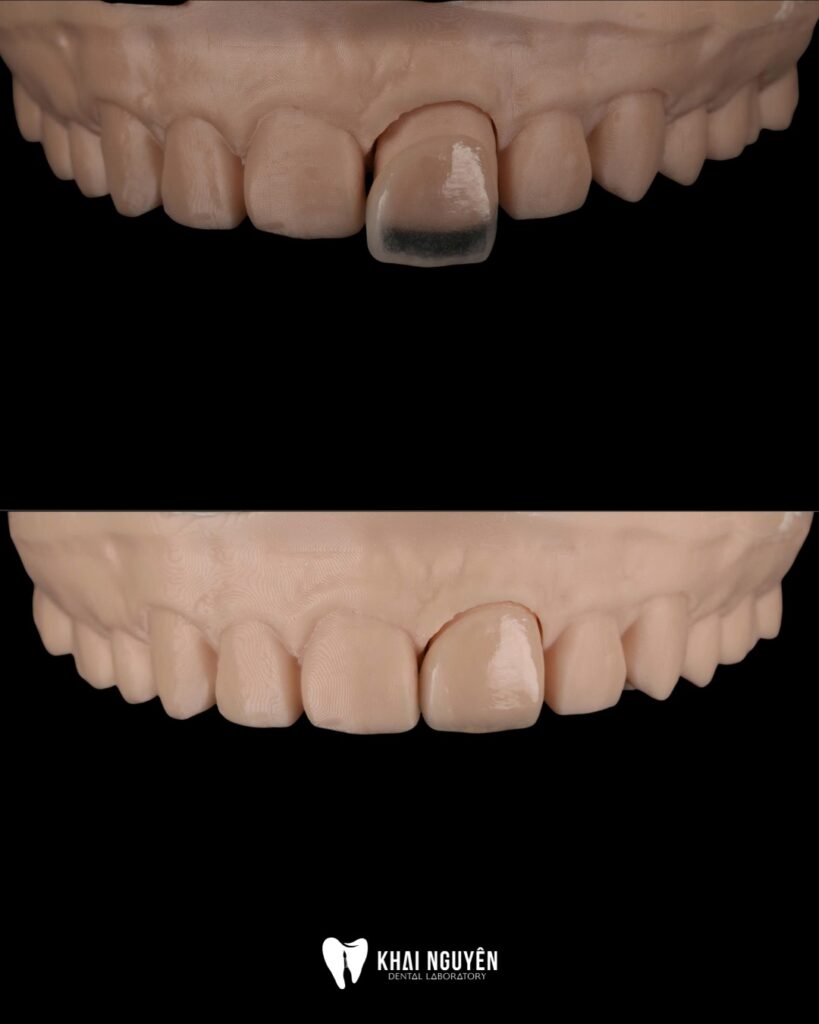
Single veneer on a holding stick over the model, ten-unit Amber Mill veneer case

Case produced at Khai Nguyen Dental Lab on the treating dentist’s prescription, published on Instagram @khainguyendentallab on 15 May 2025. No patient-identifying information is included.

Case details

Indication Ten maxillary veneers
Material Amber Mill (milled lithium disilicate)
Shade 1M1 to 1M2
Technical point The final restorations follow the wax-up approved by dentist and patient
Image source Instagram @khainguyendentallab, 15 May 2025

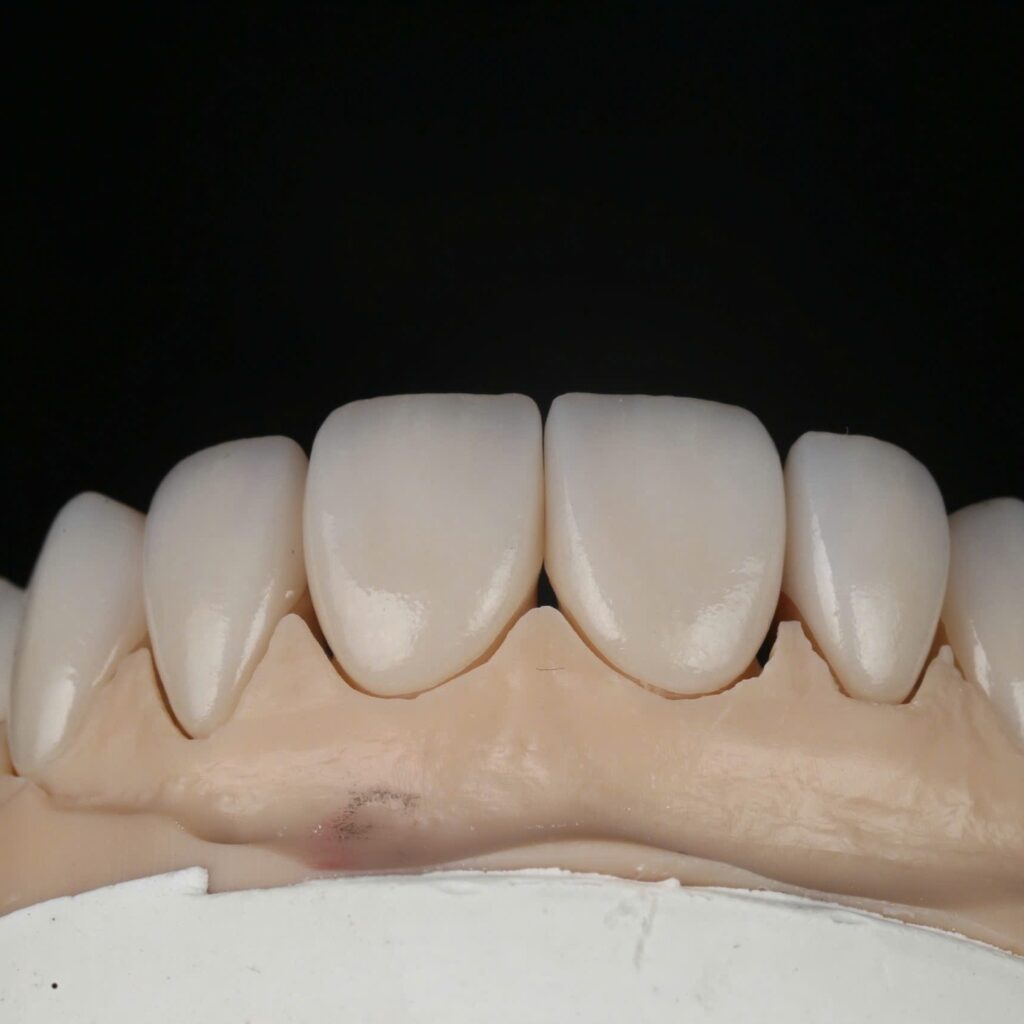
Above: ten Amber Mill veneers on the holding stick before finishing.

Why the wax-up decides the outcome

In a multi-unit aesthetic case the central question is not “does the restoration look good” but “is it what the patient already agreed to”. A wax-up, whether in wax or digital, is a visual contract between three parties: dentist, patient and laboratory. Once the patient has seen and approved the form on an intraoral mock-up, the laboratory’s remaining job is to reproduce that design faithfully — not to improve on it unasked.

In this case the final restorations follow the original wax-up closely. That sounds simple but requires a disciplined workflow: the wax-up is scanned, used as the reference envelope when designing the veneers, and verified by superimposing the design file onto the wax-up file before milling.

Laboratory workflow

  1. Scan the approved wax-up and set it as the reference for the design.
  2. Design all ten units against that reference, keeping outline, proportion and incisal length consistent across the arch.
  3. Superimpose the design file onto the wax-up file to confirm that deviation from the wax-up stays within an acceptable threshold.
  4. Mill from lithium disilicate blanks, crystallise, stain to the 1M1–1M2 range and finish the surface.

Lessons for multi-unit aesthetic cases

  • Always send the wax-up or mock-up scan if the patient has approved it. Without it the laboratory designs to general aesthetic norms, and the chance of missing the patient’s expectation is high.
  • State explicitly if the wax-up needs adjusting: for example, “keep the form, reduce incisal length by 0.5 mm”. The laboratory will not modify an approved wax-up on its own initiative.
  • Prepare through the mock-up, so veneer thickness stays even and does not have to be compensated by thickening the restoration.

See also minimum veneer thickness and our dental ceramic materials comparison.

The technique behind this case: Why a Restoration Must Follow the Approved Wax-Up.

Written for dentists and technicians. Khai Nguyen Dental Lab manufactures to clinical prescription only and does not sell directly to patients.

Masking a Dark A4 Preparation to a Bright 1M1: Three Things the Dentist Can Prepare

Veneer e.max trên nền cùi tối màu A4 được nâng lên màu 1M1 bằng thỏi e.max MO và sườn đắp sứ

Written for dentists and dental technicians. The cases shown were fabricated by Khai Nguyen Dental Lab to the treating dentists’ prescriptions and published on the lab’s Facebook and Instagram in July and August 2026; no patient-identifying information is included.

Restoring one or two central incisors over a dark preparation is the most stressful brief a ceramist receives: the substrate has to be masked, yet the restoration must stay translucent enough to blend with the natural neighbour. This article explains how Khai Nguyen handled an A4 preparation prescribed for a 1M1 result, and the three things a dentist can prepare chairside to raise the odds of success.

Why a dark preparation is difficult

Esthetic ceramics look natural because they transmit light. That same translucency lets the substrate show through: an A4 stump, or a tooth darkened after endodontic treatment, turns a thin restoration grey whatever shade of ingot is chosen. To reach a bright 1M1 without an opaque, plastic look, the masking layer must sit in the right place (against the stump), stay thin enough to leave room for translucent porcelain, and carry a warm tone that neutralises the grey of the substrate.

The larger the colour distance between stump and target, the more thickness is needed. That is why the first of the three factors below is in the dentist’s hands, not the lab’s.

Three things the dentist can prepare chairside

1. Restorative space

Over a dark stump, a 0.3 to 0.5 mm veneer can hardly mask and stay translucent at the same time. The lab needs at least 0.8 to 1.0 mm labially for a thin masking core plus a layered surface, and 1.5 mm or more at the incisal edge for translucency. For a full crown, 1.2 to 1.5 mm labially allows a medium-opacity pressed core with layering on top. Photograph the preparation with a stump shade guide in frame; without it the lab has to guess the opacity and the remake risk is high.

2. Material

For the A4-to-1M1 case, Khai Nguyen pressed the core from an IPS e.max Press MO (medium opacity) ingot. MO masks a dark substrate without killing the restoration, unlike the HT or MT ingots normally used for veneers on bright stumps. For very dark stumps or metal posts, multilayer zirconia masks better; where several units on the same arch must match, the lab can prescribe both crowns and veneers in zirconia so the colour stays consistent (see the full-arch case below). Our ceramic materials comparison summarises the masking ability of each family.

3. A design built around the right effects

The MO core is designed with a cut-back in the incisal third and on the labial surface, leaving room for layered porcelain that carries enamel striations, dentin lobes and the incisal halo. The masking sits deep inside; the vitality sits on the outside. When the dentist sends photos of the adjacent teeth under neutral light and states the desired level of effects (light, medium, pronounced), the lab maps the effects to the patient’s real teeth instead of a generic template.

Photo above: A4 stump restored in 1M1: the e.max MO core masks the dark substrate while the layered porcelain keeps natural translucency.

Lab workflow for the A4-to-1M1 case

  1. Stump shade assessment from the photo with the stump guide, and the decision on core opacity.
  2. Digital design at full contour, then a cut-back leaving an even 0.4 to 0.6 mm for porcelain labially and more at the incisal edge.
  3. Pressing the core from the e.max MO ingot; masking checked by seating the core on a die of matching stump shade.
  4. Layering warm dentin at the cervical zone to neutralise grey, enamel and translucent porcelain at the edge, effects following the photos of the natural teeth; several firings.
  5. Checks under several light sources, especially with light transmitted from behind, which is when a dark substrate shows most.

When many units must match: zirconia for crowns and veneers alike

In a recent full-arch case the dentist prescribed zirconia for the bridges, crowns and veneers. Zirconia veneers are not a routine choice, but with several stumps of different colour they solve two problems at once: masking the substrate and keeping one material system across the arch so the shade stays uniform. In return, dentist and lab must agree carefully on minimum thickness, bonding protocol and margin position, because zirconia does not forgive an over-thin edge the way feldspathic porcelain does.

The two-central-incisor case

Two central incisors are harder than one, because the eye compares two symmetrical teeth directly. Beyond shade and form, the lab must reproduce the same type of effects on both: the same position of dentin lobes, the same incisal translucency, the same surface texture, without making them identical. In this case the dentist sent close-ups of the canines and lateral incisors so the lab could read the patient’s own “effect language” instead of applying a standard pattern.

Checklist for sending a dark-stump incisor case

  • Photo of the prepared stump with a stump shade guide in frame, under neutral light.
  • Photos of the adjacent and opposing teeth with the target shade tab (1M1, BL2, A1) next to them.
  • State the reduction achieved labially and incisally; if it is insufficient the lab will say so before production.
  • State the desired level of effects and the patient’s age, since young teeth need more detail than older ones.
  • For important cases, ask for a photo of the core on a coloured die before layering.

Read the case study on zirconia crowns and veneers over uneven preparation shades, or send an anterior case via WhatsApp +84 902 945 585.

Written for dentists and technicians. Khai Nguyen Dental Lab manufactures to clinical prescription only and does not sell directly to patients.

Intraoral Photogrammetry (IPG) for Full-Arch Implants: What It Solves and What It Does Not Replace

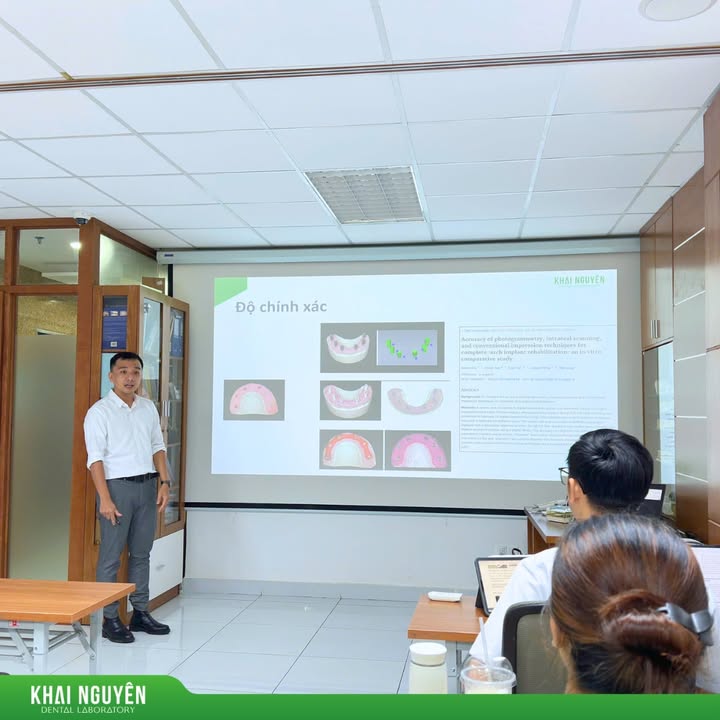
Buổi sinh hoạt chuyên môn về ứng dụng quang trắc học IPG trong phục hình implant toàn hàm tại Nha khoa Viễn Đông, tháng 10/2025

Written for dentists and dental technicians, based on the clinical meeting between Khai Nguyen Dental Lab and Vien Dong Dental Clinic (October 2025), the seminar with Viet Dang (March 2026) and the full-arch cases the lab produces.

Recording implant positions for a full arch is the step where most cases go wrong. With four to six implants in one arch, a single abutment misplaced by a few tens of microns leaves the framework without passive fit, and all the esthetic work that follows becomes pointless. Intraoral photogrammetry (IPG) is the approach increasingly used to solve this, and it is the topic Khai Nguyen discussed with the clinicians of Vien Dong Dental Clinic and brought into the March 2026 seminar.

Three ways to record a full arch, and the limits of each

Method Principle Limitations
Conventional splinted impression Copings screwed to the abutments, splinted with resin or a metal bar, impressed in silicone Resin shrinks, the impression distorts on removal, results depend heavily on technique; a model must be poured and verified at the lab
Intraoral scan with scan bodies The scanner captures the scan bodies and stitches them into implant positions Error accumulates with distance: excellent for one to three adjacent implants, less reliable across a long arch with no anatomical reference points in a fully edentulous patient
Intraoral photogrammetry (IPG) A dedicated camera takes many images of markers screwed to the abutments from different angles; software computes the three-dimensional position of each abutment Gives implant positions only, not soft-tissue contour or the opposing arch; requires dedicated equipment and must be combined with a soft-tissue scan

Photo above: Clinical meeting on photogrammetry for full-arch implant restorations with Vien Dong Dental Clinic, October 2025.

What IPG solves

The strength of photogrammetry is that accuracy does not degrade with the distance between abutments. Because the system computes each marker’s position by intersection from images taken at different angles, error does not accumulate along the arch as it does when consecutive scan frames are stitched. In a fully edentulous arch, where no natural teeth provide stitching references, this is the decisive difference.

For the lab, IPG data means implant positions arrive digitally and already verified, so verification-jig checks on the model shorten considerably or need not be repeated. That is why cases such as the full-arch zirconia overlay on a titanium iBar or upper and lower All-on-X can go straight into design instead of waiting through several framework try-ins.

Clinic and lab workflow

  1. Remove the provisional and attach photogrammetry markers to the multi-unit abutments. Check they are fully tightened and do not obscure one another at the capture angles.
  2. Capture with the photogrammetry device. It computes the three-dimensional position of each abutment and exports an implant position file.
  3. Scan the soft tissue and the opposing arch. This step cannot be skipped: IPG gives abutment positions, while gingival contour, ridge form and the opposing arch must come from an intraoral scan.
  4. Scan the provisional if the patient is wearing one comfortably; it is the most valuable data on vertical dimension, smile line and lip support.
  5. Send the lab three data sets plus facial photos: the implant position file, the soft-tissue and opposing scans, and the provisional scan.
  6. The lab merges the data, aligning implant positions to the soft-tissue scan, designs the teeth first, then reduces to a framework or bar, mills and checks passive fit.

What IPG does not replace

  • It does not replace the soft-tissue scan. Many cases arrive without it, leaving the lab with abutment positions but no gingival contour for designing the tissue surface.
  • It does not replace a clinical fit check. For a full-arch bridge, an intraoral single-screw test remains the final check before the ceramic work is completed.
  • It does not replace esthetic information. Vertical dimension, midline and lip support still have to be established by the dentist, usually through provisionals.

If you do not have photogrammetry equipment

Full-arch cases are entirely feasible without it. Khai Nguyen accepts all three data types: conventional splinted impressions, intraoral scans with scan bodies, and IPG files. For the first two the lab will propose a verification jig for an intraoral check before the framework is milled, and this step is worth keeping: a verification jig costs far less than re-milling a titanium bar.

To discuss the data workflow for a full-arch case, contact us on WhatsApp +84 902 945 585. See also bar-supported full-arch restorations and the scan file formats we accept.

Source: Khai Nguyen Dental Lab Facebook page, posts of 3 October 2025 and 28 February 2026.

Written for dentists and technicians. Khai Nguyen Dental Lab manufactures to clinical prescription only and does not sell directly to patients.
Bleach Shades 0M2, 1M1, 1M2 and BL: Choosing the Shade, Stain Technique and How to Brief the Lab

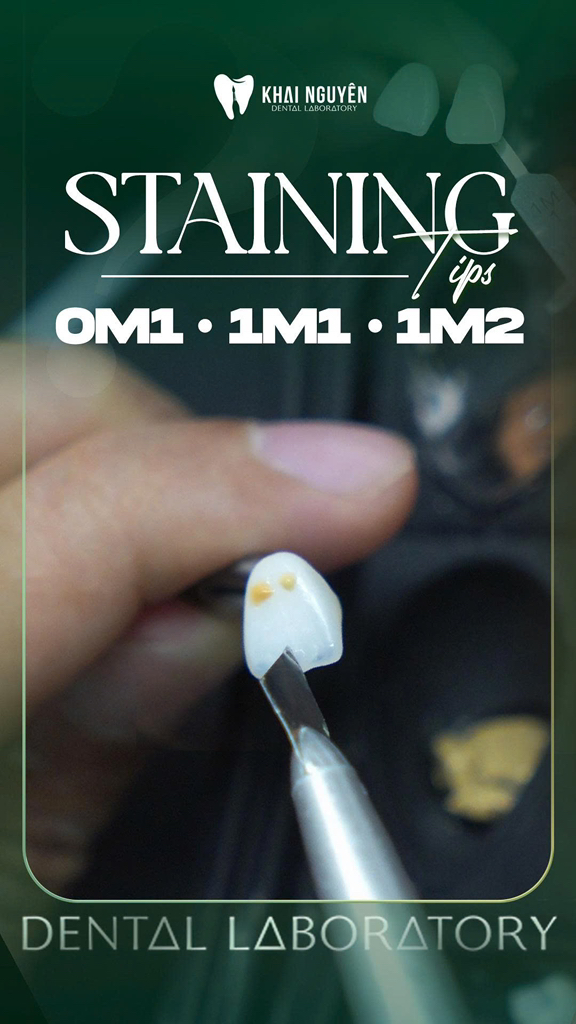
Kỹ thuật stain trên phục hình sứ: thay đổi tỉ lệ màu để đạt các tông 0M2, 1M1, 1M2

Written for dentists and dental technicians, based on technical posts by the Khai Nguyen Dental Lab team on Facebook and Instagram (August 2026, October 2025). Case photos were taken by the lab; no patient-identifying information is included.

More patients bleach, so bleach shades such as 0M2, 1M1, 1M2 or BL1 to BL4 now appear on prescriptions more often than A1 or A2. The difficulty is that these tones sit very close in value and differ only in subtle chroma; a restoration that comes back “white but dead” or “white but the wrong tone” usually starts with dentist and lab reading the shade code differently. This article explains the bleach shade systems, how technicians tune the tone with stains, and how to send shade information so the lab gets it right first time.

Two bleach shade systems in parallel use

System Codes How to read them
Vita 3D-Master groups 0 and 1 0M1, 0M2, 0M3, 1M1, 1M2 First digit is value (0 is brightest), M is the neutral hue, last digit is chroma (1 low, 2 higher). 1M1 is bright and near neutral; 1M2 has the same value but is warmer; 0M2 is one step brighter than 1M1.
Vita Bleachedguide 3D-Master 0M1 to 5M2 ordered by value An extended version of the above, arranged to compare before and after bleaching.
“BL” guides from some ceramic manufacturers BL1, BL2, BL3, BL4 BL1 is brightest. BL2 sits near 0M2 to 1M1; BL3 near 1M2; BL4 near 2M1. These are approximate conversions, not exact equivalents.

Because the guides are not exact equivalents, write the code from the guide actually used in the mouth and attach a photo with the tab in frame instead of converting by hand.

Stain technique: a small change in ratio changes the tone

At high value the disc or ingot is usually chosen in the most neutral tone, and the technician pulls it to the right chroma with stains before glazing. The Khai Nguyen team’s experience: a slight change in the ratio between the basic stain colours is enough to move from 0M2 to 1M1 or 1M2. Some working rules:

  • Go from little to more. Stains on bright shades are easy to overdo; fire a thin layer, compare with the tab under neutral light, then add.
  • Warm at the cervical, neutral on the body, slightly blue-grey at the edge. 1M2 differs from 1M1 mainly in the amount of warm colour at the cervical and body; 0M2 differs from 1M1 in value, which stains cannot fix, so the blank must be re-selected.
  • Effects are still needed. Real bleached teeth still show an incisal halo, enamel striations and white opacities. Without them a bright arch looks like plastic. See the e.max crown and feldspathic veneers in OM1 case.
  • Stains do not replace layering. When depth is required the lab cuts back and layers; stains only fine-tune the tone at the end.

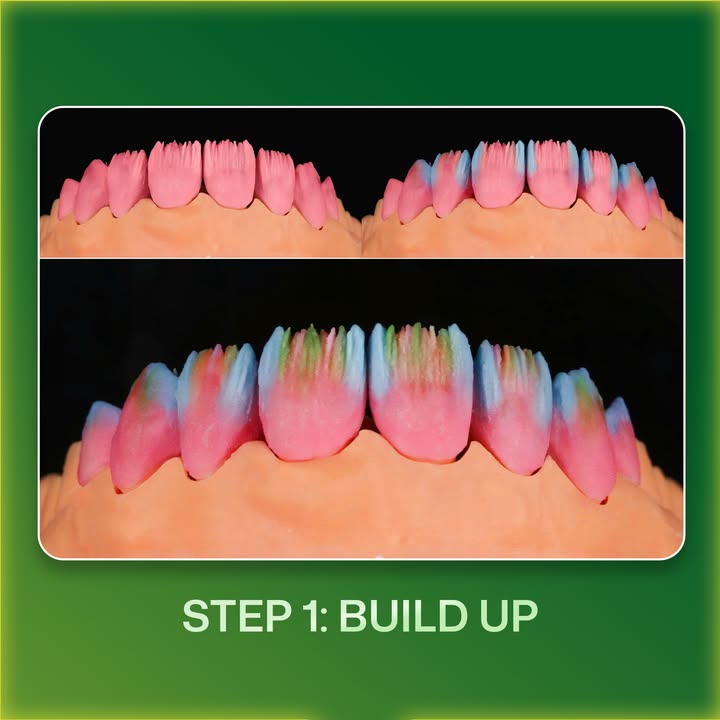
Photo above: A Khai Nguyen technician tuning the tone of a ceramic restoration with stains: small changes in colour ratio separate 0M2, 1M1 and 1M2.

Example: a BL2 case with natural translucency

For a veneer case in BL2 the dentist sent a photo of the BL2 tab next to the bleached teeth, a smiling facial photo and the note “white, but translucent at the edge”. The lab chose a medium-translucency pressed ingot in a bright tone, layered translucent porcelain in the incisal third, built a thin halo and used stains only to balance chroma between the units. The feedback photo after seating shows the BL2 value with a translucent incisal edge, not a solid white block.

How to send bleach shade information to the lab

  1. Take the shade photo at least two weeks after bleaching ends, because the colour still shifts in that period. Tab in the same plane as the teeth, slightly wet, in daylight or under a 5500 K lamp, never under the operating light.
  2. Photograph two adjacent tabs (for example 0M2 and 1M1, or BL2 and BL3) so the lab sees whether the patient sits between them or leans one way.
  3. Say which tooth is the reference: canines are usually darker than incisors; for an incisor restoration, match the contralateral incisor.
  4. State the desired translucency in words (“clearly translucent edge”, “almost none”) or with a reference photo.
  5. If the patient will bleach again, choose a target one step lower so the restoration is not darker than the natural teeth a few months later.

Frequently asked questions

Should every bleached patient get 0M1?

No. 0M1 is very bright and looks artificial if the remaining teeth are not equally bright. Match the natural teeth after bleaching, usually 1M1 or BL2, and go to 0M1 or 0M2 only when the whole smile segment is being restored.

Do bright restorations need layering, or is staining enough?

Posterior crowns can be stained monolithic. Anterior crowns and veneers should be layered, or at least cut back at the incisal edge, because bright tones expose any lack of depth.

Are phone photos good enough?

Yes, if a shade tab is in frame, the operating light is off and no filters are used; the tab is the reference that lets the lab correct the camera’s colour cast.

See our comparison of pressed ceramic systems, or send a case via WhatsApp +84 902 945 585.

Written for dentists and technicians. Khai Nguyen Dental Lab manufactures to clinical prescription only and does not sell directly to patients.
Glazing vs Polishing Ceramic Restorations: What Differs and When to Use Which

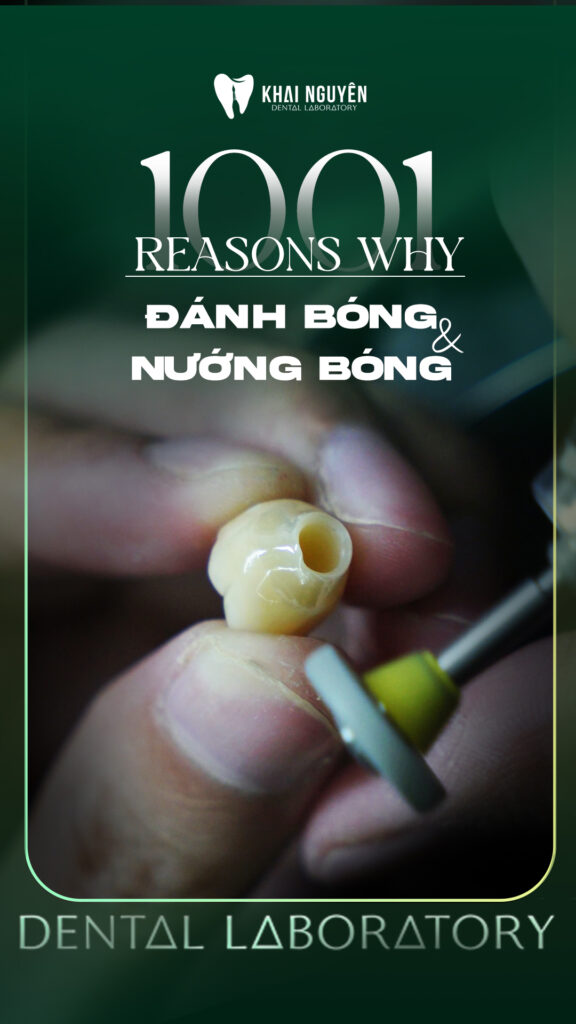
Đánh bóng cơ học và nướng bóng (glaze) phục hình sứ: kỹ thuật viên Khai Nguyên đang đánh bóng mão sứ

Part of the “1001 questions at the lab” series produced by the technicians of Khai Nguyen Dental Lab for young technicians and for dentists who want to understand how ceramic restorations are finished. The first episode was published on the lab’s Facebook page in May 2026.

“Glaze or polish?” is the question new technicians ask most at the finishing stage, and it is also what dentists wonder when one crown arrives mirror-shiny and another has the soft lustre of a natural tooth. The two techniques produce surfaces that differ in optics, roughness and longevity, and they are not always interchangeable.

Two techniques, two kinds of surface

Glazing (firing) Mechanical polishing
Method A thin layer of glass (glaze paste or spray) is applied and fired below the porcelain firing temperature; the glass flows and levels the surface Rubber points, discs and polishing pastes (fine diamond, aluminium oxide) are used from coarse to fine until the surface shines on its own
Resulting surface Very glossy and uniform, tending towards a mirror; the glass fills micro-texture, so texture is softened Soft lustre that keeps the striations and texture the technician created; gloss can be varied by zone
Durability of the gloss The thin glass layer can wear over the years or be removed when the dentist adjusts the occlusion; the adjusted area becomes rough The gloss is in the ceramic itself; after adjustment, re-polishing restores it
Effect on opposing teeth Fresh glaze is very smooth, but worn glaze exposes rough ceramic underneath that can abrade opposing enamel, especially with zirconia Well-polished zirconia is considered kinder to opposing enamel than glaze-only zirconia
Time Fast, one firing for many units Labour-intensive, unit by unit and zone by zone

Photo above: A Khai Nguyen technician polishing a ceramic crown mechanically: the gloss is created in the ceramic itself, independent of any glaze layer.

When to use which

Glazing suits

  • Stained monolithic posterior restorations that need a sealed surface quickly.
  • After staining, because stains need a firing to fix them and the glaze protects the colour underneath.
  • Layered porcelain with fine porosity after the last firing; glaze seals it.

Mechanical polishing suits

  • Anterior veneers and crowns that must keep hand-made surface texture (vertical striations, horizontal ridges, reflective planes); a thick glaze erases these details.
  • Monolithic zirconia in direct contact with opposing enamel; smoothly polished zirconia causes less wear than worn glaze.
  • Occlusal surfaces and contact points that the dentist may adjust at seating; chairside re-polishing restores the gloss afterwards.

Combining both

In most esthetic cases at Khai Nguyen the technicians combine the two: stain and fire a very thin glaze to fix the colour, then polish selectively to reduce gloss where natural teeth are not shiny (cervical zone, between striations) and keep high gloss on the reflective planes. The result is zone-dependent gloss like a natural tooth rather than uniform shine. For monolithic full-arch work in Aidite 3D Pro multilayer zirconia the process is shorter: stain with the Biomic kit and glaze, since the multilayer disc already provides the effects.

Three common finishing mistakes

  1. Glaze too thick. A glass-like surface with no texture; on incisors it creates flat reflections that make the teeth look larger. Fix: a thin glaze or none, and polish instead.
  2. Skipping polishing grades. Jumping from a coarse point to fine paste leaves long scratches under the gloss, visible under oblique light. Fix: work through every grit and check under a raking light after each.
  3. Occlusal adjustment without re-polishing. The adjusted area exposes rough ceramic that stains and wears the opposing tooth. Fix: a chairside ceramic polishing kit matched to the material, or return the unit to the lab if the area is large.

What the dentist can write on the prescription

  • “Soft lustre, keep texture” for anterior teeth; “high gloss” for posterior teeth if the patient prefers it.
  • The material of the opposing teeth (enamel, ceramic, composite) so the lab chooses the least abrasive finish.
  • A request for photos under oblique light before shipping if surface texture matters.

Read more: three finishing steps on LiSi Press veneers in A1, choosing zirconia discs by case. Send a case via WhatsApp +84 902 945 585.

Written for dentists and technicians. Khai Nguyen Dental Lab manufactures to clinical prescription only and does not sell directly to patients.
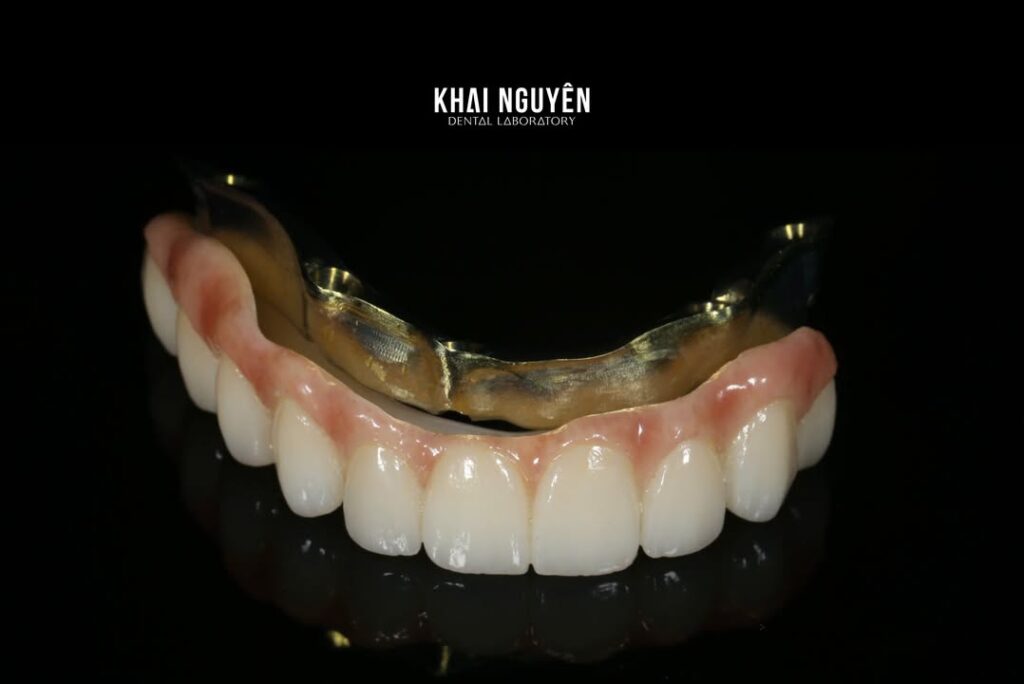
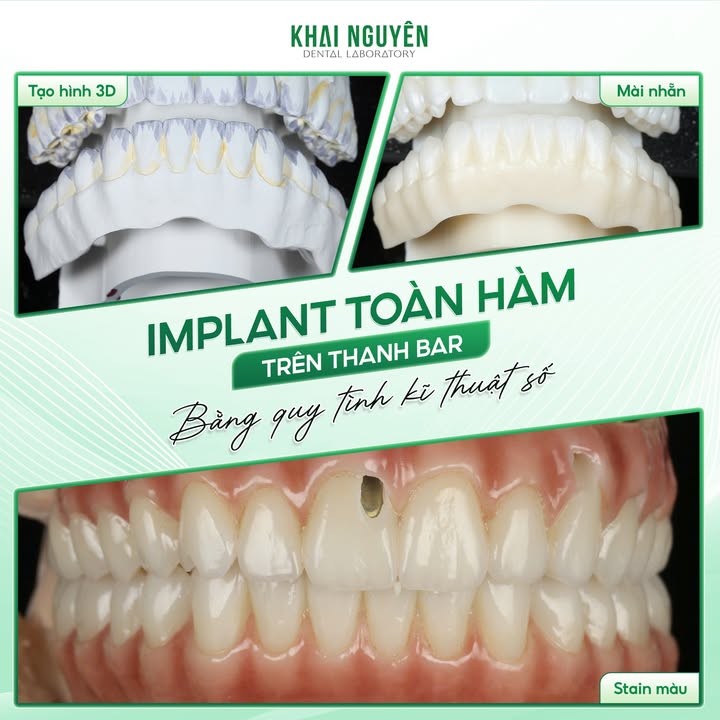
Bar-Supported Full-Arch Restorations: Full Contour or Split iBar, and Polishing the Bar Below the Gingiva

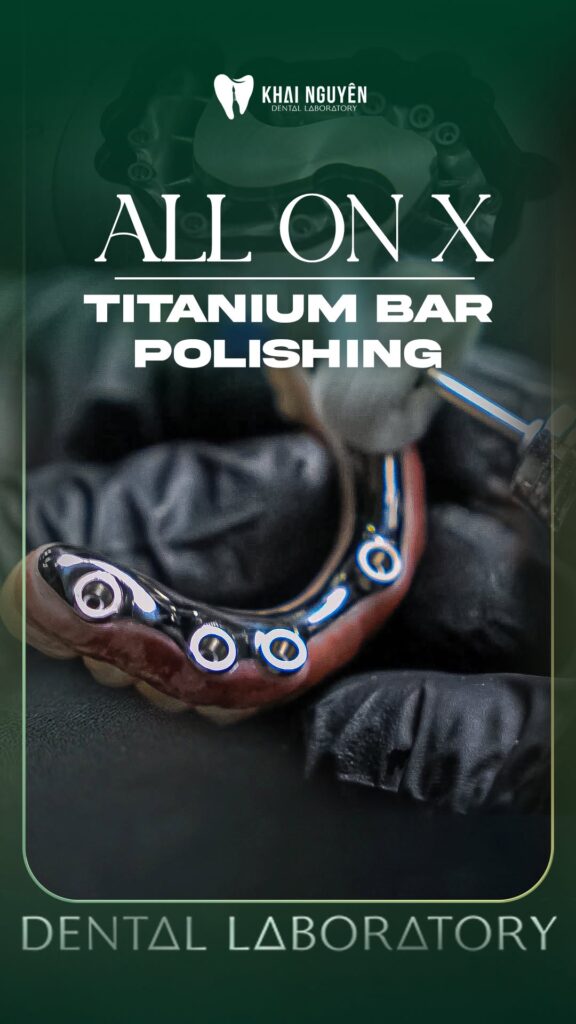
Đánh bóng thanh bar titan dưới nướu trong ca All-on-X tách iBar, Khai Nguyên Dental Lab

Written for dentists and dental technicians, based on the bar-supported full-arch cases Khai Nguyen Dental Lab published on Facebook and Instagram between June 2025 and July 2026. Photos were taken by the lab; no patient-identifying information is included.

For fixed full-arch implant restorations the question dentists most often put to the lab is: screw a zirconia bridge directly to the multi-unit abutments, or mill a titanium bar and place zirconia over it? And with a bar, mill monolithic zirconia that wraps the bar completely (full contour) or make a separate overlay (the “split iBar” approach)? This article explains how Khai Nguyen chooses between these options, and one step few people notice that decides the success of the case: polishing the bar below the gingiva.

Three constructions for a fixed full arch

Construction How it is made Advantages Watch out for
Zirconia bridge screwed directly Monolithic or gingiva-layered zirconia bridge screwed to multi-unit abutments Few components, low profile, good esthetics All load passes through zirconia; fracture risk around screw channels if the framework is thin or the fit is not passive
Full contour on iBar CAD/CAM titanium bar screwed to the implants; monolithic zirconia milled to enclose the bar and bonded to it Titanium carries the load, zirconia only provides esthetics; less zirconia fracture Needs enough restorative height for bar plus zirconia; two fits must be right
Split iBar (bar plus separate overlay) Separate titanium bar; teeth and gingiva milled as a separate part bonded or screwed to the bar; overlay replaceable later Repair and replacement of the overlay without touching the bar; easy bar polishing Junction between bar and overlay must be sealed; strict bonding protocol

A full-contour iBar case in Aidite 3D Pro

In one All-on-X case Khai Nguyen chose a full-contour design: monolithic zirconia milled to enclose the iBar for maximum rigidity and load capacity. To balance esthetics in a monolithic restoration the lab used Aidite 3D Pro, a multilayer zirconia with a smooth gradient from cervical to incisal built into the disc. At the finishing stage the technicians only stained with the Biomic kit and glazed; no layering was needed and the result still had depth. This shortens the process, avoids the chipping risk of layered porcelain on a heavily loaded restoration, and still meets the dentist’s esthetic requirements.

Digital workflow from bar to overlay

  1. Verify implant positions. The model is checked with a verification jig before design. When the impression is taken with intraoral photogrammetry (IPG), the implant positions reach the lab as digital data and this step becomes much shorter.
  2. Teeth first, bar second. Teeth are set up from the bite record and facial photos for vertical dimension, midline and lip support, then reduced inward to define a bar that supports every tooth without showing through thin gingiva. Bar and overlay live in the same design file.
  3. Mill the titanium bar and test the fit. Single-screw (Sheffield) test on the model; a gap at the opposite end means the bar is not passive and must be remade before the zirconia is milled.
  4. Mill the monolithic zirconia from a multilayer disc, sinter, try on the bar; check that the cement space is thin and even.
  5. Polish the bar below the gingiva. See the dedicated section below.
  6. Esthetic finishing: stain, glaze, layer or stain the gingiva; bond the overlay to the bar following the cement manufacturer’s protocol; remove excess cement.

The hidden step that decides the case: polishing the bar below the gingiva

With the split iBar approach, the part of the bar under the gingiva and the tissue surface of the restoration are what the patient never sees but touches every day. Titanium or zirconia that is not thoroughly polished there retains plaque, causes peri-implant mucositis and odour, and is a common reason for dissatisfaction even when the teeth above are beautiful. At Khai Nguyen the whole underside of the bar and the junction areas are mirror-polished before the overlay is bonded, and the tissue surface of the overlay is made slightly convex with no dead corners, so floss and interdental brushes pass through.

Photo above: Polishing the titanium bar below the gingiva in a split-iBar All-on-X case: hidden, but decisive for soft-tissue health and patient satisfaction.

Which construction for your case

  • Low restorative space (below roughly 12 mm from the multi-unit top to the occlusal plane): a directly screwed zirconia bridge is usually the only feasible option.
  • Enough space and a bruxing patient or heavy occlusal load: full contour on an iBar, so titanium takes the load and zirconia only handles esthetics.
  • The dentist wants long-term repairability: split iBar, because the overlay can be replaced without removing the bar.
  • Long spans on few implants: a titanium bar distributes the load; Khai Nguyen calls this zirconia on I-bar for long-span cases.

Real cases: full-arch Aidite 3D Pro zirconia overlay on a titanium iBar and directly screwed upper and lower All-on-X. Related product: full-arch zirconia bonded on bar. Send a full-arch case via WhatsApp +84 902 945 585.

Written for dentists and technicians. Khai Nguyen Dental Lab manufactures to clinical prescription only and does not sell directly to patients.
Full-Mouth Rehabilitation Combining Veneers, Onlays, Crowns and Implants: Occlusion Control and Shade Consistency

Ca nâng khớp toàn hàm phối hợp veneer, mão sứ và phục hình trên implant, Khai Nguyên Dental Lab

Written for dentists and dental technicians, based on three full-mouth rehabilitation cases Khai Nguyen Dental Lab published on Facebook between January and April 2026, fabricated to the prescriptions of the treating dentists (including Dr Sai Aom Kham and Dr Nguyen Ngoc Trung Hau of Vien Dong Dental Clinic). Photos were taken by the lab; no patient-identifying information is included.

A full-mouth rehabilitation with an increase in vertical dimension rarely uses one type of restoration. Anterior teeth need veneers or esthetic crowns, worn posterior teeth need onlays or crowns, edentulous areas need implant restorations, and all of them must occlude at a new vertical dimension in one uniform shade. For the lab the challenge is not any single unit but two things that run through the whole case: occlusion, and shade consistency across different materials. This article summarises how Khai Nguyen organises such cases.

Two challenges of mixed-restoration cases

Controlling occlusion at a new vertical dimension

When the bite is raised there is no natural tooth left as a reference for the occlusal plane and excursive guidance. The lab rebuilds everything on the articulator at the vertical dimension, centric relation and canine guidance the dentist established with the provisionals. The provisional the patient has worn comfortably for several weeks is therefore the most valuable data: a scan of it gives the lab an occlusal plane, incisal edge length and amount of opening that have been tested in the mouth, instead of designing from scratch.

Shade consistency across veneers, onlays, crowns and implants

Each restoration type sits on a different substrate: veneers on bright enamel, crowns on darker stumps, onlays on dentin, implant crowns on titanium or zirconia abutments. The same shade code on the prescription gives four different results if the lab uses one opacity for all. The solution is to select the opacity of the core individually per unit according to its substrate, while using one porcelain system for the outer layer across the whole arch so translucency and surface texture are uniform.

Photo above: Full-mouth rehabilitation combining veneers, ceramic crowns and implant restorations: occlusion and overall esthetics are planned together for every unit.

Lab workflow

  1. Complete data set: scans of both arches after preparation, a scan of the stabilised provisional, a bite record at the new vertical dimension, frontal and lateral smiling facial photos, a shade photo with the tab in frame, the stump shade of each tooth and the abutment type of each implant.
  2. Design the whole arch in one file. The lab designs upper and lower arches together: occlusal plane, midline, lip support, canine guidance, and only then separates the units by restoration type. Separating too early is the source of most occlusal errors in large cases.
  3. Material by position and substrate: for example pressed or feldspathic veneers for the anterior teeth, multilayer zirconia for posterior and implant crowns, lithium disilicate for onlays. In the ZirCAD Prime case, the disc’s Gradient Technology provides a smooth shade transition inside the block, which helps zirconia crowns blend with the layered veneers next to them.
  4. Produce in groups and try everything on the articulator. Cores and crowns are tried together on the model to check contacts, static and excursive occlusion before the outer porcelain is layered.
  5. Layer and finish a uniform outer layer on every unit with the same porcelain system and firing schedule; check shade under several light sources and photograph the whole case before shipping.

Illustrative case: full arch in ZirCAD Prime with Gradient shading

In a case prescribed by Dr Nguyen Ngoc Trung Hau (Vien Dong Dental Clinic), IPS e.max ZirCAD Prime was chosen for most units because of the high esthetic demand across the arch. The gradient built into the disc gives posterior and anterior crowns the same colour family without relying entirely on hand layering, while the incisors were cut back and layered for translucency and effects. Coordination between clinic and lab, from provisional to framework try-in, decided this case.

What the dentist should prepare before sending a full-mouth case

  • A stabilised provisional worn for at least 4 to 8 weeks at the new vertical dimension, with its scan sent with the case.
  • A reliable bite record at that vertical dimension; if in doubt send two and say which takes priority.
  • A per-tooth material plan agreed between dentist and lab before preparation, because reduction differs between veneers, onlays and crowns.
  • Stump shade photos for every tooth and the implant abutment types, so the lab sets the core opacity per unit.
  • A try-in plan: a full-mouth case should have at least one framework or tooth try-in before finishing, even in a digital workflow.

Read more: zirconia crowns and veneers over uneven preparation shades, how to choose a lab for large cases. Send a full-mouth case via WhatsApp +84 902 945 585.

Written for dentists and technicians. Khai Nguyen Dental Lab manufactures to clinical prescription only and does not sell directly to patients.
The technique behind this case: Mixing Restoration Types in One Case: Two Challenges.


WhatsApp