Category Archives: Restoration Materials

Zirconia, lithium disilicate, pressed and layered ceramics, feldspathic porcelain: flexural strength, translucency, clinical indications and how to choose the right material for each case. Written for dentists and dental technicians, based on the brand-name materials fabricated at Khai Nguyen Dental Lab.
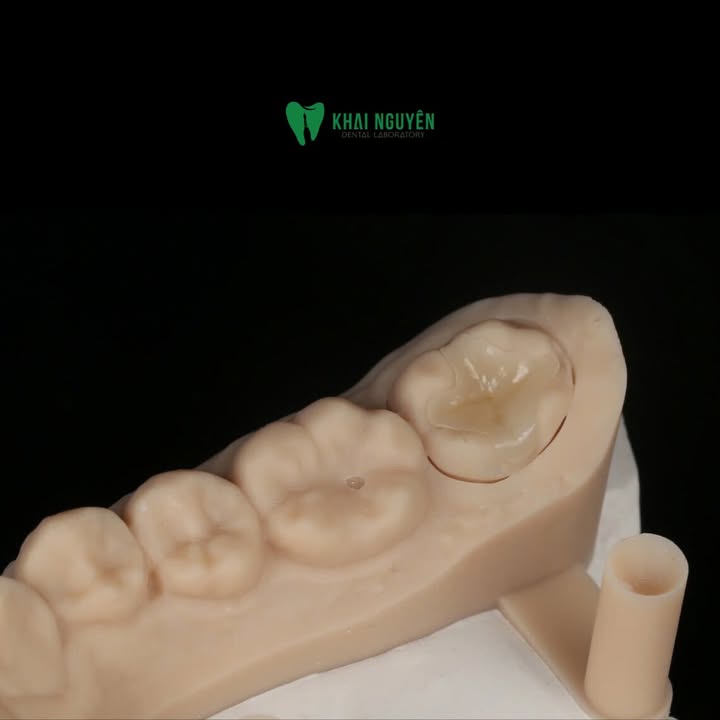
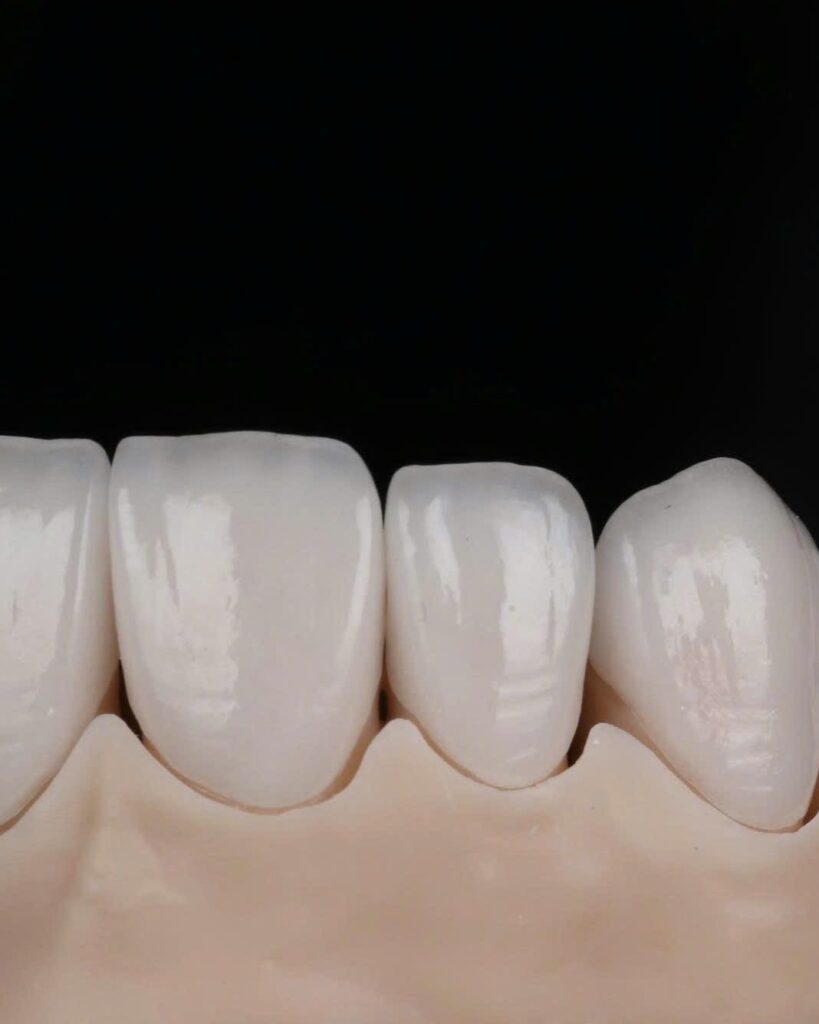
Case Study: e.max Ceramic Inlays, Onlays and Overlays, Built for Marginal Fit and a Seamless Transition
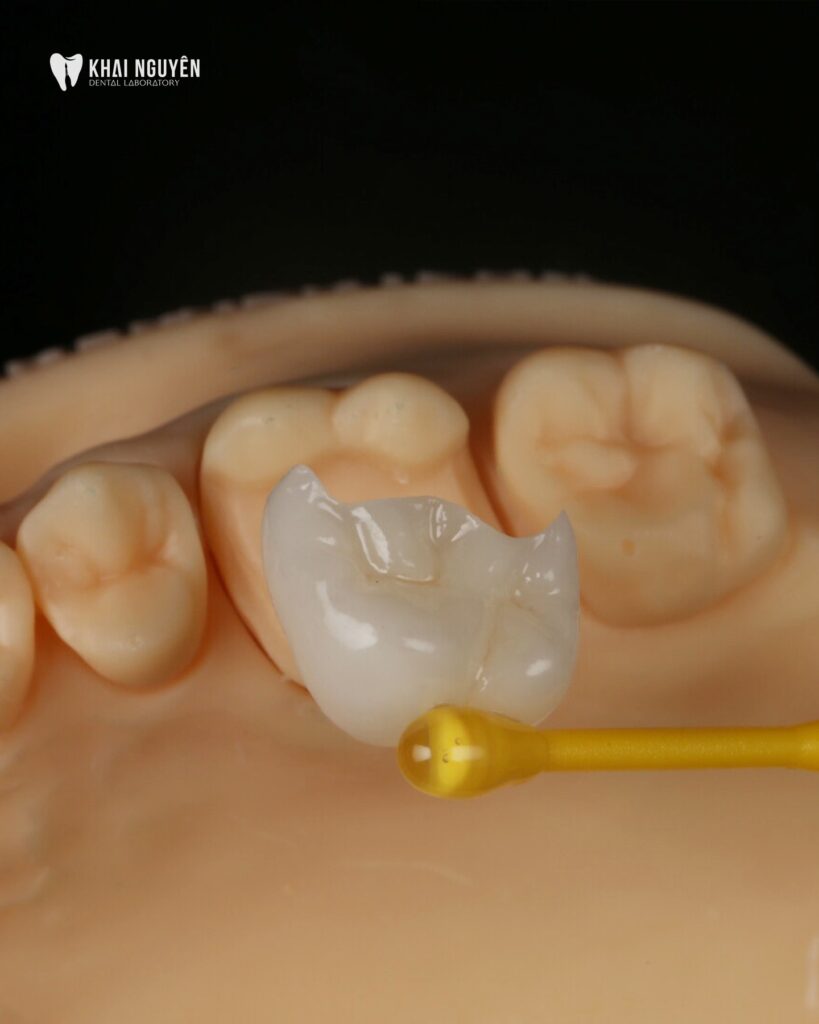
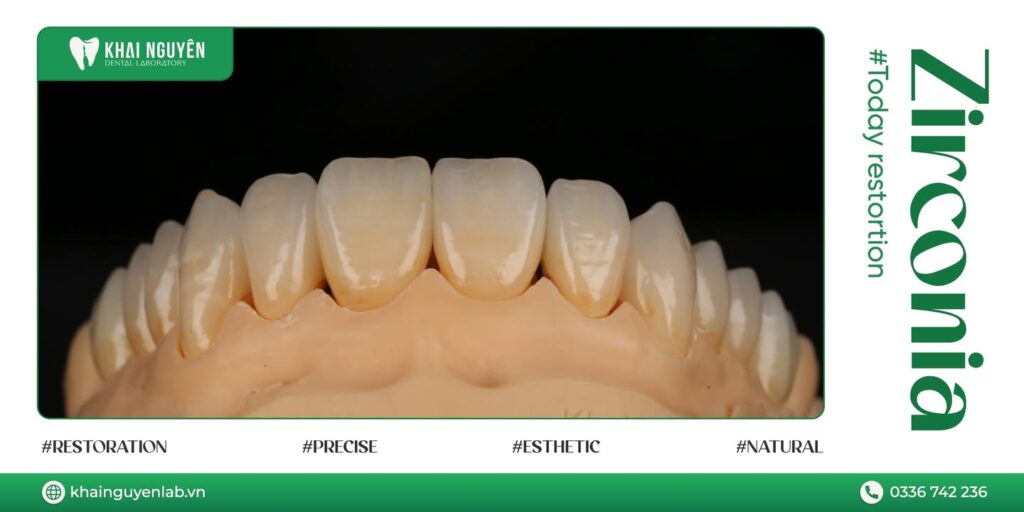
Ceramic overlay seated on the model at Khai Nguyen Dental Lab, showing the marginal fit against the adjacent teeth

Case fabricated at Khai Nguyen Dental Lab to the treating dentist’s prescription. Photos were taken by the lab on the model and published on Instagram @khainguyendentallab on 12 January 2026 and on Facebook on 16 June 2026. No patient-identifying information is included. Written for dentists and dental technicians.

Case summary

Indication Indirect posterior restorations: ceramic inlays, onlays and overlays
Material IPS e.max Press or IPS e.max CAD, chosen by cavity form and esthetic demand
Technical priorities Marginal fit, occlusal anatomy continuous with the remaining tooth, seamless transition zone
Typical in-lab time 2 to 3 working days
Photo sources Instagram, 12 January 2026 and Facebook, 16 June 2026

Photo above: a ceramic overlay seated on the model, with the margin closing against the adjacent teeth.

Why a small case is a hard case

Inlays and onlays are often treated as simple work: one unit, no anterior esthetics. At the bench the opposite is true. The smaller the restoration, the less error it tolerates. A posterior crown that is 50 microns short at the margin can still be compensated by cement, and a subgingival finish line hides much of it. An inlay that is 50 microns short leaves that gap on the occlusal surface, where the patient feels it with the tongue and where plaque collects.

Three requirements the lab has to meet at once:

  • Marginal fit. An inlay preparation has several walls and angles; the restoration must seat along one path without binding, and close everywhere along its perimeter.
  • Anatomy continuous with the remaining tooth. Unlike a crown, an inlay or onlay replaces only part of the tooth, so cusps, grooves and marginal ridges have to run without a break into the remaining natural enamel.
  • A seamless transition zone. This is the criterion Khai Nguyen treats as the most important for this group: the boundary between ceramic and enamel should be invisible in colour, in gloss and in surface form.

e.max Press or e.max CAD

Both are lithium disilicate with comparable flexural strength, and both bond with the same etch-and-silane protocol. They differ in how the shape is produced:

  • e.max Press goes through a wax stage, so the technician builds cusps, grooves and proximal contacts by hand on the model. That helps with complex cavities, thin walls, or when occlusal contacts need fine adjustment. After pressing, the unit can be cut back and layered when the case needs depth of colour.
  • e.max CAD is milled from a block: fast and consistent, suited to clearly defined cavities and to shorter turnaround. In exchange, secondary grooves and proximal contacts are refined after milling.

The lab chooses by cavity form rather than by default. Our ceramic materials comparison lists strength and minimum thickness for each family.

Lab workflow

  1. Assess the preparation before designing. Path of insertion, wall taper and margin quality are read first. If there is an undercut or a wall is too thin, the lab reports back before production instead of compensating with a thicker restoration.
  2. Design to the remaining tooth. Cusps and grooves are built to run into the natural enamel; no default tooth library is used at the junction.
  3. Press or mill, then try on the model to confirm a single path of insertion and a closed margin.
  4. Contacts and occlusion. Proximal contacts are adjusted against the neighbouring teeth, and static and excursive occlusion are checked on the articulator.
  5. Surface finishing. Occlusal texture is created, then the unit is polished mechanically, with thick glaze avoided on contact areas so the opposing tooth is not abraded. See glazing vs polishing.

Feedback from the clinic

In September 2025 Dr Nguyen Thanh Dung noted the naturalness and continuity of the transition zone in the inlay and onlay cases produced by the lab. That is the criterion the lab pursues for this group of restorations, because it is what the patient feels with the tongue every day and where discolouration appears first over time.

Lessons for inlay and onlay cases

  • Prepare a clear path of insertion. An undercut forces the lab to compensate with a thick cement layer, which reduces fit and increases the risk of debonding.
  • State the material you want and why. Choose e.max CAD for speed, e.max Press for complex cavities or when layering is needed.
  • Send the opposing scan and a bite record. Inlays and onlays sit on the occlusal surface, so occlusion decides their lifespan; without the opposing arch the lab can only guess the contacts.
  • Re-polish after chairside adjustment. An adjusted area left unpolished is rough, stains and wears the opposing tooth.

See the inlay, onlay and overlay product page or send a case via WhatsApp +84 902 945 585.

Case Study: Full Zirconia Restoration for a Bruxing Patient with V-Shaped Cervical Wear
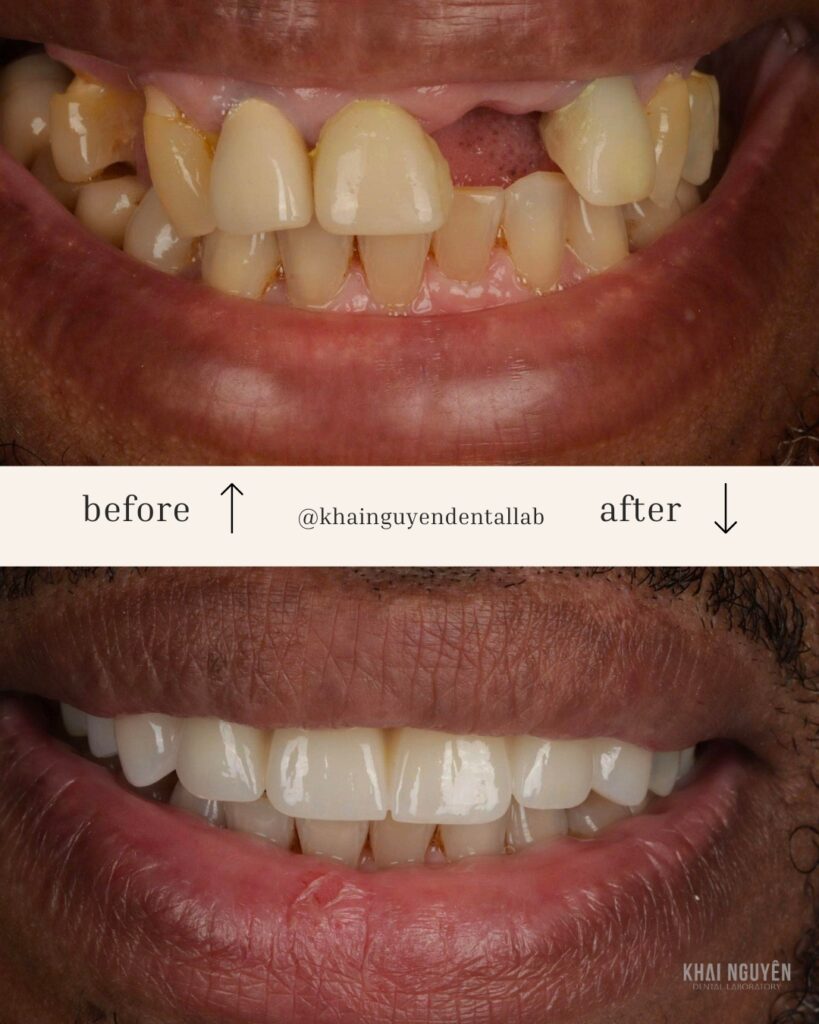
Before and after: full zirconia restoration for an international patient with bruxism and V-shaped wear, squared form and translucent incisal edges

Case fabricated at Khai Nguyen Dental Lab to the treating dentist’s prescription, published on Instagram @khainguyendentallab on 18 August 2025. The before-and-after photos were sent to the lab by the dentist as feedback. No patient-identifying information is included.

Case summary

Condition Bruxism with V-shaped cervical wear
Indication Full zirconia restoration of the arch
Dentist’s requirements Squared form, translucent incisal edges, natural surface texture
Patient International case
Photo source Instagram @khainguyendentallab, 18 August 2025

Photo above: before treatment (top) and after seating the full zirconia restoration (bottom).

Why zirconia for a bruxing patient

For a patient who grinds, strength comes first. Pressed lithium disilicate has a flexural strength around 400 to 500 MPa, enough for single units in an average patient but risky against repeated parafunctional load. Zirconia, depending on the disc, reaches 800 to 1,300 MPa and tolerates that load far better (see the materials comparison).

The objection to zirconia is that it looks opaque and artificial. The dentist’s requirements here, squared form, translucent incisal edges and natural texture, are exactly what stops zirconia reading as a white block. The lab used a multilayer disc for a built-in gradient, created the surface texture by hand and preserved translucency in the incisal third instead of thickening uniformly.

V-shaped cervical wear and what it means for the design

V-shaped lesions at the cervical margin indicate repeated flexural load, usually alongside bruxism. For the lab this tells two things: the patient generates high forces so a strong material is needed, and the finish line sits close to already damaged tissue, so the margin must be designed carefully to avoid creating a new weak point. The design also has to avoid premature contacts in excursion, since these are the source of the flexural load.

Lab workflow

  1. Occlusal analysis from the bite record and the opposing scan, identifying the main load-bearing areas.
  2. Squared form as requested with defined line angles, while load-bearing ridges are slightly rounded to distribute force.
  3. Multilayer disc selection, strong enough cervically and more translucent at the incisal edge.
  4. Hand-made surface texture after sintering, then thorough mechanical polishing instead of a thick glaze, because polished zirconia abrades opposing teeth less (see glazing vs polishing).
  5. Excursive contacts checked on the articulator and the case photographed before shipping.

Lessons for bruxing patients

  • Tell the lab the patient grinds. It changes disc selection, minimum thickness and the finishing method.
  • Consider a night guard alongside the restoration; the lab can make it from the same scan set (see occlusal splints).
  • Prefer polishing over thick glaze on occlusal surfaces, to reduce wear of the opposing teeth once glaze wears away.

Send a case for a bruxing patient via WhatsApp +84 902 945 585, or read how we handle international cases.

Bleach Shades 0M2, 1M1, 1M2 and BL: Choosing the Shade, Stain Technique and How to Brief the Lab
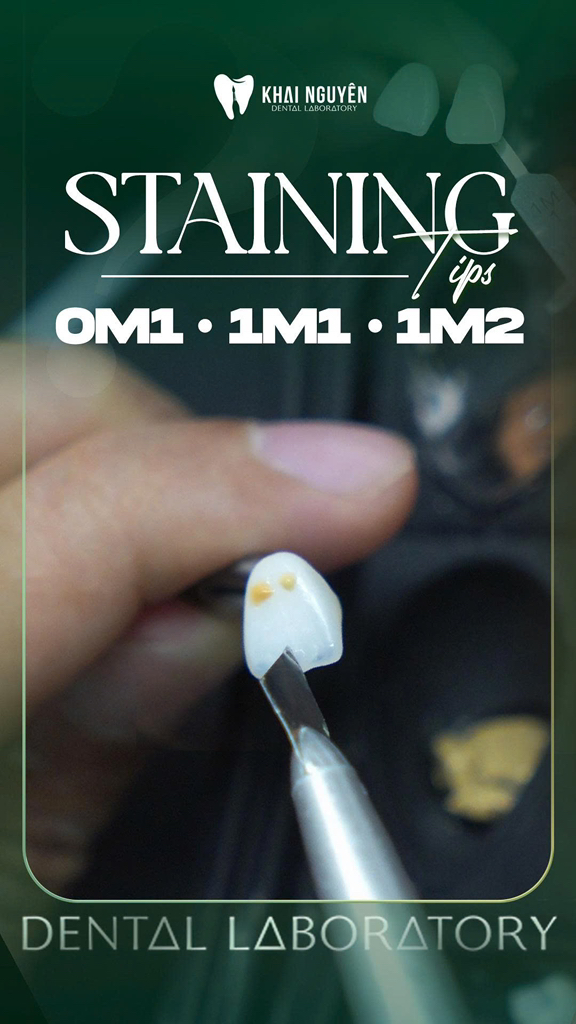
Kỹ thuật stain trên phục hình sứ: thay đổi tỉ lệ màu để đạt các tông 0M2, 1M1, 1M2

Written for dentists and dental technicians, based on technical posts by the Khai Nguyen Dental Lab team on Facebook and Instagram (August 2026, October 2025). Case photos were taken by the lab; no patient-identifying information is included.

More patients bleach, so bleach shades such as 0M2, 1M1, 1M2 or BL1 to BL4 now appear on prescriptions more often than A1 or A2. The difficulty is that these tones sit very close in value and differ only in subtle chroma; a restoration that comes back “white but dead” or “white but the wrong tone” usually starts with dentist and lab reading the shade code differently. This article explains the bleach shade systems, how technicians tune the tone with stains, and how to send shade information so the lab gets it right first time.

Two bleach shade systems in parallel use

System Codes How to read them
Vita 3D-Master groups 0 and 1 0M1, 0M2, 0M3, 1M1, 1M2 First digit is value (0 is brightest), M is the neutral hue, last digit is chroma (1 low, 2 higher). 1M1 is bright and near neutral; 1M2 has the same value but is warmer; 0M2 is one step brighter than 1M1.
Vita Bleachedguide 3D-Master 0M1 to 5M2 ordered by value An extended version of the above, arranged to compare before and after bleaching.
“BL” guides from some ceramic manufacturers BL1, BL2, BL3, BL4 BL1 is brightest. BL2 sits near 0M2 to 1M1; BL3 near 1M2; BL4 near 2M1. These are approximate conversions, not exact equivalents.

Because the guides are not exact equivalents, write the code from the guide actually used in the mouth and attach a photo with the tab in frame instead of converting by hand.

Stain technique: a small change in ratio changes the tone

At high value the disc or ingot is usually chosen in the most neutral tone, and the technician pulls it to the right chroma with stains before glazing. The Khai Nguyen team’s experience: a slight change in the ratio between the basic stain colours is enough to move from 0M2 to 1M1 or 1M2. Some working rules:

  • Go from little to more. Stains on bright shades are easy to overdo; fire a thin layer, compare with the tab under neutral light, then add.
  • Warm at the cervical, neutral on the body, slightly blue-grey at the edge. 1M2 differs from 1M1 mainly in the amount of warm colour at the cervical and body; 0M2 differs from 1M1 in value, which stains cannot fix, so the blank must be re-selected.
  • Effects are still needed. Real bleached teeth still show an incisal halo, enamel striations and white opacities. Without them a bright arch looks like plastic. See the e.max crown and feldspathic veneers in OM1 case.
  • Stains do not replace layering. When depth is required the lab cuts back and layers; stains only fine-tune the tone at the end.

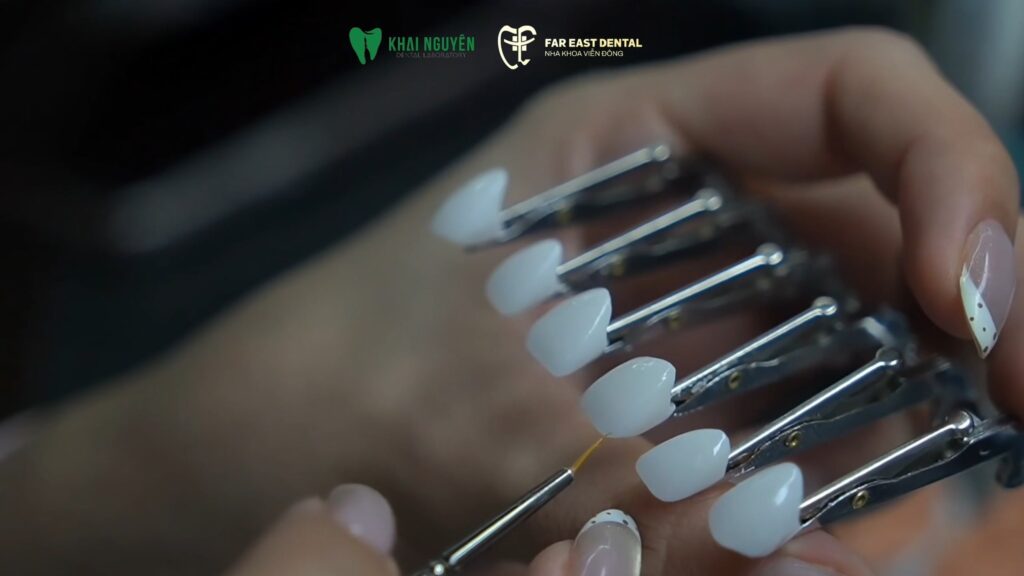
Photo above: A Khai Nguyen technician tuning the tone of a ceramic restoration with stains: small changes in colour ratio separate 0M2, 1M1 and 1M2.

Example: a BL2 case with natural translucency

For a veneer case in BL2 the dentist sent a photo of the BL2 tab next to the bleached teeth, a smiling facial photo and the note “white, but translucent at the edge”. The lab chose a medium-translucency pressed ingot in a bright tone, layered translucent porcelain in the incisal third, built a thin halo and used stains only to balance chroma between the units. The feedback photo after seating shows the BL2 value with a translucent incisal edge, not a solid white block.

How to send bleach shade information to the lab

  1. Take the shade photo at least two weeks after bleaching ends, because the colour still shifts in that period. Tab in the same plane as the teeth, slightly wet, in daylight or under a 5500 K lamp, never under the operating light.
  2. Photograph two adjacent tabs (for example 0M2 and 1M1, or BL2 and BL3) so the lab sees whether the patient sits between them or leans one way.
  3. Say which tooth is the reference: canines are usually darker than incisors; for an incisor restoration, match the contralateral incisor.
  4. State the desired translucency in words (“clearly translucent edge”, “almost none”) or with a reference photo.
  5. If the patient will bleach again, choose a target one step lower so the restoration is not darker than the natural teeth a few months later.

Frequently asked questions

Should every bleached patient get 0M1?

No. 0M1 is very bright and looks artificial if the remaining teeth are not equally bright. Match the natural teeth after bleaching, usually 1M1 or BL2, and go to 0M1 or 0M2 only when the whole smile segment is being restored.

Do bright restorations need layering, or is staining enough?

Posterior crowns can be stained monolithic. Anterior crowns and veneers should be layered, or at least cut back at the incisal edge, because bright tones expose any lack of depth.

Are phone photos good enough?

Yes, if a shade tab is in frame, the operating light is off and no filters are used; the tab is the reference that lets the lab correct the camera’s colour cast.

See our comparison of pressed ceramic systems, or send a case via WhatsApp +84 902 945 585.

3Y-TZP vs 5Y-PSZ Zirconia: Strength, Translucency and Which Disc for Which Case
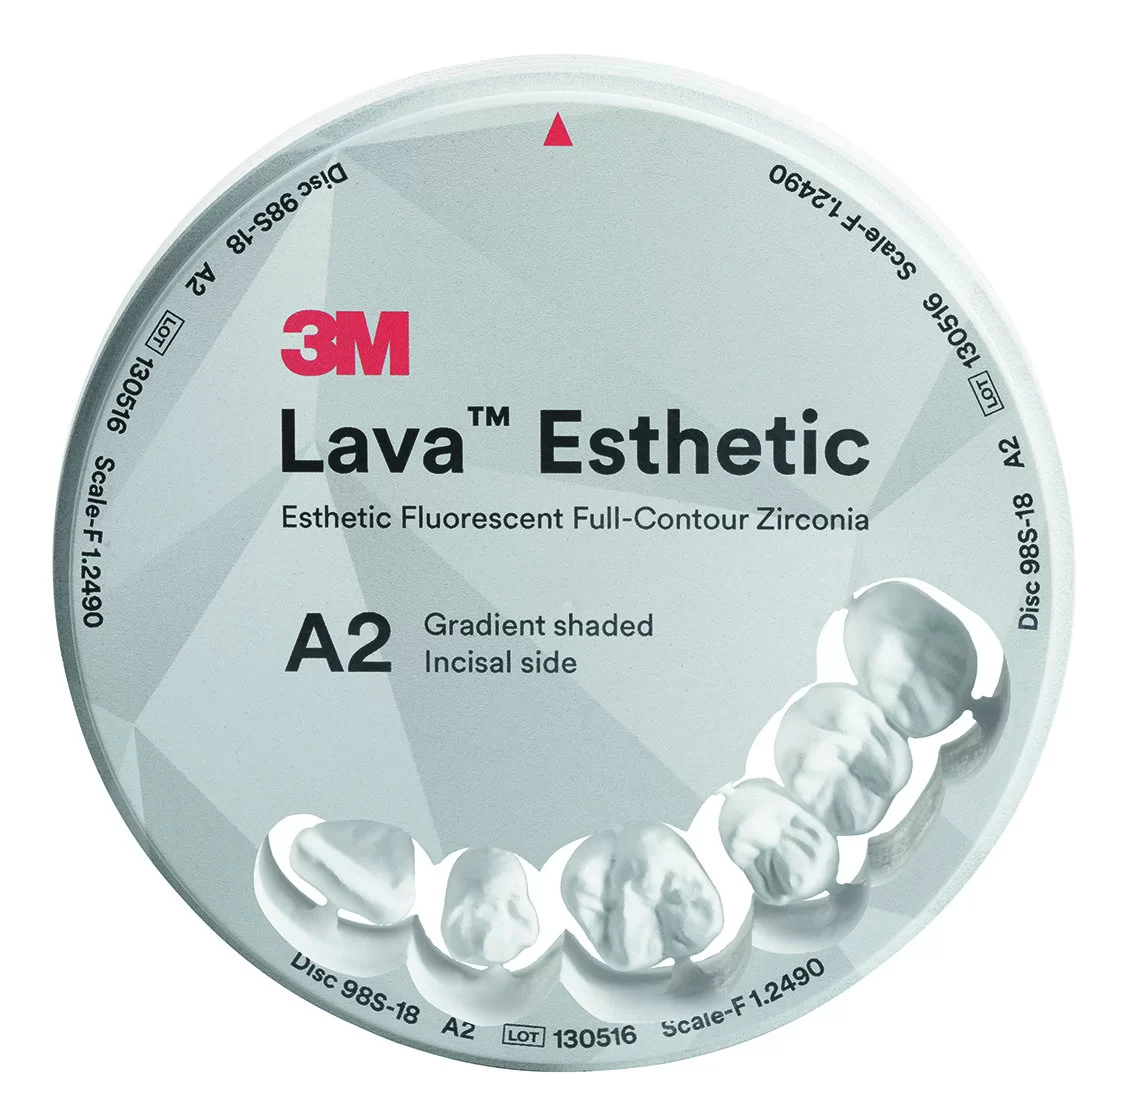
TL;DR: 3Y-TZP zirconia (about 3 mol% yttria) reaches 1,200–1,300 MPa but is opaque, so it is used for long-span bridges, molars and implant prostheses. 5Y-PSZ (about 5 mol% yttria) is far more translucent but drops to around 800 MPa, so it is used for monolithic crowns in the esthetic zone and short bridges. Multilayer discs with 3Y in the dentin zone and 5Y at the incisal edge are today’s most common choice for monolithic full-arch work. This article explains the structural difference, indications, minimum thickness and how to choose between the discs used at Khai Nguyen Dental Lab.

Yttria decides both strength and translucency

Dental zirconia is ZrO2 stabilised with yttria (Y2O3). At 3 mol% the material is mostly tetragonal and benefits from transformation toughening: when a crack starts, tetragonal grains around it transform to the monoclinic phase, expand, and squeeze the crack shut. That is why 3Y-TZP reaches 1,200–1,300 MPa. Raising yttria to 5 mol% adds cubic phase, which is optically isotropic and scatters less light, hence the higher translucency, but the cubic phase has no transformation toughening, so strength falls to about 800 MPa and fracture toughness is lower. 4Y sits between the two.

Comparison table

Criterion 3Y-TZP 5Y-PSZ Multilayer (3Y dentin / 5Y incisal)
Discs at Khai Nguyen DD Bio Zirconia, DMax Natura 3M Lava Esthetic Cercon, IPS e.max ZirCAD Prime
Flexural strength (datasheet) 1,300 MPa 800 MPa 1,200 MPa (dentin zone)
Translucency Low to medium High, close to LT glass ceramic Gradient from opaque cervical to translucent incisal
Minimum thickness (general guidance) 0.5 mm posterior walls; 0.6–0.8 mm anterior 0.8–1.0 mm 0.6–0.8 mm
Bridge connectors Smallest (per datasheet, often 9 mm² posterior) Larger; manufacturers limit span Connector should sit in the 3Y layer
Indications Long-span bridges, molars, full-arch implant prostheses, layered frameworks, bruxers Monolithic anterior and premolar crowns, 3-unit anterior bridges, zirconia veneers Monolithic full-arch crowns, 3–4 unit bridges, implant restorations in the esthetic zone
Avoid for Monolithic incisor crowns needing high translucency (unless layered) Molar bridges, thin walls, severe bruxism Very long spans where connectors fall in the 5Y layer
In-lab time 1.5–3 working days for stained and glazed monolithic crowns

Four clinical consequences

1. Do not borrow 3Y strength for a 5Y disc

Many dentists prepare 0.5 mm out of habit with conventional zirconia and then ask for a crown “as translucent as e.max”. With 5Y, a 0.5 mm wall is below the manufacturer’s safe minimum. If translucency is needed, prepare 0.8–1.0 mm or choose a multilayer disc.

2. Bridges: connectors must sit in the 3Y layer

With multilayer discs the technician nests the bridge so the connectors fall in the 3Y dentin layer. Long posterior bridges should be full 3Y, stained, or layered in the esthetic zone.

3. Antagonist wear depends on polishing, not on yttria

Both 3Y and 5Y are kind to opposing enamel when the occlusal surface is mirror-polished. Chairside occlusal adjustment without re-polishing is the main cause of opposing wear.

4. Low-temperature degradation mainly concerns 3Y

The tetragonal phase of 3Y can slowly transform to monoclinic in a moist environment over years; modern discs add alumina (for example 0.25% Al2O3 in DD Bio and DMax Natura) to limit this. 5Y, with more cubic phase, is less sensitive. Clinically this is not a reason to avoid 3Y posteriorly.

Quick picker

  • Long spans, molars, All-on-X, bruxers: 3Y (DD Bio, DMax Natura).
  • Monolithic anterior crowns needing maximum translucency on non-discoloured abutments: 5Y (3M Lava Esthetic).
  • Full-arch monolithic, 3–4 unit bridges, no trade-offs: multilayer (Cercon, e.max ZirCAD Prime).
  • Heavily discoloured abutments or metal posts: 3Y or multilayer with an opaque cervical layer; consider layering anteriorly.

See also the comparison of zirconia with lithium disilicate and feldspathic, our workshop on indicating zirconia in digital dentistry, and the case-by-case zirconia selection service.

Frequently asked questions

Is 4Y the best of both?

4Y-PSZ (about 900–1,000 MPa) is a reasonable compromise for single crowns and short bridges, but multilayer 3Y/5Y discs solve the same problem while keeping 3Y in the load-bearing zone, so our lab prefers multilayer.

Can zirconia be bonded like e.max?

Zirconia cannot be etched with HF. The recommended protocol is low-pressure alumina air abrasion (50 μm), an MDP-containing primer, then resin cement. For retentive preparations, resin-modified glass ionomer is acceptable.

Can zirconia be used for veneers?

Yes, with 5Y at 0.5 mm or more when masking is needed, but ultra-thin veneers below 0.4 mm should still be lithium disilicate or feldspathic.

If you are weighing up an overseas partner in the first place, start with our guide to Vietnam dental lab outsourcing. Send a case for disc advice through the ordering process or WhatsApp +84 902 945 585.

Pressed Lithium Disilicate Compared: IPS e.max Press vs GC LiSi Press vs Shofu Vintage LD Prime

TL;DR: IPS e.max Press (Ivoclar Vivadent, 470 MPa), GC Initial LiSi Press (GC, 508 MPa) and Shofu Vintage LD Prime (Shofu, 400 MPa) are all pressed lithium disilicate ceramics with the same indications: veneers, single crowns, inlays/onlays and short bridges up to the premolar. The differences are in crystal structure, the range of opacities, the matching layering porcelain and technician preference. This comparison is based on manufacturer datasheets and on pressing all three at Khai Nguyen Dental Lab.

What pressed lithium disilicate is

Lithium disilicate is a glass ceramic with about 70% Li2Si2O5 crystals by volume, giving 400–530 MPa flexural strength, three to four times that of feldspathic porcelain, while keeping translucency and the ability to be etched with hydrofluoric acid for adhesive bonding. In the press technique the ingot is heated and pressed into a lost-wax mould, which allows veneers as thin as 0.3 mm and crowns with tight margins. It is the default material for single anterior units in most esthetic labs.

Comparison table

Criterion IPS e.max Press GC Initial LiSi Press Shofu Vintage LD Prime
Manufacturer, origin Ivoclar Vivadent, Switzerland GC, Japan Shofu, Japan
Flexural strength (datasheet) 470 MPa 508 MPa 400 MPa
Crystal structure Needle-shaped lithium disilicate crystals, standard size HDM (High Density Micronization): ultra-fine, evenly dispersed crystals Lithium disilicate crystals in a glass matrix optimised for layering and staining
Ingot opacities HT, MT, LT, MO, HO, Impulse (widest range) HT, MT, LT, MO HT, MT, LT, MO
Matching layering ceramic IPS e.max Ceram GC Initial LiSi (matched expansion) Vintage LD (layering) and Vintage Art LF (stains)
Strengths in our lab Longest clinical record; shade system most dentists know; consistent with e.max CAD Very smooth surface after pressing, minimal reaction layer, fast polishing; low wear on opposing enamel Natural translucency and fluorescence; ideal for monolithic staining and thin incisal layering
Indications Veneers, anterior and premolar crowns, inlays/onlays/overlays, implant crowns in the esthetic zone, 3-unit bridges up to the second premolar (per manufacturer)
Not indicated Molar bridges, long spans, severe bruxism without a splint
In-lab time at Khai Nguyen 2–3 working days for stained monolithic crowns; 3–5 days for cut-back and layered work

Where the real differences are

1. Strength: 100 MPa does not change the indication

From 400 to 508 MPa is one indication group. None of the three is approved by its manufacturer for molar bridges. Clinical durability is decided by respecting minimum thickness (crowns 1.0–1.5 mm, veneers 0.3–0.5 mm) and by the bonding protocol: 20-second HF etch, silane, light- or dual-cure resin cement.

2. Translucency and masking

All three offer HT ingots for bright natural teeth and LT/MO for discoloured abutments. e.max Press has the widest range, including HO for metal cores; Vintage LD Prime stands out for natural fluorescence under UV; LiSi Press gives even translucency thanks to its fine crystals. For a single central incisor, choosing the right opacity matters more than choosing the brand.

3. Finishing: monolithic stain or cut-back and layer

Monolithic stained and glazed crowns are faster and stronger; cut-back with layered incisal porcelain looks better but adds one or two days and needs a skilled ceramist. Each brand has its own layering ceramic with matched thermal expansion; a lab should not layer one brand’s porcelain on another brand’s pressed core.

4. Wear on opposing teeth

All three are kinder to opposing enamel than unpolished zirconia. GC reports low antagonist wear for LiSi Press thanks to its fine crystalline surface; in practice, proper polishing after occlusal adjustment matters more than the difference between brands.

Which one we use for which case

  • Veneers and central incisor crowns that must match natural neighbours: IPS e.max Press MT or HT, cut back and layered with IPS e.max Ceram when the incisal edge is translucent.
  • Monolithic premolar crowns, inlays/onlays that need fast polishing: GC Initial LiSi Press.
  • Anterior esthetic cases with natural fluorescence, monolithic staining: Shofu Vintage LD Prime with Vintage Art LF.
  • Dentists already used to one shade system: stay with it; consistency between the chairside shade guide and the ingot matters more than technical differences.

Product pages: IPS e.max Press, GC Initial LiSi Press, Shofu Vintage LD Prime, and the full comparison of dental ceramics including zirconia and feldspathic.

Frequently asked questions

Is pressed ceramic as strong as zirconia?

No, in flexural strength (400–530 MPa versus 800–1,300 MPa). But for single crowns and veneers that are bonded correctly, long-term survival of lithium disilicate is very high, for example 97.2% for IPS e.max CAD after more than eight years in the independent clinical report cited on our product page.

Can a 3-unit bridge be pressed in lithium disilicate?

Yes, per manufacturer guidance, up to the second premolar with the minimum connector dimensions from the datasheet. Molar bridges should be zirconia.

How should pressed lithium disilicate be cemented?

Adhesively with resin cement after HF etching and silane. Conventional cements reduce the strength of glass-ceramic restorations.

Need material advice for a specific case? Send it through the ordering process or WhatsApp +84 902 945 585.

Workshop: How to Indicate Zirconia in the Age of Digital Dentistry

Workshop: How to Indicate Zirconia in the Age of Digital Dentistry
Khai Nguyen Dental Lab cordially invites dentists to the workshop “How to Indicate Zirconia in the Age of Digital Dentistry” to keep up with the latest technology!
Why attend?
  • Master the workflow from clinic to lab for personalized restorative design and treatment planning with advanced digital technology: face scan, cone-beam CT, intraoral scanners and more.
  • Take home the know-how for indicating monolithic zirconia in esthetic restorations.
  • Exchange ideas and learn from experts and peers.
  • Enjoy attractive offers from Khai Nguyen Dental Lab!
Time: 14:00 – 17:00, 28 November 2024
Venue: C-space Coworking, 62 Vo Van Tan, District 3, Ho Chi Minh City

WhatsApp