Victor Le – Digital Communications Manager, Khai Nguyen Dental Lab

Victor Le

Digital Communications Manager, Khai Nguyen Dental Lab

Digital Communications Manager at Khai Nguyen Dental Lab, with five years in communications and technical content for the dental laboratory field, responsible for editing technical articles together with the lab's technician team.

Articles by Victor Le

Khai Nguyen Academy: A 12-Hour Technician Course and a Chairside Polishing Workshop

Workshop Đánh bóng phục hình sứ trên lâm sàng, 12/07/2023, Khai Nguyên Dental Lab cùng Shofu và Sota-D

Since 2023 Khai Nguyen Dental Lab has run a continuing programme called “Alongside the Dentist” and Khai Nguyen Academy: hands-on courses and workshops that let clinicians see how the work inside a laboratory is actually done. This article covers two representative programmes and what participants take away from each.

A 12-hour course as a dental technician

The course is for clinicians who want to carry out every stage of fabricating an all-ceramic restoration themselves rather than hear it described. It runs over five sessions of two and a half hours each, limited to twelve participants so that everyone has their own bench.

Content: the complete all-ceramic fabrication workflow, a materials overview, the basics of CAD/CAM, and — the main part — hands-on waxing, CAD/CAM design, pressing, framework adjustment, ceramic layering and grinding, staining and glaze firing.

What participants take home: two layered veneers, one lithium disilicate onlay and one monolithic multilayer zirconia crown, all made by their own hands.

The real value is not those four restorations. It is that after layering ceramic once, a clinician understands why the laboratory asks for 0.8 mm rather than 0.5 mm on the facial surface, why a shade photograph with a tab in frame matters, and why a case on a dark preparation takes longer. That understanding is the foundation of better clinic–laboratory collaboration.

Workshop: polishing ceramic restorations chairside

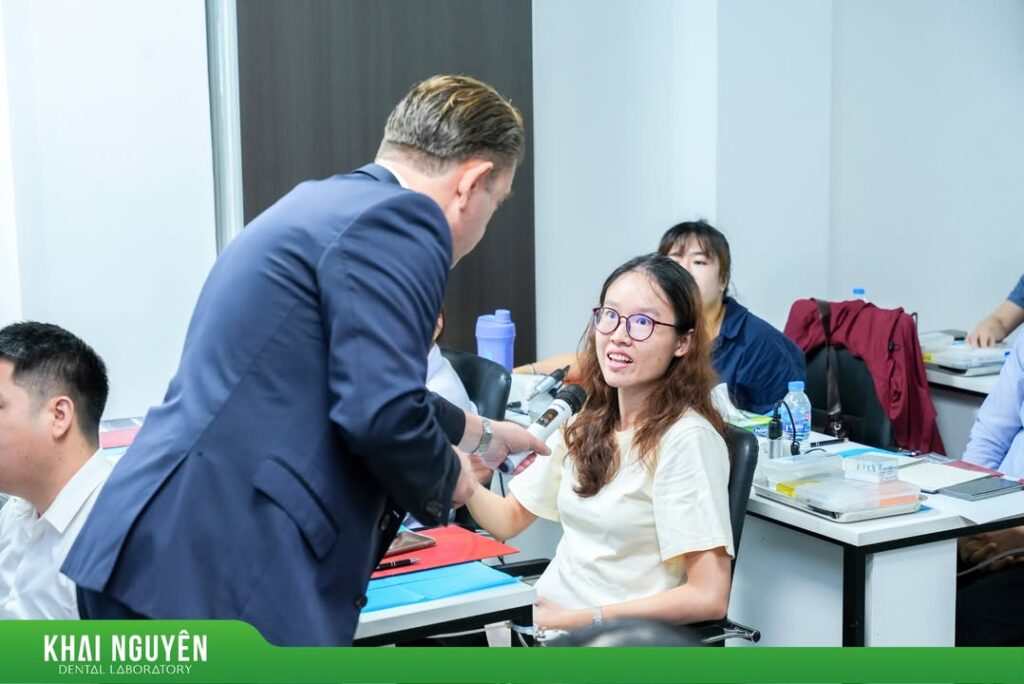
“Which polishing bur should I use before and after cementing a ceramic restoration?” is the question we receive most often from clinicians, so the laboratory dedicated a workshop to it on 12 July 2023, limited to eighteen participants. It was led by technician Nguyen Van Hoi, founder of Khai Nguyen Dental Lab, together with Dr Tran Thi Ngoc Trang, co-founder of Nikkori Dental.

Above: the chairside ceramic polishing workshop, 12 July 2023, in partnership with Shofu and Sota-D.

Content: principles of chairside ceramic polishing, the sites that require polishing, bur recommendations for both intraoral and extraoral use, and separate protocols for each restoration type: restorations prepared with the BOPT vertical technique, veneers, onlays, inlays, crowns and bridges, and ovate pontics. The hands-on element was polishing a three-unit zirconia bridge.

What participants take home: a set of thirteen genuine Shofu polishing burs — six straight handpiece and seven contra-angle — a Universal Diamond polishing paste, a bur holder, and the three-unit zirconia bridge used for practice.

Why this subject matters: a ceramic restoration that is occlusally adjusted and not repolished leaves a rough surface that stains and abrades the opposing dentition. The same point is made from the laboratory side in preparation for crowns and veneers.

Other programmes in the series

  • Seminar on bite registration with Dr Tran Thi Nguyen Ny, May 2023.
  • Workshop “How to indicate zirconia in the digital era of dentistry”, 28 November 2024 at C-space Coworking, District 3.
  • Internal training on the Shofu Vintage LD pressed ceramic system with Sota-D and Shofu Dental, November 2022.

Source: Khai Nguyen Dental Lab Facebook page, posts of 20 February 2023, 8 May 2023, 19 June 2023 and 21 November 2024.

More from Khai Nguyen: Digital restorative seminar, 7 March 2026 · Training and professional exchange 2025–2026 · Silver Sponsor of SYD 2026 · All-ceramic workshop with Ivoclar and Medent · ISO 13485 certification and 2025 recertification · HSDI 2024.

Written for dentists and technicians. Khai Nguyen Dental Lab manufactures to clinical prescription only and does not sell directly to patients.
Training and Professional Exchange at Khai Nguyen Dental Lab, 2025–2026

Workshop đào tạo nội bộ Phục hình trên implant cùng BS. Nguyễn Ngọc Trung Hậu, 21/11/2025

From early 2025 to early 2026 Khai Nguyen Dental Lab ran and took part in a series of internal training activities, professional exchanges with clinicians, and observation visits by dental students. This article collects them in chronological order, as part of the laboratory’s position that craftsmanship is the core determinant of restoration quality.

February 2025: internal workshop on layering anterior effects, Matisse method

On 22 and 23 February 2025, specialist Ziyang Ke worked directly with our technicians on layering effects that reproduce a natural central incisor using the Matisse method. The outcome was fifteen finished anterior units in which shade, translucency and light reflection were reconstructed from natural teeth. We are grateful to the clinicians who allowed delivery dates to be moved so that our technicians could attend the full course.

March 2025: private workshop with Shofu

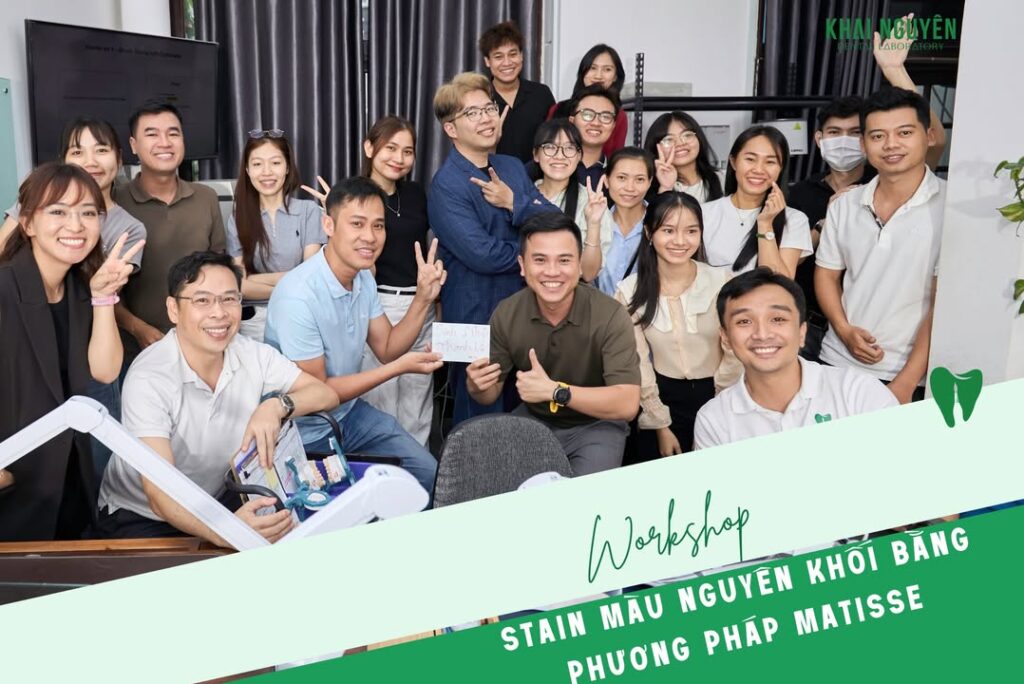
A private workshop at the laboratory with Shofu (SotaD) and Ms Connie Moy covered two subjects: building pink gingiva with Ceramage composite, and getting the most out of the Shofu Vintage Prime pressed ceramic system. The hands-on Ceramage gingival work shortened the fabrication time for artificial gingiva on full-arch implant cases while maintaining the esthetic standard.

October 2025: professional session on intraoral photogrammetry at Vien Dong Dental

Khai Nguyen attended a discussion with the clinicians of Vien Dong Dental on “Intraoral photogrammetry (IPG): a new step in the digital full-arch implant impression workflow”. This is the workflow the laboratory applies to full-arch bar cases; it removes the conventional impression step and shortens the time needed to verify implant positions.

November 2025: hosting two groups of resident dentists

Khai Nguyen hosted two groups of resident dentists from the Faculty of Odonto-Stomatology at Van Lang University and the University of Medicine and Pharmacy in Ho Chi Minh City. Our team presented an overview of materials and current restoration types, the production workflow and turnaround times, guided a tour of the production area, and closed with a question and answer session.

November 2025: internal workshop on implant restorations with Dr Nguyen Ngoc Trung Hau

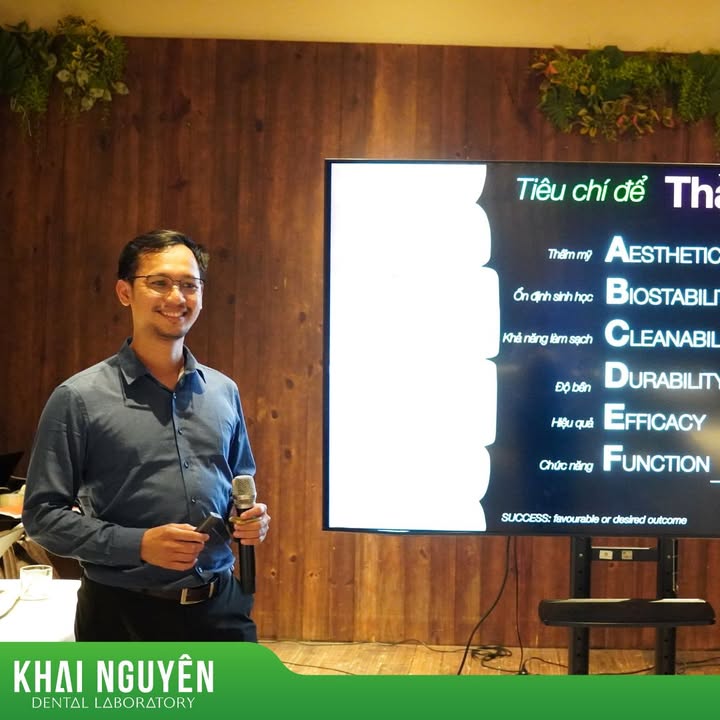
On 21 November 2025, Dr Nguyen Ngoc Trung Hau (Vien Dong Dental) spoke to our technicians about types of implant restoration, material selection criteria and emergence profile design. Within the same programme, Mr Nguyen Tran Nguyen Khai presented on long-term provisional materials for digital All-on-X. A clinical perspective from the dentist helps the laboratory understand why each instruction on a prescription matters.

Above: internal workshop on implant restorations with Dr Nguyen Ngoc Trung Hau, 21 November 2025.

January 2026: professional exchange with Dr Colin Sar on the Kois Scan Body

Dr Colin Sar visited the laboratory to discuss “Applying the Kois Scan Body to the smile design workflow”. The session gave our technicians access to a more accurate method of merging facial and arch data, so that smile design follows the patient’s facial esthetics more closely.

What this means for the clinics that send us cases

Each activity above maps onto a specific case type: effect layering for single anterior units, pink gingiva for full-arch implants, photogrammetry for implant impressions, emergence profile for implant crowns, and facial data for smile design. Related reading: choosing an implant abutment and how to choose a dental lab.

Source: Khai Nguyen Dental Lab Facebook page, posts from 20 February 2025 to 26 January 2026.

More from Khai Nguyen: Digital restorative seminar, 7 March 2026 · Silver Sponsor of SYD 2026 · All-ceramic workshop with Ivoclar and Medent · ISO 13485 certification and 2025 recertification · Khai Nguyen Academy · HSDI 2024.

Written for dentists and technicians. Khai Nguyen Dental Lab manufactures to clinical prescription only and does not sell directly to patients.

Workshop: Esthetics and Durability of All-Ceramic Restorations, with Ivoclar Vietnam and Medent

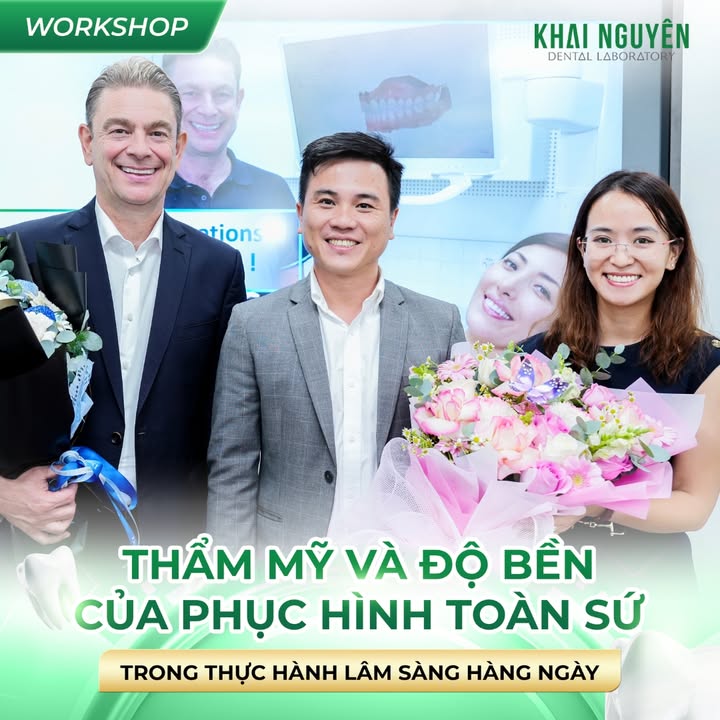
Workshop Thẩm mỹ và độ bền của phục hình toàn sứ cùng Ivoclar Vietnam và Medent, 26/07/2025

On 26 July 2025 the workshop “Esthetics and Durability of All-Ceramic Restorations in Everyday Clinical Practice”, organised by Khai Nguyen Dental Lab together with Ivoclar Vietnam and Medent, took place at Medent Ho Chi Minh City, 37 Bau Cat 3, Tan Binh District, with a large attendance of dentists.

Above: the workshop on esthetics and durability of all-ceramic restorations, 26 July 2025, co-hosted by Khai Nguyen, Ivoclar Vietnam and Medent.

Speakers

  • Dr Michael Dieter, Global Head of Education at Ivoclar, an international specialist in direct restorations and preventive dentistry, with many years of teaching at major conferences worldwide.
  • Dr Tran Thi Ngoc Trang, co-founder of Nikkori Dental, providing clinical support and interpretation.
TS.BS Michael Dieter, Giám đốc Đào tạo Toàn cầu Ivoclar, trình bày tại workshop 26/07/2025
Dr Michael Dieter presenting at the workshop.

Programme

  • An update on the esthetics, strength and indications of current all-ceramic systems.
  • Optimal preparation design and selection of the luting material for each indication.
  • Surface treatment of the restoration to secure a reliable bond.
  • Clinical management of complex situations involving all-ceramic restorations.
  • Hands-on: direct bonding practice on crowns, onlays and veneers with Ivoclar materials.

Event details

Date and time 08:00 to 16:30, 26 July 2025
Venue Medent Ho Chi Minh City, 37 Bau Cat 3, Tan Binh District
Organisers Khai Nguyen Dental Lab, Ivoclar Vietnam, Medent

Why this subject matters to a laboratory

Most all-ceramic failures do not originate in the laboratory but at the adhesive interface: insufficient preparation, incorrect ceramic surface treatment, or the wrong cement for the material. When clinician and laboratory share the same understanding of indications, minimum thickness and the bonding protocol for each ceramic system, remake rates fall and restorations last longer. Khai Nguyen is an Ivoclar Lab Partner and uses IPS e.max Press, e.max CAD and ZirCAD Prime in daily production, so co-hosting a workshop on bonding all-ceramic restorations is the most direct way to support the clinicians we work with.

Related reading: minimally invasive preparation for crowns and veneers and the dental ceramic materials comparison.

Source: Khai Nguyen Dental Lab Facebook page, posts of 14 and 28 July 2025.

More from Khai Nguyen: Digital restorative seminar, 7 March 2026 · Training and professional exchange 2025–2026 · Silver Sponsor of SYD 2026 · ISO 13485 certification and 2025 recertification · Khai Nguyen Academy · HSDI 2024.

Written for dentists and technicians. Khai Nguyen Dental Lab manufactures to clinical prescription only and does not sell directly to patients.

Case Study: Veneers 14–24 Combined with Zirconia Crowns on 11 and 21

Combined case: e.max Press veneers 14 to 24 with ZirCAD Prime zirconia crowns 11 to 21, frontal view

Case produced at Khai Nguyen Dental Lab on the treating dentist’s prescription, published on Instagram @khainguyendentallab on 2 June 2025. No patient-identifying information is included.

Case details

Indication Veneers on teeth 14 to 24 combined with zirconia crowns on teeth 11 and 21
Materials IPS e.max Press (veneers) and IPS e.max ZirCAD Prime (crowns)
Challenge Matching shade across two different materials within the same smile arc
Image source Instagram @khainguyendentallab, 2 June 2025

Above: the two central incisors are zirconia crowns, the remaining units are pressed ceramic veneers; from the frontal view the boundary is not detectable.

Why two materials in one arch

The two central incisors had lost too much structure for veneers and required full crowns, while the remaining teeth had enough enamel for veneers. This is a very common situation, and also the one most likely to show: zirconia crowns and pressed ceramic veneers differ in refractive index, opacity and the way they reflect light. If the laboratory treats each type separately, the two central incisors will stand out from the arch — usually more opaque and brighter.

The principle we apply to combination cases: each unit gets a core chosen for its own substrate (multilayer zirconia over a dark preparation, pressed ceramic for veneers on enamel), but the outermost layer of every unit uses the same layering ceramic system and the same firing schedule. That way the outer surface, where light is reflected, is identical across the whole arch.

Laboratory workflow

  1. Record the stump shade of each tooth to determine core opacity individually for the two crowns.
  2. Design the whole arch at once, harmonising outline, facial contour and incisal length between crowns and veneers.
  3. Produce in parallel: mill and sinter the ZirCAD Prime crowns with a facial cutback, press the e.max veneers also with a cutback.
  4. Layer the outer surface in one pass across all eight units with the same ceramic system, fired in the same batch.
  5. Inspect under several light sources and from several angles, especially oblique, since that is where a difference in opacity shows most clearly.

Lessons for combination veneer and crown cases

  • Send the whole group on one prescription and in one batch, so the laboratory can layer and fire them together. Splitting into two batches almost always produces a shade mismatch.
  • Allow the laboratory to cut back both crowns and veneers. A monolithic stained zirconia crown is very hard to match against a layered veneer beside it.
  • Reduce enough on the facial surface of the crowns for a masking layer plus a layering layer, without making the central incisors thicker than the neighbouring teeth.

See also zirconia crowns and veneers combined over uneven preparation shades, and full-mouth rehabilitation combining several restoration types.

Written for dentists and technicians. Khai Nguyen Dental Lab manufactures to clinical prescription only and does not sell directly to patients.

CAD/CAM Accuracy in the Laboratory: Marginal Fit and Trueness

Mẫu hàm vừa in 3D trên bàn in tại phòng in của Khai Nguyên Dental Lab

Summary: the real question about CAD/CAM is not “which brand of machine” but “how much error, and measured where”. This article gathers the reported figures for marginal fit of CAD/CAM zirconia restorations, the clinical acceptability threshold used as a benchmark, and which stages of the digital chain actually determine the final error.

Where the 120 µm threshold comes from

The most widely cited benchmark is the proposal by McLean and colleagues: a marginal discrepancy below 120 µm is considered clinically acceptable for ceramic restorations. That figure sits within the 4–174 µm range that systematic reviews report for ceramic crowns generally.

It should be read correctly. It is an acceptability threshold, not a target. A well-controlled workflow produces considerably smaller gaps, and most of the clinical value of narrowing the gap lies in reducing cement dissolution over time rather than in the number recorded at cementation.

Milled zirconia: the reported figures

  • For zirconia copings produced by CAD/CAM, studies report marginal discrepancies from about 10 µm to 160 µm, with most below 80 µm.
  • For monolithic zirconia crowns, some studies report a narrower band, from 11 µm to 58 µm.
  • A scoping review of 3D printing and CAD/CAM milling in prosthodontics records a mean marginal gap for milled zirconia of 123.89 ± 56.89 µm — and the size of that standard deviation is itself the point: variation between systems and workflows remains considerable.

Such a wide spread across studies is not a contradiction. It reflects reality: results depend on the CAD/CAM system, the measurement method, the number of measurement points, the material, and the preparation design — the last of which lies entirely on the clinical side.

Milling or 3D printing

For zirconia, milling remains the standard process in fixed prosthodontics. A study comparing 3D-printed with milled zirconia crowns found no significant difference in internal fit and marginal adaptation between the groups, but did find significant differences in trueness in the occlusal, axial and internal areas.

In other words: the two technologies can seat comparably, while their overall geometry is not identical. For cases demanding high morphological accuracy, that difference matters.

Where error actually accumulates

The mill is one link. Final error is the sum of the chain, and the first three stages are usually larger contributors than machining.

1. Input data

A finish line that is not clearly readable on the impression or scan file is the largest single source of error, and no downstream stage can compensate for it. An in vitro study comparing extraoral with intraoral scanning examines exactly this stage and its effect on the fit of milled and printed zirconia crowns.

2. Design

The die spacer set in software determines whether the restoration seats fully. Too tight and it binds, producing a marginal gap even though the internal fit is close; too generous and the cement layer is thick and prone to marginal dissolution over time.

3. Sintering

Zirconia is milled pre-sintered and shrinks on firing. The shrinkage factor is entered per blank batch; entering the wrong factor or mixing batches produces a global deviation that no earlier stage detects.

4. Machining and finishing

Worn burs round off fine detail, particularly at the margin. This is why a tool-replacement schedule based on running hours matters as much as machine selection.

What this changes for the clinic

  • Preparation design affects fit as much as equipment does. A clear, square, continuous margin outperforms a thin bevel — see preparation for crowns and veneers.
  • Ask the laboratory about cement space when one type of error recurs. It is a parameter the clinic never sees but which acts directly on the result.
  • Material dictates the thickness threshold, and thickness dictates the reduction required. The materials comparison and 3Y-TZP vs 5Y-PSZ zirconia set out the groups.

FAQ

What marginal gap is good?

Below the widely cited 120 µm threshold is acceptable. Many studies of monolithic zirconia crowns report considerably lower values. Consistency between cases matters more than the absolute number.

How is marginal gap measured?

In research, typically by microscopy or sectioning with measurements at multiple points. Clinically, probing and bitewing radiographs are the practical tools, though far less sensitive.

Does a more expensive machine give better results?

Not automatically. The literature lists the CAD/CAM system as one factor among several, alongside material, measurement method and preparation design. A well-controlled workflow on a mid-range machine is usually more consistent than a loose workflow on a high-end one.

Is 3D-printed zirconia ready?

Studies show fit comparable to milled crowns, but differences in geometric trueness are still reported. For routine fixed prosthodontics, milling has the deeper evidence base.

References

Written for dentists and technicians. Khai Nguyen Dental Lab manufactures to clinical prescription only and does not sell directly to patients.

Posterior Indirect Restorations: The Morphology Driven Preparation Technique (Part 2)

Inlay sứ đặt trên mẫu, kiểm tra độ khít sát và giải phẫu mặt nhai

Summary: part 1 set out the indications and rationale for posterior indirect adhesive restorations. This part covers the technique: the principles of the Morphology Driven Preparation Technique, the butt-joint thickness threshold, the role of immediate dentin sealing, and what the laboratory needs to see on the model to reproduce the design correctly.

1. Morphology-driven preparation

The preparation technique described by Veneziani (Int J Esthet Dent, 2017) does not begin from a requirement for mechanical retention, as classical cavity designs did. It begins from two features of the tooth itself: the maximum contour line and the cuspal inclination.

The practical consequence is that the finish line is no longer placed by a fixed rule but according to its position relative to the maximum contour line:

  • Above the maximum contour line — a continuous inclined plane in the form of a hollow chamfer or concave bevel on the axial walls. This zone is still in enamel, and the inclined plane cuts the enamel prisms at an angle favourable for bonding.
  • Below the maximum contour line — a butt-joint of approximately 1.2 mm in the proximal box and on the walls. This threshold ensures adequate material thickness rather than creating thin margins prone to fracture.

The occlusal surface is prepared anatomically — cusps and grooves retained — rather than flattened. All transitional angles are rounded, with no undercuts or sharp line angles.

2. Designs to avoid

Three familiar features of classical cavity design no longer suit a restoration retained by adhesive bonding:

  • Shoulders around the cusps — remove a large volume of tissue in an area that could have been preserved.
  • Occlusal grooves — create mechanical retention that is unnecessary once bonding is in place, while introducing stress-concentrating angles.
  • Pins — expose dentine without need.

What all three have in common: they trade tooth structure for mechanical retention, when retention is already provided by the adhesive interface.

3. Immediate dentin sealing

Immediate dentin sealing means applying the adhesive layer to dentine right after preparation, before the impression, rather than at the cementation appointment. The protocol described in the literature involves etching dentine with 37% phosphoric acid for about 15 seconds, rinsing and suctioning so the surface remains visibly moist, applying a universal adhesive for 20 seconds, air-drying and light-curing for 10 seconds.

The reported benefits are improved dentine bond strength and reduced risk of debonding. A systematic review and meta-analysis protocol is synthesising its effect on the fracture strength of posterior indirect restorations, and an in vitro study examines its effect across different luting agents.

From the laboratory’s side, what matters is that sealing changes the preparation surface. If it has been performed, say so when sending the case — the technician will calculate cement space differently.

4. Preparation design and marginal adaptation

Preparation design directly affects the marginal adaptation of the finished restoration. An in vitro study comparing three preparation designs for lithium disilicate overlays found significant differences in marginal adaptation between designs — meaning design selection is not only a question of tissue preservation but of accuracy.

This is also why a butt-joint is recommended below the maximum contour line: a thick, square margin can be reproduced far more accurately by both scanning and milling than a thin bevelled one.

5. Clinical advantages reported in the literature

  • Better bond quality — the inclined plane optimises the cut of enamel prisms and increases the available enamel bonding surface.
  • Less dentine exposure — fewer bonding and sensitivity problems.
  • Maximum preservation of hard tissue — the cavity is designed for reinforced composite luting, improving flow and excess removal.
  • Better aesthetic integration — the inclined-plane design allows a smoother shade blend at the tooth–restoration transition.

6. What the laboratory needs to see

  • The boundary between bevelled and butt-joint zones — if the model does not show the transition, the technician has to guess and will produce the wrong margin type.
  • A clear, unchipped butt-joint margin, sufficient to verify 1.2 mm of thickness.
  • Anatomic occlusal morphology retained — a flattened occlusal surface removes the reference for rebuilding cusps and grooves.
  • A note on whether immediate dentin sealing was performed.
  • Opposing model, bite registration and a note on bruxism.

FAQ

Is 1.2 mm a hard number?

It is the threshold cited for the butt-joint in the morphology-driven technique, intended to avoid thin fracture-prone margins. Total restoration thickness also depends on the material — lithium disilicate and zirconia do not share a threshold.

Is immediate dentin sealing mandatory?

Not mandatory, but the bond-strength benefit is consistently reported. If performed, tell the laboratory.

Does this apply to endodontically treated teeth?

Yes, and this is the group that benefits most, because tissue preservation retains structure that is already reduced.

Can intraoral scanning read a butt-joint margin?

Yes, and usually better than a thin bevel, because a square margin gives a crisp boundary. The condition is still that soft tissue is controlled and the margin is not obscured by blood or fluid.

References

Written for dentists and technicians. Khai Nguyen Dental Lab manufactures to clinical prescription only and does not sell directly to patients.

Choosing an Implant Abutment: Custom or Stock

Phục hình All-on-4 FP1 trên phôi zirconia màu A2

Summary: the abutment determines three things at once — whether the peri-implant soft tissue stabilises, whether the restoration can be screw-retained or has to be cemented, and the aesthetic result anteriorly. This article covers stock and custom abutments, when angulation correction is needed, and a decision tree by clinical situation.

Stock abutments: when they are enough

Manufacturer stock abutments have real advantages: the implant connection is produced within the manufacturer’s own tolerances, they are available immediately, and they cost less. They are sufficient when three conditions hold together: the implant is placed on axis, the shoulder is not excessively deep, and the site does not demand high aesthetics.

Their limitation is the emergence profile. Stock abutments are bodies of revolution, while a natural cervical cross-section is not round — incisors are flattened bucco-palatally, molars wider mesio-distally. Anteriorly, that discrepancy shows as an asymmetric gingival margin.

Custom abutments: what the extra buys

An emergence profile matched to the intended form

This is the main reason. A custom abutment allows each surface to be designed separately: slightly concave adjacent to the implant shoulder to leave room for tissue, then widening to the actual cross-section of the tooth being replaced. Whether the soft tissue stabilises is largely decided in that segment.

Margin position set where you want it

The margin can sit shallower palatally and deeper facially — something a stock abutment cannot do because its margin lies in a single plane. A shallow palatal margin makes excess cement controllable if the case must be cemented.

Height and taper matched to the real situation

With limited interocclusal space, a custom abutment preserves the maximum available height instead of grinding down a stock abutment — and grinding usually destroys the surface treatment as well.

Abutment materials

  • Titanium. The strongest option, well tolerated by tissue, the default posteriorly and wherever loads are high.
  • Zirconia on a titanium base. For the aesthetic zone where the mucosa is thin and titanium greyness could show through. The implant connection remains titanium — an important point, because zirconia in direct contact with a titanium implant connection causes micro-wear.
  • Full zirconia. Only to be considered at low-load sites and where the implant manufacturer has validated that configuration.

Correcting the axis

Implants are rarely placed exactly on the intended prosthetic axis. When the axis deviates there are three routes:

  • Angled abutment — redirects the upper portion, restoration stays screw-retained.
  • Angulated screw channel — keeps the abutment straight but allows the driver to enter from a different direction, moving the channel off the facial surface.
  • Cementation — solves any angle, at the cost of residual subgingival cement risk.

Practical order of preference: preserve screw retention by every available means, and switch to cementation only when the margin can sit equigingival or supragingival. The hybrid abutment crown preserves both advantages — see hybrid abutment crowns on a titanium base.

The evidence base: where custom outperforms stock

The geometric difference has been measured. Custom abutments have wider emergence angles, in the region of 20–30 degrees, compared with roughly 11–15 degrees for prefabricated ones; custom abutments also follow the dimensions of the individual socket, whereas stock abutments have a smaller circular cross-section.

On clinical outcomes, a systematic review of peri-implant conditions and aesthetic outcomes of customised versus conventional healing abutments reported that none of the included studies found biological or aesthetic disadvantages for customised abutments, and that this group maintained peri-implant hard and soft tissue stability. Two randomised controlled trials in immediate implant placement (PMC12991680, PMC12385633) point in the same direction.

One aspect is less often discussed: surface quality. A microscopy evaluation of emergence profile surfaces compared custom CAD-CAM abutments with stock abutments — a reminder that the surface finish of the subgingival segment is a separate variable, independent of shape.

Decision tree

  • Posterior, good axis, thick tissue, adequate interocclusal space → stock titanium abutment, screw-retained.
  • Posterior, deviated axis → angled abutment or angulated screw channel, still screw-retained.
  • Anterior, thick tissue, good axis → custom titanium abutment.
  • Anterior, thin tissue → custom zirconia abutment on a titanium base.
  • Limited interocclusal space → custom abutment to use every available millimetre.
  • Multi-unit bridge on non-parallel implants → consider a hybrid assembly or a bar.

What the laboratory needs

  • Implant system, line and platform diameter — exactly, not approximately.
  • A photograph of the emergence profile immediately after removing the healing abutment.
  • Implant shoulder depth relative to the facial gingival margin.
  • Mucosal thickness, if measured.
  • Opposing model, bite registration and a note on bruxism.

FAQ

Is a custom abutment always better?

No. Posteriorly, on axis, with thick tissue, a stock abutment gives an equivalent result at lower cost. The benefit of customisation rises with aesthetic demand and with axis deviation.

Can full zirconia be used posteriorly?

Not advisable unless the implant manufacturer has validated it. A zirconia–titanium connection under cyclic posterior loading is prone to micro-wear and screw loosening.

How deep should the abutment margin sit?

The shallower the better. The facial aspect in the aesthetic zone may need more depth, but where the case uses a hybrid assembly, extraoral bonding has already removed the main reason to worry about depth.

Can an abutment be reused when the restoration is remade?

Yes, if the abutment is intact and the screw is replaced. The screw is always replaced — a screw that has been torqued once should not be reused.

References

Written for dentists and technicians. Khai Nguyen Dental Lab manufactures to clinical prescription only and does not sell directly to patients.

Dental Photography for the Laboratory: The Set and Cross-Polarisation

The same e.max crown on the model before delivery

Summary: for a laboratory, clinical photographs are not supporting documentation — they are primary input data. Technicians build form and shade distribution from photographs more than from written descriptions or shade codes. This article covers the minimum photographic set, equipment that is genuinely sufficient, and three shooting errors that destroy the value of an entire set.

What the laboratory uses photographs for

Three things, each requiring a different kind of image.

  • Form and proportion. Facial and smile photographs show how much tooth is displayed at rest and in smile, whether the occlusal plane is parallel to the interpupillary line, and how wide the buccal corridors are. Without this, form is guesswork against population averages.
  • Shade and translucency. A shade code conveys base shade only. Internal shade distribution — the opaque dentine body cervically, the translucent incisal third, white spots, craze lines — is legible only from photographs.
  • Substrate. For veneers and thin restorations the preparation shade dictates the opacity required. The preparation photograph is the most commonly omitted image and the one that causes the most remakes.

The minimum set

Extraoral

  • Full face, lips at rest — tooth display without smiling.
  • Full face, natural smile — smile line, buccal corridors.
  • Close-up of the teeth and lips in smile, to relate the incisal edge to the lower lip.

Intraoral

  • Frontal with retractors, teeth in occlusion.
  • Left and right lateral with retractors.
  • Close-up of the anterior segment, shot perpendicular.
  • Incisal edge from below or from the palatal aspect, to show thickness and translucency in the incisal third.

Shade photographs

  • Shade tab in the same plane as the teeth, at the same distance, never overlapping the tooth.
  • Preparation photograph with a stump shade tab.
  • Cross-polarised image, if a polarising filter is available — it removes surface reflection and reveals internal shade structure.

Equipment: what is actually sufficient

A dedicated setup gives the most consistent results: body, macro lens, and either a ring flash or twin lateral flashes. Twin flashes render form better than a ring flash, because a ring flash flattens the surface and erases texture.

A recent phone remains usable for form and proportion. Its limitation is shade: automatic white balance shifts between frames, so one frame cannot be compared with another. That is precisely why the shade tab must appear in the same frame as the tooth — it gives the technician a reference to calibrate against.

Accessories are worth more than a camera upgrade: retractors, intraoral mirrors, a black contrast background, and a polarising filter.

The evidence base: how accurate is cross-polarisation

Cross-polarised photography is not an optional flourish. It has been studied as a shade-matching method in its own right: a study on the accuracy of shade matching using cross-polarisation photography evaluates the influence of a polarising filter on digital shade matching.

A study comparing shade-matching performance in laboratory and clinical settings recorded markedly better results in the laboratory setting with a polarising filter (about 52% correct), while in the clinical setting overall accuracy fell to about 32%. That figure deserves attention: shade matching is difficult even with good tools, which is exactly why sending photographs to the laboratory is not a supplementary step but a compensation for that limitation.

Comparing three methods — spectrophotometer, intraoral scanner and cross-polarised photography — a study in the Journal of Esthetic and Restorative Dentistry found intra-instrument reliability highest for the spectrophotometer, followed by cross-polarised photography, then the intraoral scanner.

Three errors that ruin a set

1. Beauty mode left on

Smoothing skin also flattens tooth surface texture — the very thing the technician needs to see. Turn off every filter, including automatic sharpening.

2. Shooting off-axis

An angled shot distorts width-to-length proportion. A technician building to the proportions in the photograph will produce the wrong form.

3. Dehydrated teeth

Teeth dehydrate within minutes of retraction, brightening and losing translucency. Shade photographs must be taken in the first minutes, or the patient should close for a few minutes beforehand.

Sending images to the laboratory

  • Send original files. Messaging apps compress images and strip detail exactly in the shade transition zones.
  • Name files by content, or include one line of description per group.
  • State clearly which frame is the target shade and which is the preparation.
  • If the substrate is uneven between teeth, say which tooth is darker.

FAQ

What is lost without a polarising filter?

Accurate reading of internal shade distribution. Compensate with multiple close-ups from different angles and a written description of white spots or translucent zones.

How many frames are enough?

For a single posterior crown, three or four. For a multi-unit aesthetic case, the full set above is the minimum rather than the ideal.

Can photographs replace direct shade matching?

Not entirely. Photographs and shade codes complement each other: the code gives a starting point, the image gives distribution and texture. The hardest cases are single or paired central incisors, where the reference sits on the adjacent tooth — there, photographs are close to decisive.

References

Written for dentists and technicians. Khai Nguyen Dental Lab manufactures to clinical prescription only and does not sell directly to patients.

Hybrid Abutment Crowns on a Titanium Base

Phục hình implant trên thanh bar

Summary: the hybrid abutment crown combines the advantages of screw retention and of adhesive bonding: the ceramic crown is bonded to a titanium base extraorally, and the assembly is then screwed onto the implant. This article covers why that solves the weaknesses of both original options, what the extraoral bonding protocol requires, and when intraoral cementation is still the right choice.

The problem with each original option

Direct screw retention

Its greatest advantage is retrievability: for repair, for cleaning, for implant complications. With no cement there is no risk of residual cement subgingivally. The drawback is that the screw channel sits on the occlusal or facial surface, taking up space and compromising aesthetics anteriorly, while also weakening an all-ceramic restoration precisely where it carries load.

Intraoral cementation

It allows the restoration to be positioned aesthetically regardless of implant axis, with no screw channel. Its serious drawback is excess subgingival cement: hard to detect, hard to remove completely, and a well-documented contributor to peri-implantitis. The deeper the margin, the less controllable the residue.

How the hybrid abutment crown resolves this

The ceramic crown is bonded to the titanium base extraorally, in the laboratory, under controlled conditions: clean surfaces, a correct surface-treatment protocol, a measured quantity of cement, and complete removal of excess followed by polishing before the case leaves the lab. The assembly is then screwed onto the implant like any screw-retained restoration.

The result: no subgingival cement, full retrievability, and a screw channel that can be redirected using an angled base or an angulated screw so it does not emerge facially.

The extraoral bonding protocol

Titanium surface

The titanium base is air-abraded with aluminium oxide at low pressure, cleaned, then treated with a phosphate-monomer primer. Skipping air abrasion reduces bond strength markedly and the restoration may debond from the base within months.

Ceramic surface

This differs by material. Lithium disilicate is etched with hydrofluoric acid and silanated. Zirconia cannot be acid-etched — it requires mechanical roughening and a phosphate-monomer primer. Applying the wrong protocol to the wrong material compromises the bond from the outset.

Cement control

Use a dual-cure or chemically cured resin cement, in adequate but not excessive quantity, and remove excess at the gel stage. Once polymerised, the entire ceramic–titanium junction must be polished, especially the portion that will sit subgingivally.

The evidence base: strength and surface protocol

The surface protocol above is not house convention — it is the protocol used in the in vitro literature: titanium bases air-abraded with 50 µm Al₂O₃; zirconia abutments and crowns sandblasted; lithium disilicate etched with 9% hydrofluoric acid and silanated; bonded with a dual-cure resin cement.

On strength, an in vitro study of nine abutment and crown material combinations in the premolar region reported the highest fracture strength for the zirconia abutment–zirconia crown combination (about 1,417 N), followed by lithium disilicate abutment–zirconia crown (about 1,349 N). Retention studies on titanium bases report higher values for adhesive and self-adhesive resin cements than for conventional cements, and emphasise the role of surface pretreatment and MDP-containing primer systems.

On fit, an in vitro study examines internal fit and marginal adaptation of hybrid abutment crowns with custom-milled screw channels on titanium bases.

Emergence profile — what determines soft tissue

An implant is narrower than the tooth being replaced, so the contour from the implant shoulder up to the gingival margin always has to widen. Get that segment wrong and the soft tissue will not stabilise, whatever the material quality.

A practical principle: keep the portion adjacent to the implant shoulder slightly concave to leave room for tissue, and widen only as the gingival margin approaches. The entire subgingival surface must be smooth and polished.

When intraoral cementation is still appropriate

  • Multi-unit implant bridges on non-parallel implants, where a screw-retained assembly has no common path of insertion.
  • Cases requiring more axis correction than the available angled bases allow.
  • Where the restoration margin is equigingival or supragingival, so excess cement is visually controllable.

The common condition for all three: the margin is not deeply subgingival. That is the practical boundary between “cementable” and “should not be”.

What the laboratory needs

  • The exact implant system and base reference — manufacturer, line, platform diameter.
  • A matching scan body or impression coping, securely seated and recorded.
  • A photograph of the emergence profile immediately after removing the healing abutment, within the first seconds before the tissue collapses.
  • A note on the preferred screw-channel direction in the aesthetic zone.
  • Opposing model and bite registration.

FAQ

Is it as durable as direct screw retention?

The ceramic–titanium bond is durable when the surface protocol is followed. The practical weak point is not bond strength but omitted surface treatment or the wrong primer for the material.

Can it be retrieved and remade?

The whole assembly is retrievable via the screw. Separating the crown from the base usually sacrifices the ceramic.

Zirconia or lithium disilicate?

It depends on site and load. Zirconia posteriorly and for bridges; lithium disilicate for single aesthetic units because of its translucency. The materials comparison sets out strength and minimum thickness by group.

Does an angled base weaken the restoration?

Not if ceramic thickness around the screw channel still meets threshold. Problems arise when the axis deviates enough that the channel encroaches on a functional cusp — at which point implant position, or a different approach, should be reconsidered.

References

Written for dentists and technicians. Khai Nguyen Dental Lab manufactures to clinical prescription only and does not sell directly to patients.

Minimally Invasive Preparation for Crowns and Veneers

Veneer feldspathic đắp tay cho răng 11 và 21

Summary: preparation determines most of the outcome of a fixed restoration — and it determines whether the laboratory can deliver what you intended. This article covers preparation principles for crowns and for veneers, minimum clearance by material group, and the preparation errors laboratories see most often on the models that arrive.

The principle: the lab does not create space

Every restoration needs a minimum material thickness to reach its strength. That space has to be created by the clinician at preparation — the technician only fills what is already there. When space is insufficient the laboratory has three options, and all three are bad: mill below the safe threshold, over-contour beyond natural anatomy, or return the case.

So clearance should be checked chairside, before the impression, with a sectioned silicone index. Checking after the restoration is finished is too late.

Preparing for an all-ceramic crown

Finish line

Chamfer or rounded shoulder, even in width, continuous and clearly defined around the whole circumference. This is the condition for the technician to identify the boundary on the model or in the scan file. A finish line that is blurred, interrupted or covered by tissue forces the laboratory to infer it — and inference produces an estimated fit.

Place it equigingival or supragingival whenever aesthetics allow. Go subgingival only to mask a discoloured substrate or to gain retention height, and then keep it within about half a millimetre.

Occlusal and facial clearance

High-strength zirconia tolerates a thinner layer than lithium disilicate, but how thin depends on the zirconia group. Translucent zirconia (5Y-PSZ) has substantially lower flexural strength than 3Y-TZP and therefore does not share the same thickness threshold — see 3Y-TZP vs 5Y-PSZ zirconia. Lithium disilicate and feldspathic porcelain sit at higher thresholds; the dental ceramic materials comparison sets the groups side by side.

Taper and axial height

Excessive taper loses mechanical retention; insufficient taper makes the restoration hard to seat fully and invites a marginal gap. On short preparations retention depends heavily on taper — a situation worth agreeing with the laboratory in advance rather than leaving to default.

Round every angle

Sharp angles concentrate stress within the restoration and create geometry the design software handles poorly. Rounding all transitional angles is the last step before taking the impression.

Preparing for veneers

Veneers differ from crowns in that there is almost no margin for error. A tenth of a millimetre on a crown can be compensated with ceramic; on a veneer it changes shade and translucency outright.

Stay in enamel wherever possible

Bonding to enamel gives markedly higher and more durable bond strength than bonding to dentine. Where dentine exposure at the cervical is unavoidable, seal it immediately and note it for the laboratory, because a discoloured dentine substrate affects the final shade.

Prepare to the target form, not to the present tooth

Reducing from the existing surface copies its existing deviations. A more predictable approach is to prepare through an approved mock-up: depth grooves placed on the mock-up, reduction taken to the base of the grooves, so the tissue removed equals exactly what the new form requires.

Incisal edge

Choose one design and keep it consistent across the case: stop short of the edge, or wrap it with a palatal shoulder. Mixing both across adjacent teeth produces a translucency mismatch in the most visible zone.

No-prep cases

Only feasible where volume is already missing — small, spaced or worn teeth. If the tooth is already full or prominent, no-prep means over-contour. Safe thickness thresholds per material are in minimum veneer thickness.

The evidence base for minimally invasive preparation

In the literature, minimally invasive veneers are described in a thickness range of roughly 0.2–0.5 mm, and ceramic veneers of 0.3–0.7 mm bonded to enamel are considered reliable. A systematic review comparing conventional with minimally invasive veneers synthesises the evidence for both groups.

For vertical preparation designs, a multicentre retrospective follow-up study of 265 lithium disilicate veneers reports clinical outcomes for the technique, and a three-year clinical evaluation examines zirconia and zirconia-reinforced lithium silicate crowns prepared on the same principle.

For occlusal veneers specifically, a systematic review on the effect of preparation design on marginal adaptation and fracture strength shows that preparation design is a significant variable — not thickness alone.

Five errors laboratories see most often

  • Discontinuous finish line, usually broken interproximally where visibility and retraction are hardest.
  • Insufficient occlusal clearance over functional cusps, discovered only when the new anatomy is designed and the restoration proves thinner than threshold.
  • Unrounded sharp angles at the axio-occlusal transition.
  • Over-tapered preparations on endodontically treated teeth, from widening in search of retention.
  • Uneven veneer reduction between adjacent teeth, so ceramic thickness varies and the final shade is inconsistent.

The first four are correctable chairside in the same appointment if caught early. The fifth usually only becomes visible once the ceramic is built up.

Sending the case so the laboratory does not have to guess

  • Impression or scan file with a clearly readable finish line all the way round, plus opposing arch and bite registration.
  • A photograph of the preparation with a stump shade tab, particularly where the substrate is unevenly discoloured.
  • A silicone index, or a photograph of it, if the case involves an increase in vertical dimension.
  • A note on bruxism and canine guidance.
  • For veneers: the approved mock-up and the photographic set.

Two articles cover the consequences of poor preparation directly: peri-restorative gingival inflammation and post-cementation sensitivity.

FAQ

Is slightly under the threshold acceptable?

No. Ceramic thickness thresholds are mechanical limits, not soft recommendations. Below them the probability of fracture rises sharply, and the fracture usually appears months later rather than at cementation.

Do endodontically treated abutments need a different approach?

They differ in that remaining tissue is less and more brittle. Prioritise preserving what remains and consider cuspal coverage rather than widening the preparation to find retention.

Scanning or conventional impression?

Both give good results when the finish line is clear and soft tissue is controlled. The determining factor is not the technology but whether the tissue was retracted enough to expose the margin.

References

Written for dentists and technicians. Khai Nguyen Dental Lab manufactures to clinical prescription only and does not sell directly to patients.


WhatsApp